Author: Andy Carter
I brew with simplicity in mind and tend to avoid unnecessary complication when it comes to brewing gear. When I transitioned from extract to all-grain over a decade ago, I settled on the batch sparge method using a converted cooler mash/lauter tun (MLT), as it was less complicated than the 3-vessel fly sparge approach I’d seen others using. My process and gear were pretty typical– in addition to the cooler MLT, I had a propane burner and a 10 gallon/38 liter stainless kettle for heating strike and sparge water as well as boiling the wort.
As happy as I was with this setup, the most annoying thing was running out of and paying to refill propane, which considering how often I brew, wasn’t too infrequent. While I was initially intrigued by the electric breweries I saw people posting about online many years ago, most were DIY rigs that not only seemed a bit too involved to put together, but required a 240v circuit, which isn’t feasible for many apartment dwellers like me. More recently, a number of plug-and-play electric brewing systems have been released, and while some do cost a pretty penny, others are much more affordable.
One such system is the BrewZilla v3.1.1, an all-in-one system that allows for brewing 5 gallon/19 liter all-grain batches of beer on a standard 120v circuit and includes a pump for recirculation. Having heard many good things about other similar types of systems, and considering my lack of access to a 240v circuit, I looked forward to seeing how the BrewZilla compared to my old batch sparge approach.
The product reviewed for this article was provided by MoreBeer in exchange for an honest review. The opinions expressed in this article are solely those of the author and a concerted effort was made to approach the review from an unbiased perspective.
Soon after agreeing to review the BrewZilla unit, it arrived to my home in a very well packed box that conveniently listed many of the unit’s features.
I immediately got to work unboxing the system and took stock of all the parts.
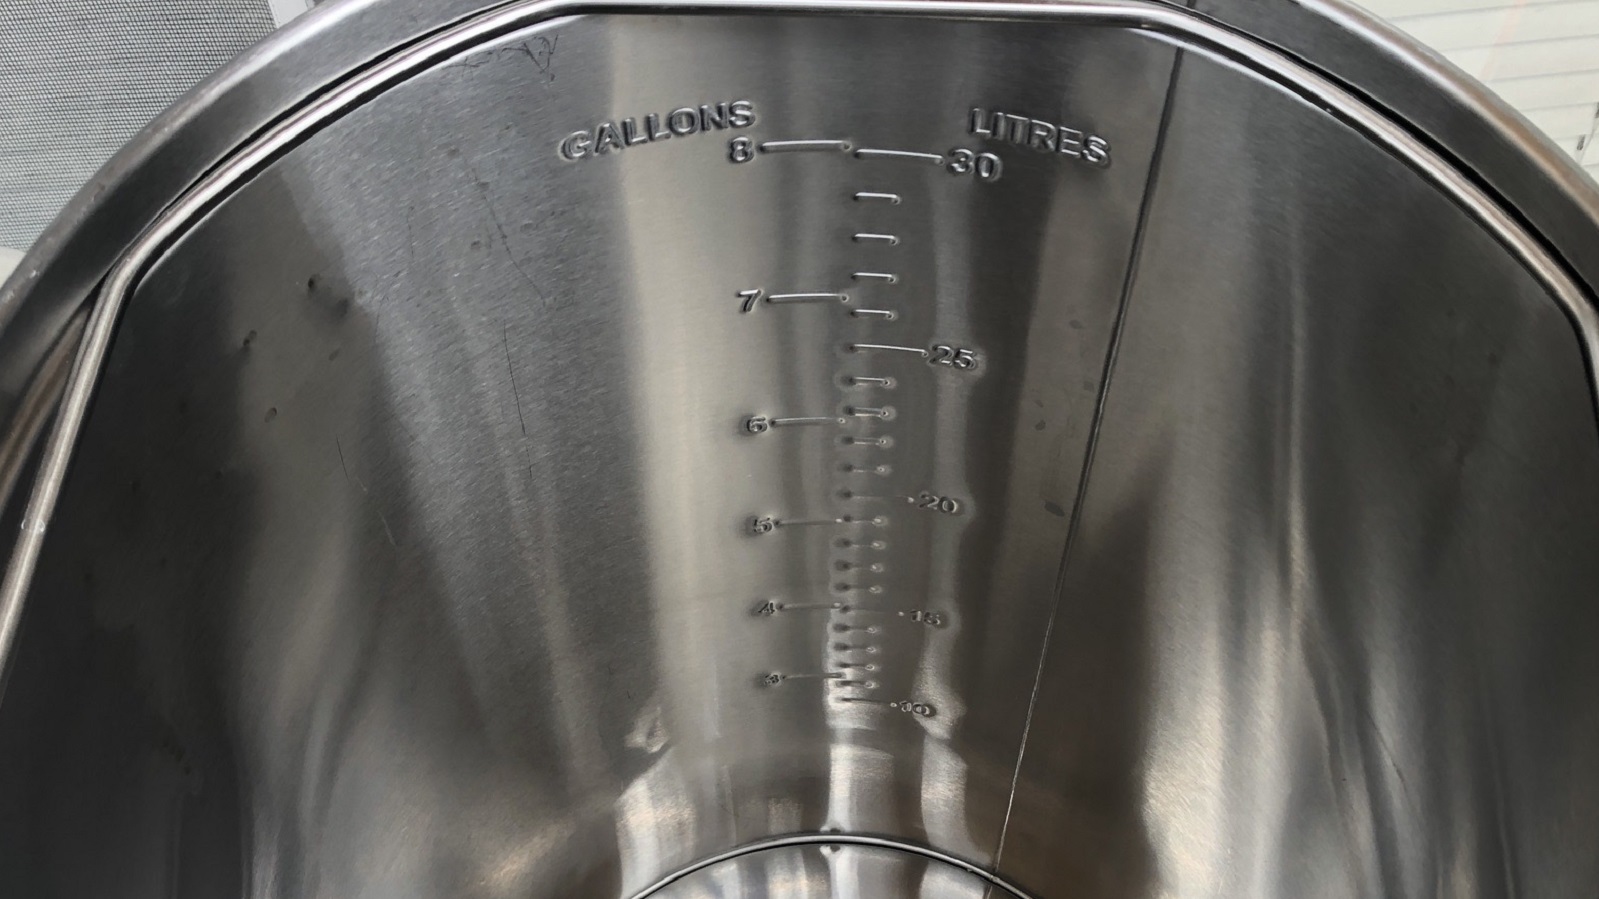
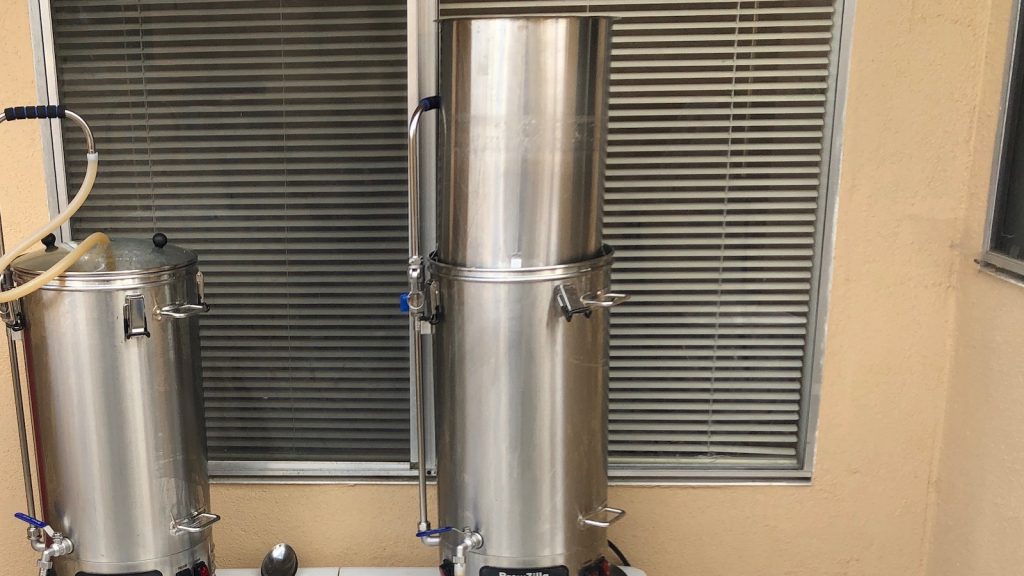
Some assembly was required, but it was surprisingly easy thanks to the detailed instructions found online. At 9.25 gallons/35 liters, the BrewZilla kettle is plenty big enough to boil typical 5 gallon/19 liter batches without risking a messy boilover, and I like how the volume markings are stamped into the kettle.
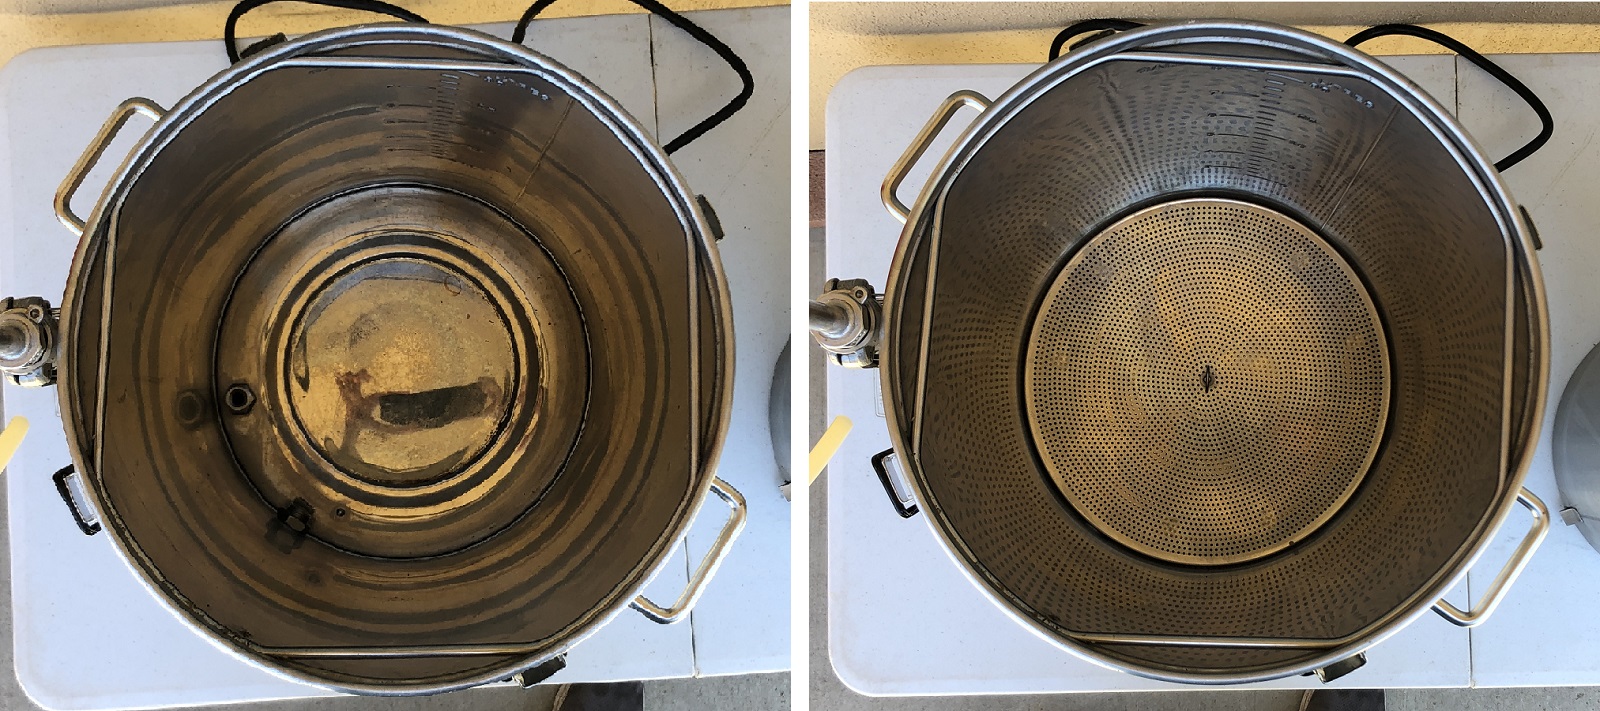
Besides the kettle, the most substantial piece of the system is the malt pipe, a cylinder into which the false bottom assembly is placed to create a mash basket; the unit comes with two false bottoms with different mesh sizes.
Before putting the mash tube in the kettle, a different stainless mesh screen with legs gets placed at the bottom to filter grain bits from entering the pump inlet.
The malt pipe serves as a grain basket that fits nicely in the kettle and gets lifted out when the mash rest is complete. Yet another stainless mesh screen gets placed atop the mash to even further reduce the chances of grain bits making their way into the wort. In total, it took me about 20 minutes piece everything together, at which point it was ready for an initial cleaning.
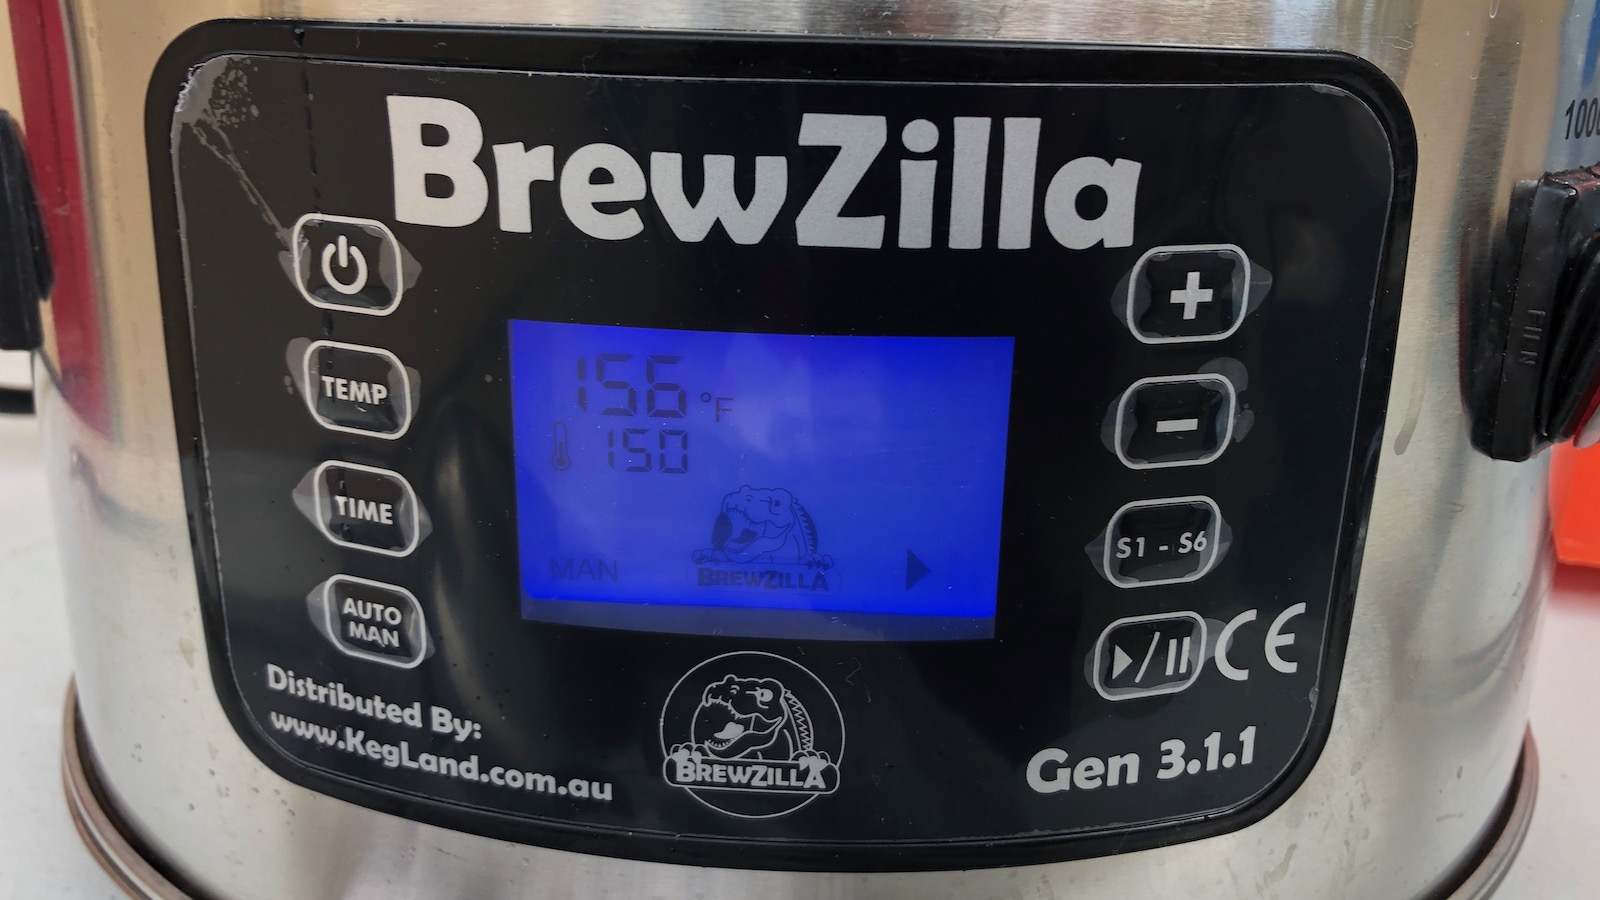
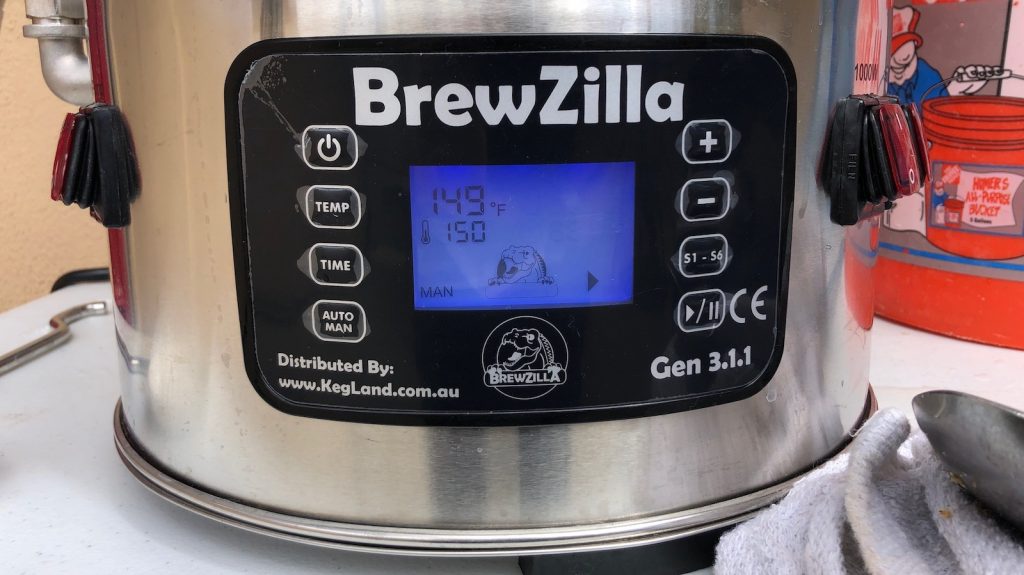
Unlike other popular electric brewing systems, the controller for the BrewZilla is built into the unit, so I didn’t have to worry about connecting any power cables or finding a spot for a large control panel, just plug it into an open outlet and we’re off to the races.
Once the unit is plugged in, the control panel powers up to display a pleasant blue background with dark lettering that is very easy to read. The instructions do a good job explaining how to use the controller, it really wasn’t a steep learning curve at all.
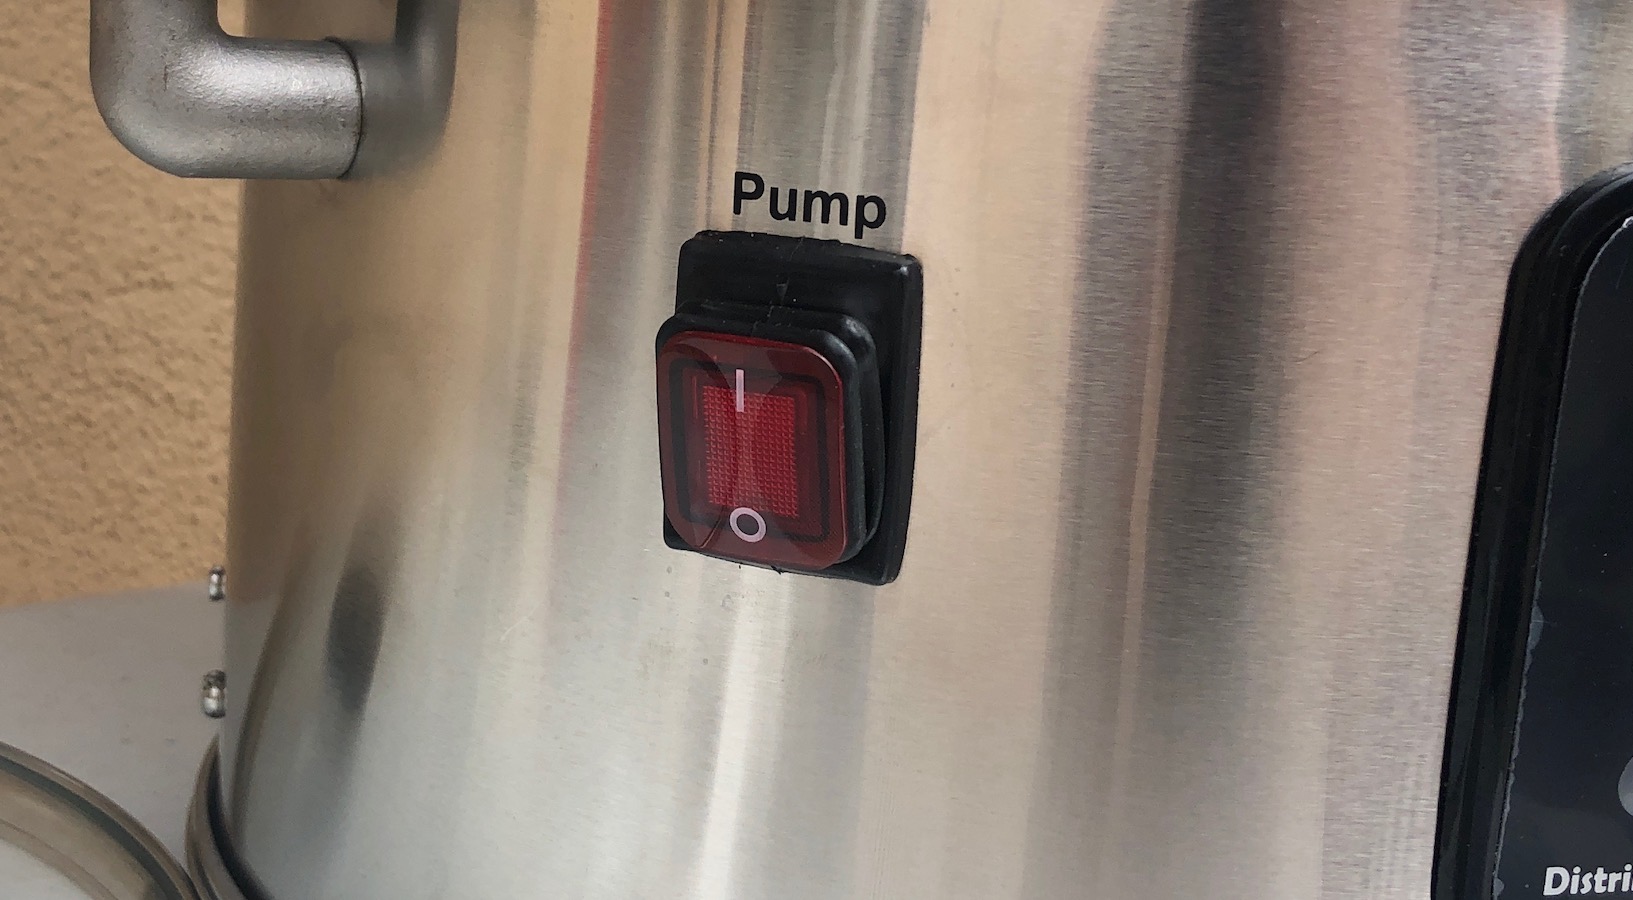
To the left of the control panel is a switch that operates the single speed recirculation pump.
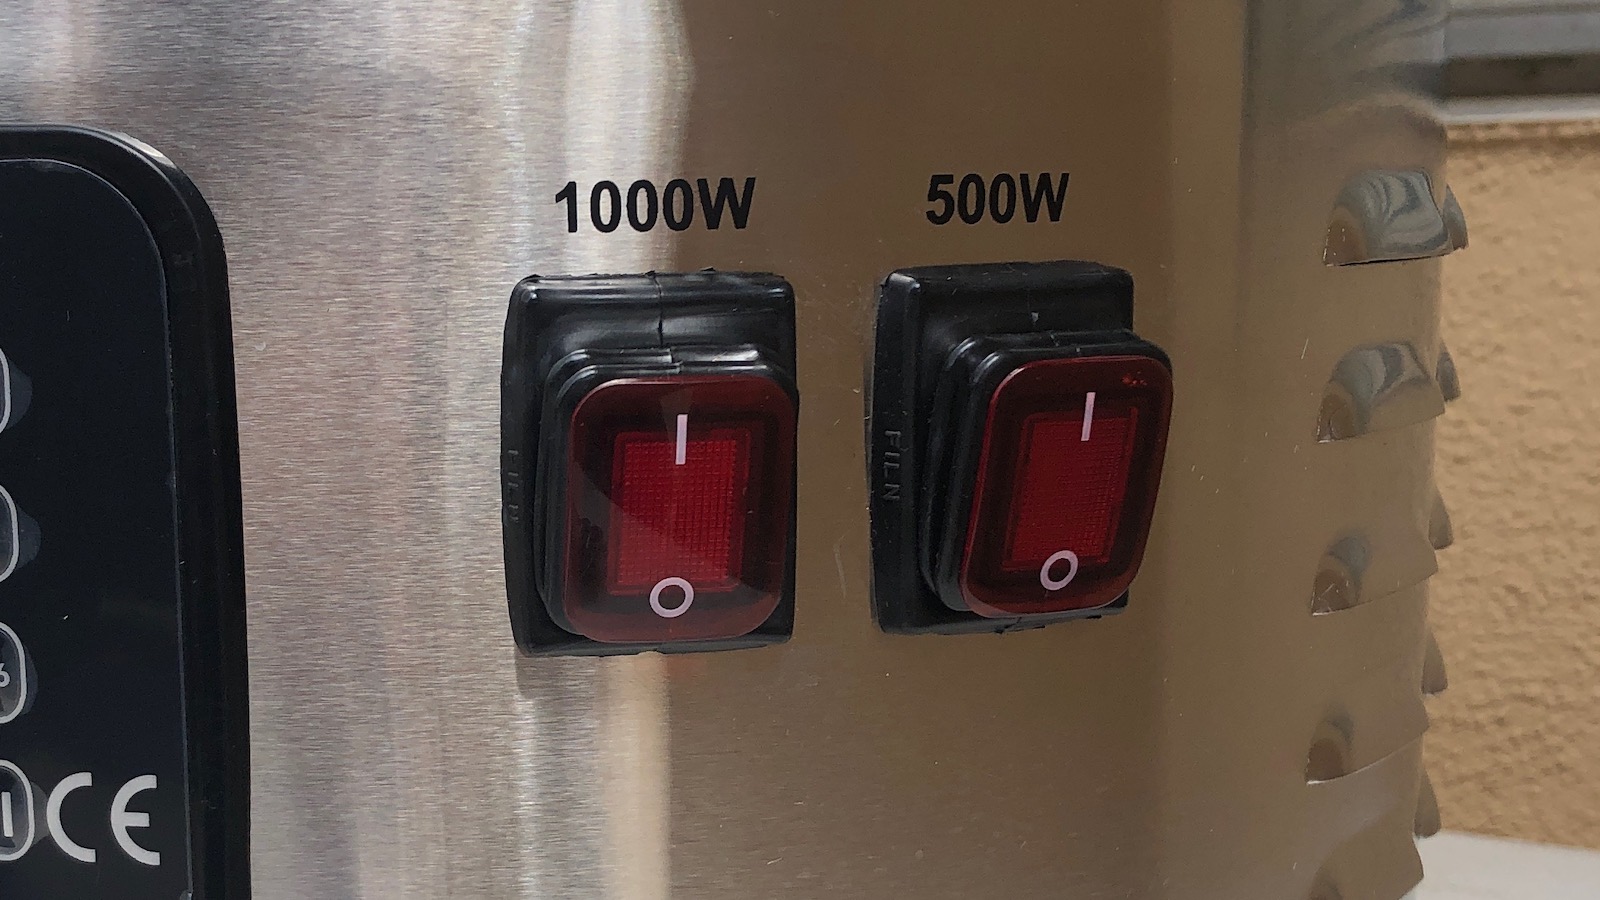
On the other side of control panel are two switches that operate separate 1000w and 500w elements. While the control panel is “smart” and relies on both elements to ensure set mash temperatures are maintained, the switches can be used independently as well.
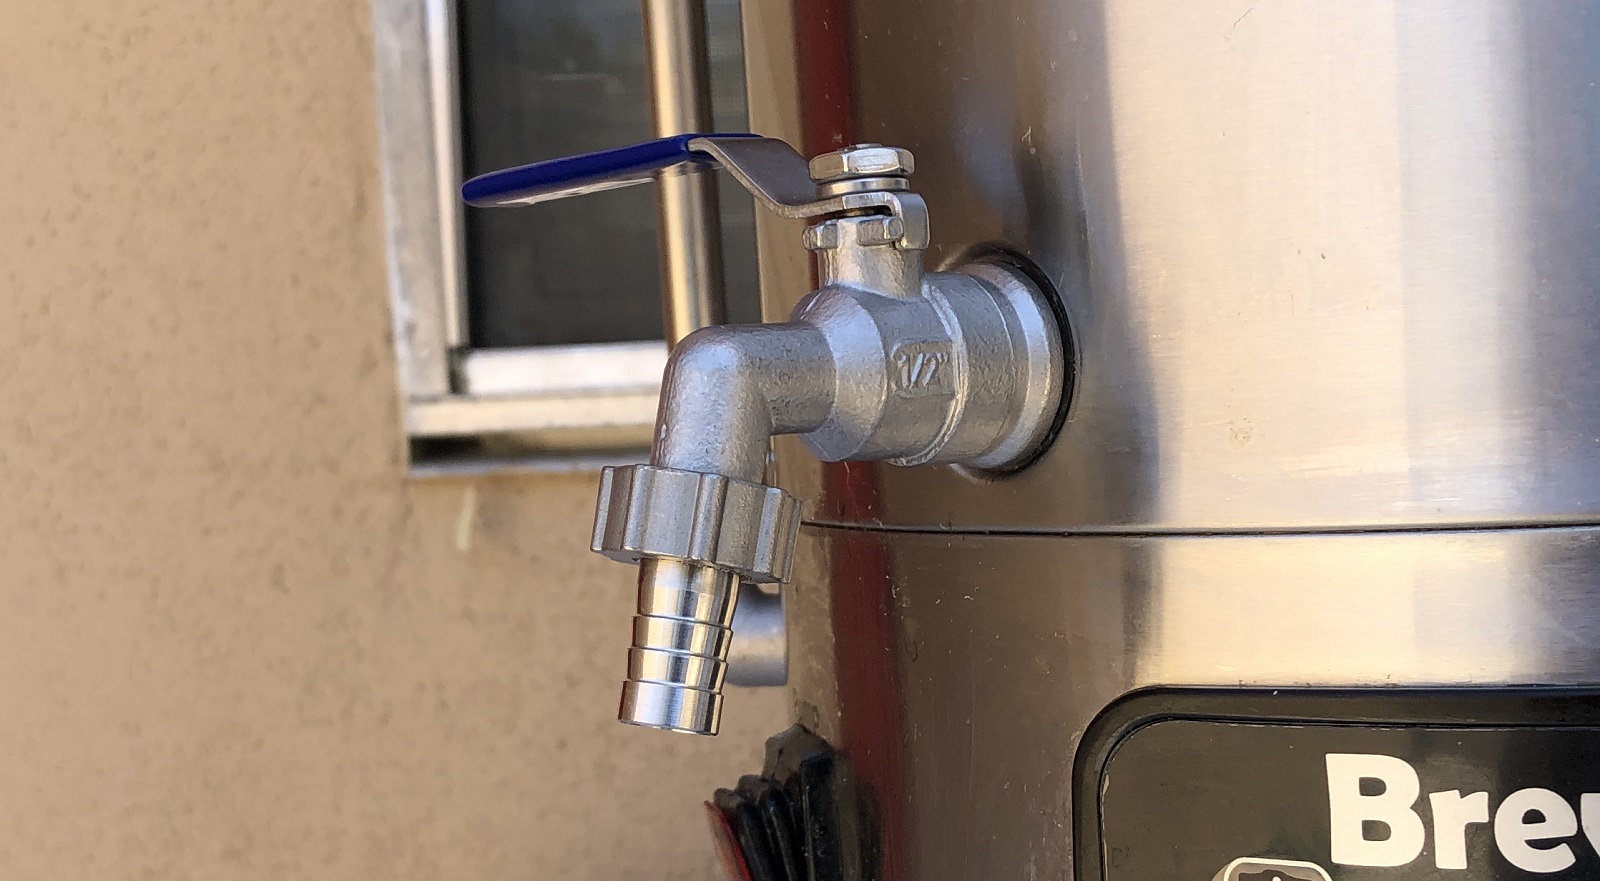
The ball valve on the BrewZilla fairly standard and works well. With the inner opening below the bottom stainless mesh filter, only clear wort flows out of the valve.
System Performance
In the time I’ve had the BrewZilla, I’ve brewed multiple batches on it and have come to hone my approach. While one can perform full volume mashes with this unit, the batch size would have to be reduced, so I’ve opted for the batch sparge method for 5 gallon/19 liter batches. To start, with the assembled mash tube in the kettle, I collect the proper volume of mash water and use the full 1500w to heat it to my desired strike temperature.
It takes approximately 45 minutes for the water to reach the proper temperature, at which point I stir in the milled grain, set the controller to maintain my target mash temperature, then turn the recirculation pump on.
At the completion of the mash rest, I pull the full mash tube out of the kettle and allow the grains to drip for a few minutes.
Rather than performing a fly sparge, I transfer the first runnings to a spare vessel before lowering the grains back into the kettle and adding the sparge water.
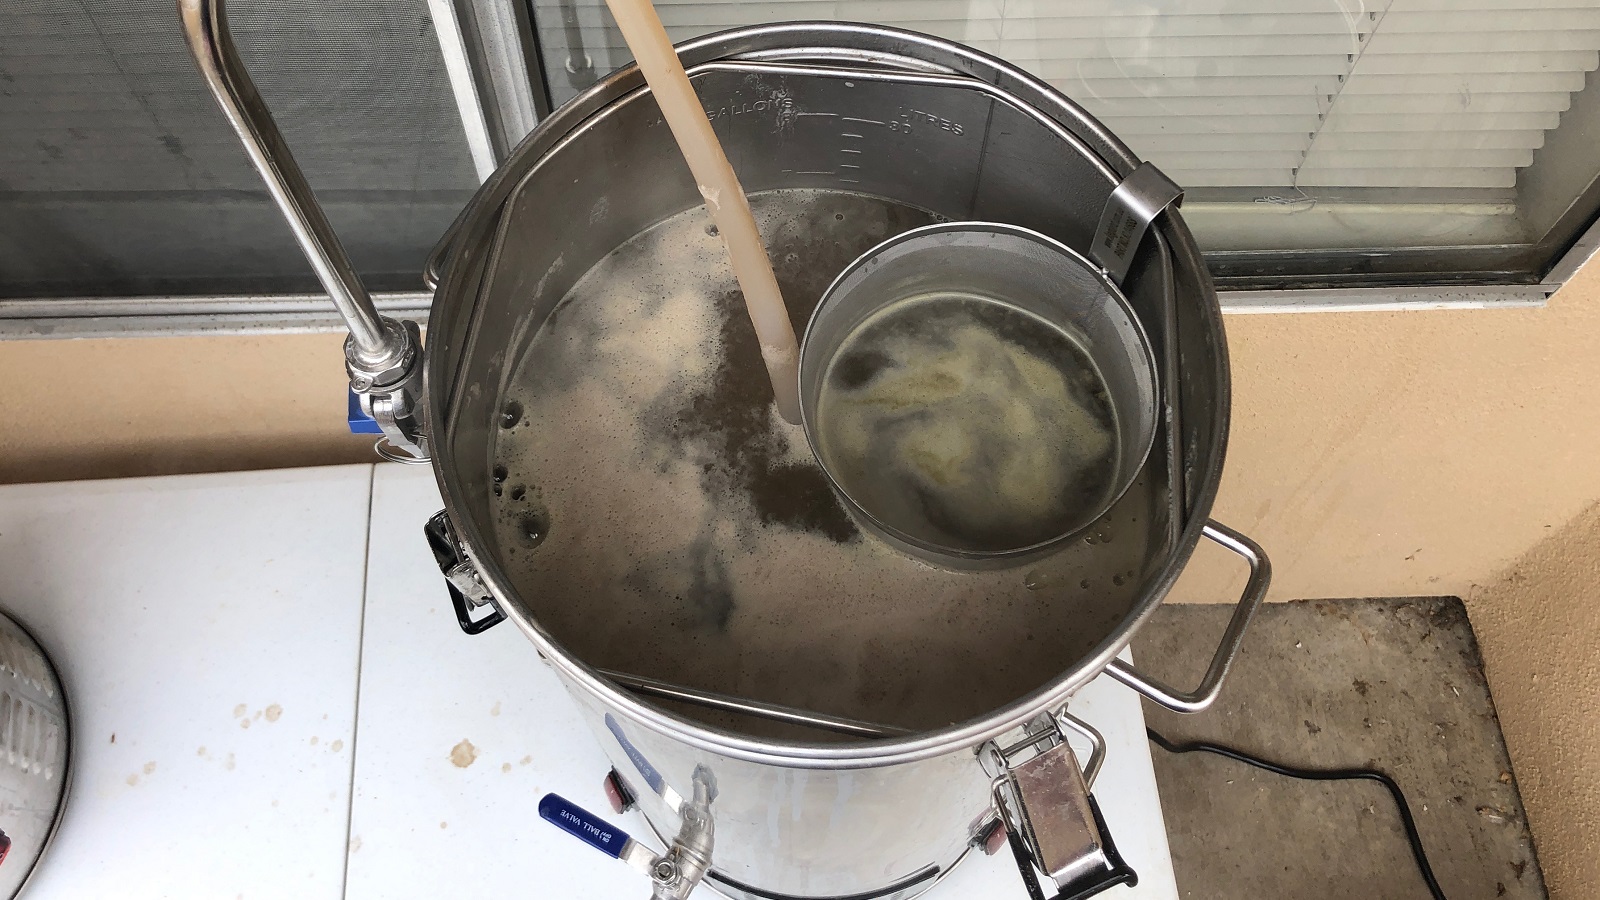
Following a brief rest, I lift the grains out again, letting them drip for a few minutes before removing the mash tube and adding the first runnings back to the kettle. Next, I set the controller to full power in order to bring the wort to a boil, which has taken 40 to 45 minutes depending on the mash temperature and weather. I like to use a stainless mesh hop spider to reduce the risk of hop matter clogging the pump.
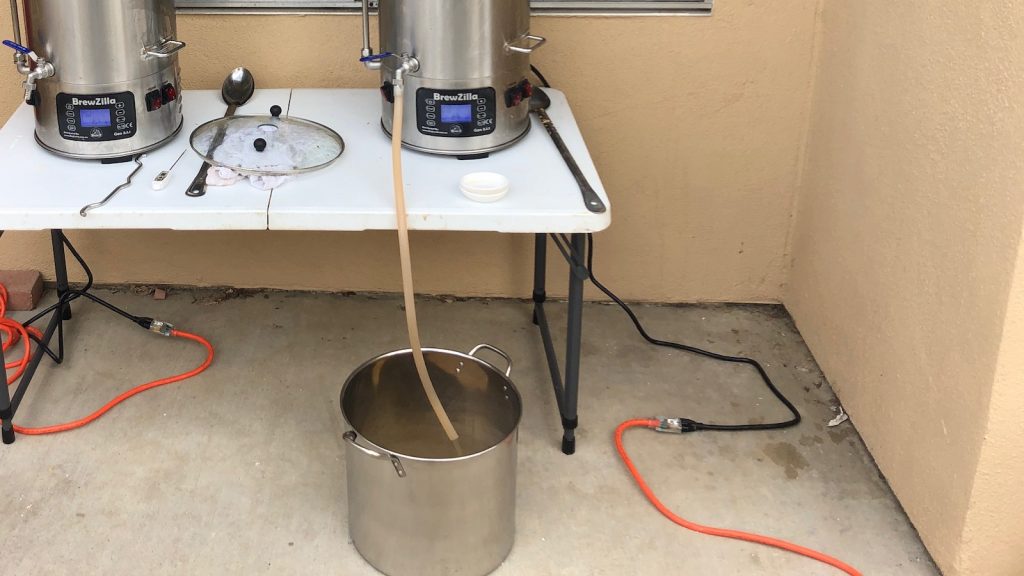
When the boil is finished, I chill the wort with the included stainless chiller, which has various options for use. Rather than running cold water through the chiller and placing it in the wort, I place the chiller in an ice bath and pump hot wort through it, which has worked decently for me so far.
Cleaning the BrewZilla couldn’t be easier. After adding water and powdered cleaner to the kettle, I turn both elements and the pump on to recirculate the hot cleaning solution. After about 5 minutes, I run clean hot water through the system for a final rinse before disassembling and setting it aside to dry.
| The Verdict |
Coming from a propane system I knew like the back of my hand, the BrewZilla was a bit daunting at first, but any worries I had quickly faded after my first brew session– I am hooked on electric brewing! The BrewZilla v3.1.1 offers many of the same features as other 120v electric brewing systems at a much more affordable price-point and, in my experience, makes beer of equal quality.
A common complaint some users have voiced about the 120v BrewZilla system has to do with heating times, which in all fairness, does take 15-20 minutes longer than my old propane setup. However, I see this as an advantage, as it affords me more time to prepare for other parts of the brew day, not to mention it’s my best option since I live in an apartment. Also, unlike propane, the BrewZilla regulates the mash temperature very well, keeping it right at the set point for the duration of the rest.
Personally, I feel the biggest drawback to the BrewZilla system is the chiller. As durable and handsome as stainless may be, I’ve noticed it takes quite a bit longer to chill wort than with my copper immersion chiller, which makes sense considering the thermal conductivity of stainless is nearly 20x less than copper. Still, it does work, and anyone interested in hastier chilling times can easily use something else.
At $450, the BrewZilla v3.1.1 is an incredible value for an all-on-one electric system that comes with a pump and chiller. While it has the look and feel of something a more experienced brewer might use, it’s perfectly suitable for the person looking to try their hand making beer for the first time. It can also be adapted to fit most extract and all-grain brewing methods. All in all, I’m a fan and would easily recommend this BrewZilla system to anyone looking for a low-cost way to get into electric brewing.
The latest version of the BrewZilla 120v Electric Brewing System can be purchased from the fine folks at MoreBeer!
Support Brülosophy In Style!
All designs are available in various colors and sizes on Amazon!
Follow Brülosophy on:
FACEBOOK | TWITTER | INSTAGRAM
If you enjoy this stuff and feel compelled to support Brulosophy.com, please check out the Support page for details on how you can very easily do so. Thanks!








41 thoughts on “Product Review | BrewZilla/Robobrew 120V Electric Brewing System With Pump”
I am considering this system but usually hop loose in the kettle. How do you think the false bottom would do to contain the hops (pellets)? I am also curious about the false bottom on the malt pipe, how does the mesh compare to a brew bag for example? Does it let any grain through, are there any issues with the bottom coming unseated?
I’ve had the Robobrew (I guess they changed the name?) for about three years and frequently use both whole and pellet hops in the kettle. There is a possibility of clogging the drain pipe but what I’ve done is create a whirlpool by holding the return tubing aas close to a right angle as possible against the side. 3-5 minutes of whirlpooling has usually created a very impressive pile of hops on the screen. If anything it works a little too well as the last time it happened it took longer to draw the finished wort off than I expected b/c the hot break and pellets were very compact.
I love my Robobrew and, despite having dropped some serious coin on the SS Brewtech 2v system I still break this out when I want a pretty relaxed brew day. I love to use it for 5 gal of lower abv beers (under 5%). Works like a champ!
My one hint for everyone is to do as much of the boil as you can with the lid on until it really gets cracking, and set the boil temperature to something close to 225F. Yes, i know water boils at 212, but for some reason if you set the temp regulator much higher than boiling you just get there a little faster. With both heaters on you can actually get a pretty impressive, violent boil.
I’ve been brewing for over 25 years and have recommended this to basically anyone who’s getting into brewing or wants to upgrade to all-grain. Spend the extra $$ if you can and this is all you might ever need.
I have a Grainfather and use the Robobrew false bottom. I use hops loose untill I reach over 4 ounces. If I’m doing a hoppy beer I’ll use a bag. Otherwise I just throw them in and that false bottom seems to handle it well.
If you do loose pellets, I would not run the pump. The lowest false bottom is not fine enough to catch dissolved hop pellets, and the pump diameter/piping is likely to get clogged.
The malt pipe false bottom is pretty secure as-is. They used to have a gasket for this, but appears it was removed in recent tool revisions. Grain can sneak though, but only with aggressive mash stirring with a spoon.
Andy, this seems like it would be the case but I’ve whirlpooled with loose pellets and it’s never clogged over dozens of batches. Whole hops? Absolutely (he says having learned this the hard way).
I would say that if you DO recirculate with pellets that you spend some extra time rinsing out the pump line. I heat up 2-3 gallons of water to 150ish then just pump into another bucket. Flushing the line has worked well for me.
I own one of those and I would strongly recommend using hop spider for it. My pump got clogged after using only 75g of east kent golding
This (virtually) same (or similar) product (made in China) is available from several suppliers under various names (brewzilla, robobrew, klarstein, maltmaster, etc.), but they‘re all essentially the same system. I have a variant, and find that the false bottom, which doesn‘t fit tightly, but has about a 1cm gap all around, is virtually useless at containing hop matter. when emptying the wort, the false bottom does catch some amount of hop material, but you‘re still left with a green soup at the bottom, which clogs pumps, forcing you to either throw out the last 1-2 gallons or figure out some way to filter it…I‘m still experiment with various techniques to do this, but none are quite satisfactory. I also have a hop spider as shown above, but with large hop bills, I‘m not convinced that the enough wort flows thru the hop spider to give good contact time and flavor/aroma transfer. One thing I‘ve tried out is emptying and cleaning the malt cylinder after sparging and putting it back in as a kind of giant hop spider, since the bottom of the malt cylinder is tight fitting. This works pretty well and contains perhaps 60-70% of the hop material, but the sieve holes in the bottom are too large, and still about 30% of the hop matter escapes into the larger system. The wimpy „bazooka“ filter on the ball-valve inlet plugs up quickly and makes transferring the finished hopped sweet wort a bit of a headache.
If anybody has a real solution to these problems, please add them here to the comments!
I have had a Mash N Boil system for a couple of years now and I totally agree with all of your points regarding simplicity and timing. I like the upgrades that this unit has compared to mine – the controller is nicer, the integrated pump makes it simple for mash recirculation, and the cleaning process is much easier. That being said, I have made most of those upgrades externally and I am pretty happy with it – though if I could have gotten it all at once, it would have been a lot less tinkering, and definitely cheaper. Thanks for the review!
i have the mash and boil for 4 years now,after 2 years i added a pump and a sight glass
One aspect that was kinda glossed over is that you still need another kettle and heat source (or a second Brewzilla) to heat up a large quantity of sparge water, if you want to continue doing 5 gallons batches.
I’ve got a BEMB and the way I’ve handled this is 2-fold. 1) Back off slightly from the “5 gallon batch” mark to 17 L (finished, into the keg) batches. 2) Preheat the full 37L, run off 15L into a “2 gallon” drink cooler I had around, mash, then use that still-warm water to sparge. I have occasionally used a pot to boil an additional liter or two of water and added that to the cooler if I -really- needed to push the volume of my boil and cared about sparge temp (hint I really don’t care that much about sparge temp).
Even easier I will often make 15L (finished vol) batches by just doing a full volume mash. Efficiency takes a hit of course, but it is so easy I end up brewing more often, so overall I end up with more beer and more variety.
Daniel, thanks for filling us in on the full volume mash. I always want to finish my beers with an as-full as possible corny keg, so I am always shooting for ~ 5.5 gallons of beer. Easy enough to make bigger beers if you lower the final beer volume too.
This is what I used to do as well, heat a full volume of water then run off and reserve 10-15L in a cooler box until I was ready to pour it back in at sparge.
I’ve started doing overnight mash rests to break up the brew day (I also get mad efficiency!) and that method was no longer possible as the sparge water would go cold in the cooler box overnight.
I’ve now bought a cheap coffee urn type water heater to use for sparge water (the kind of thing you’d see at a community meeting pouring hot water for your tea cup). Works really well and feels good knowing I can accurately set my sparge water as well 😀
Definitely a consideration. I currently use older brewing gear to do this on a stovetop or a propane burner. That being said, I have done room-temp batch sparging with little impact to my beer. I have not try this with fly sparging yet, but I will put it on my to-do list! That way, the kettle never has to be drained.
I just boil a big pot of water on the stove and mix with cold water in my sparging pitcher to (approx.) the desired sparging temperature.
I have been brewing with the Robobrew 3.1 for the past year. Loose hops can definitely pass through the bottom mesh and clog the pump. I got a sink strainer at the dollar store and cut it so it sits against the pump inlet. The pump never jammed up on me ever since. Seeing how much crap is stuck to the strainer after a batch makes me glad that it didn’t get in the pump.
Also, I got tired of having to use rice hulls to prevent stuck sparges, especially as I set up my mill to 0.030″ to increase efficiency. I got a Brew in a Bag filter made for the Grainfather (it’s the same size as the Robobrew). I can now grind as fine as I want and I can also make no-sparge batches to boot, as the BIAB rides lower in the kettle than the mash pipe and allows more space for the grain.
In summary, my Robobrew set-up went to pretty good (stock version) to awesome with the addition of a strainer and a BIAB filter. I also reused my existing copper immersion chiller instead of the stainless steel version, but that doesn’t count as an upgrade as I already had it.
Hey Simon, where did you get the BIAB filter?
http://www.brewinabag.com/?aff=3
This is the bag I use as well as reviewed and endorsed by brulosophy. I copied this affiliate link directly from his review: https://brulosophy.com/2014/06/25/the-brew-bag-a-review/
You mentioned still using a batch sparge process with this. How did you heat your sparge water? Can you explain that part in more detail?
Sure! I have extra non-ported kettles from my early homebrewing days. I use these to either a) collect first runnings or b) heat the sparge water on a kitchen stovetop or outdoor propane burner. This process mimics my pre-electric brewing process the most. If heating water is an issue, try room temp batch sparge water. I have not had a negative impact to my beer I can taste. If extra kettles are the issue, I am going to try room temp fly sparging in the future and will post my results.
@Matt I’ve been using a Robobrew 3.0 for a few years now. I always pitch my hops straight in without a strainer (even on DIPA’s). The bottom of the malt pipe stays in place and works exactly like a stainless steel brew-in-a-bag. However, unlike an actual bag wort can only deep through the bottom. This sometimes results in a compact grain bed (and a stuck or slow mash/sparge). With some adjustments (milling gap size, grain conditioning, rice hulls, etc.) this can be eventually overcome.
@Chris You don’t *need* another vessel and heat source. I’ve never used one. You can opt to either do a full volume mash with a small effeciancy hit (remember you re-circulate through the entire mash process — effectively rinsing the grains continuously) or you can simply sparge with cold water. You can also pre-heat your entire volume of water overnight and in the morning seperate a portion of hot water needed for sparging into a pot or bucket. Wrap the pot in a blanket and one hour later you have hot sparge water (not 76c, but fairly close).
I use my Robobrew for full volume almost all the time. The only time I don’t is when I’m shooting for over 1.070 OG. In that case I keep a gallon or two to the side and just cold sparge. My one big complaint of the robobrew was the malt pipe. On a straight barley mash, it doesn’t tend to get stuck… but with a decent amount of adjuncts, it would easily get stuck or be super slow. I now use a bag inside the malt pipe and that has seemed to solve that issue… and I can then easily rinse and use the malt pipe as my hop spider.
Any recommendations for the mash thickness and boil-off rate? I recently acquired a RoboBrew and am looking to dial in some settings for recipe calculation. Thanks!
So far I have brewed from 1.040 to 1.055 OG, always starting with 5 gallons of water in the kettle. Ill collect first runnings, then sparge water to get to ~ 7 gallons kettle full pre boil. My estimated boil off rate is ~ 1 gallon/hour. This was also with the pump running to keep things recirculating. There has been a bit of variability depending on how kettle full you truly are; I think the heating elements are fighting heat dissipation from the kettle walls. These, along with a pretty fine crush (0.037 inch), I am getting about 77% efficiency.
I have the V3 robobrew without a pump. as far as I can see this (sans pump) is exactly the same as your model. At the time that was about $300 so a great deal to go electric. I have had some issues with it but still recommend it with an asterisk. So possible issues. The heating elements are in the bottom and are not at all low density, so anything that settles on the bottom stands a good chance of scorching and that will error out the unit. At that point you have to empty and clean it before you can continue. Keeping recirculation going would probably help. I use a seperate brew pump. The pump that comes with models that have one is really small, which is why you will see a lot of people talking about clogging. The valve is also small. It looks like a 1/2″ valve but internally the passage is about 1/4″. It does take longer to heat than a system with an immersion heating element because it’s not in as much contact, but since you don’t have to watch it… Doesn’t bother me. I swapped out the stock valve for a real 1/2″ valve because I’m all set up with camlock fittings and the stock valve doesn’t have standard US pipe threads. I had the bottom pop out of the malt pipe once which was a bit of a pain. And the malt pipe can get pretty heavy if you have much grain in it. Which is another little gripe. To read the display you really need to be pretty close to head on so if you put it on the floor you have to get down there to read/set it. But if you put it on something it makes it hard to lift the grain pipe.
The last “gripe” is QA is pretty low. The first time mine “failed” it was because a with on the controller was loose because during assembly someone screwed down the contact so hard it stripped the connector. It’s actually surprising it ever worked, but a couple of brews and the heat cool cycle knocked it loose enough to cause an error. I also discovered that the wiring is really under sized for the amperage. I assume it was designed for the 220V unit and the 110V unit draws more amperage. As a consequence the wiring gets pretty hot.
Sounds like a lot of bad stuff but with an asterisk I still recommend it. And this review unit looks like it has the upgrades that Robobrew added like the nicer switches. If you don’t have a problem tinkering (what homebrewer does?) then it’s really a no lose purchase. If you never have an issue it is a bargain. If you have an issue it is fairly easy to fix or modify. Which is good because replacement parts are near impossible to get in the US and Kegland (the “manufacturer for RoboBrew anyway) doesn’t stock any parts for 110V models. To get anything you have to talk to the US distributor. But you can install an immersion heater for about $50 if the elements die, InkBird makes a brewing controller for about $110, swapping out the valve lets you use a bigger pump, etc.
Since I was in the guts I installed a switch so the built in elements can be run from an external controller. I will probably increase the gauge of at least the power cord because every bit of heat in the cord is heat that isn’t going to the boil.
The biggest plus for me was dipping my toe in electric brewing for not much $. It has changed my brewery upgrade plans. Electric is SOOOO nice. I will keep one gas setup for outdoor brewing but I’m going to switch my main systems to electric.
Super helpful comment. Appreciate the time and effort. Thanks!
I am having issues with the pump on my Robobrew 3.1.1. It is brand new and I have brewed one batch with it. During that batch, my pump would stop circulating. Then, it would come on again randomly if left on. I thought maybe it was getting clogged, so I read up on how to unclog during a brew session – to no avail. I started my second brew session and was heating my strike water and had the pump on to circulate the water. The pump is acting up again and turning off and on intermittently. There is nothing but water in the brew kettle, so I know it is not a clogging issue. Any thoughts on what could cause this? Any help would be greatly appreciated. I would hate to have to return this unit!
A trick for clearing the pump (saw this at my local homebrew shop!): turn off the pump, open the recirc valve, and push air down the recirc tubing. I use a clean kitchen baster. Turn the pump back on, it should flow. You can try this a few times, and if that still does not work, the impellers are actually jammed. It is possible to take the pump out of the base and re-assemble. Send me an email to andy [at] brulosophy [dot] com and I can send some photos to help.
I’ve made three batches with my robobrew (which is about 4-5 months worth of brewing for me) and I cannot seem to nail the boil off rate, which has caused issues with hitting my target gravity. Any advice or does anyone have a formula for boil off on a 5 to 5.5g batch with a 60-70 minute boil? thanks to anyone who can help.
I saw a thread on the kegland.au site that noted 2.2 l/hr (about .58 gal per hour) due to its narrow construction and relatively low powered boil. Makes sense to me.
The boil vigor definitely makes a difference, and that will vary. I am working out the math, but the narrow construction dissipates heat from the sidewalls, cooling off the wort. I run by boil with the pump on to turn the wort over, too.
“How high” gravity could be achieved for a 5 gal batch?
Morebeer says to not exceed 18 lbs of grain. That puts my calculations around 1.080 as highest all-malt OG. Factors include efficiency and the mechanical stability of the malt basket/pipe. Much heavier, and it might be hard to lift or start flexing would be my concern. Also, it becomes hard to recirculate the mash with the pump at this weight. One work around is to add light DME or sugar near the end of the boil to boost OG. Be sure to factor in the wort volume increase to these additions too.
Are there hooks or something on the basket to hold it above the kettle and drain the mash?
Yes, there are feet on the basket that rest on a metal wire frame.
Many batches through my Robobrew, love it, but rarely hit my OG. I buy clone grain kits from various mail order so have not attempted to control or monitor grain size. During mash how many times do you stir? I think that might help achieve OG but the act of stirring causes my grain bed to compact,clog the bottom and thus causing my recirc pump to quit circulating wart. I do not use the fine screen. My resolution is to stir again, dig down deep and scrap along the screen bed bottom, try and fluff the grains. This may work for 5+ minutes until I must do it again. By comparison, if I never stir I can go a full 60 minutes without having to touch the unit letting the wort circulate at a fairly fast flow. Rice hulls helped, but not very much. I always do 5g batches, most bills around 10-12lbs of grain. TIA
I have hit my predicted OGs pretty consistently. I will summarize my technique and give some tips:
1) I mill grain fairly finely (~0.037 gap), no rice hulls. I add my strike water and let that come to temp, but also let the system hold that temp for about 30 minutes or more. I have been finding some transient temp drift if I don’t let it “soak” heat in. Then I stir in the grains with the temp probe set to my mash temp. I do mix it very well but then let the pump slowly trickle trough the top of the grain bed. Any faster and it will overflow. Around 45-60 minutes, I will lift the bed and let it drain very well. After draining, I run that off to a 2nd kettle and batch sparge. Again, this batch sparge is let to drain very well. I think giving them ample time to drain is critical for repeatable OGs and volumes.
2) I have also ditched the finer strainer due to slow runoff.
3) Some tips: For your next batch, carefully monitor your run off gravities *and* volumes. This is the only way to figure out where the OG problem lies: is it in the mash chemistry, or the run off speeds? You should be able to predict your pre-boil OG and volume in your brewing software. If these line up, all that is left is dialing in boil off rate, which I have found can vary from 0.5 gallons to 1 gallon per hour for the 110V systems. Their amount of heat cannot compete with a windy day, preventing a more active boil from happening.
You say that it controls the mash temperature well, but since the temperature probe is just a little knob sitting on the bottom of the kettle, and the malt cylinder sits well over this, the temperature within the mash can be quite different than the temperature the probe is measuring, depending on how well the re-circulation is working. I‘ve found that if you have a very coarse grain crush, that the recirculation works well and the temperature in the grain bed is consistent with the measured temperature, but then the efficiency is very poor. If i use an appropriate crush, the the rate at which I can recirculate the wort is mush too slow to provide good heat transfer and the grain bed can be much cooler in the middle than the hot wort sitting at the bottom of the kettle where the temperature is measured. Constantly stirring the grain bed is the only solution I‘ve found, but it‘s not really what you want to do…anybody else have this problem and/or a solution?
cheers,
Josh
Hi. Thanks for the review!
“While one can perform full volume mashes with this unit, the batch size would have to be reduced, so I’ve opted for the batch sparge method for 5 gallon/19 liter batches.”
So I take it that this means it does not have the capacity for a no-sparge, 5 gallon batch?
Any potential issues brewing smaller batches with this. Looking to net 3 gallon batches
“Rather than running cold water through the chiller and placing it in the wort, I place the chiller in an ice bath and pump hot wort through it, which has worked decently for me so far.”
I like this idea. Does anyone else do this? I would think you could slow the flow down if it wasn’t cool enough or speed it up if it was too cool going into the fermenter. Thoughts?