Author: Jake Huolihan
Over the course of my time as a homebrewer, I’ve run the gamut of different fermentation vessels– plastic buckets, PET and glass carboys, plastic conicals, corny kegs, and stainless steel buckets. While each has had their own pros and cons, I ultimately settled on the Ss Brewtech Brew Bucket, which in addition to being durable and lightweight, offers the ability to independently control the fermentation temperature of the beer it contains (with additional accessories). However, as my concern with cold-side oxidation grew, I began the search for a vessel that would remain closed not only during fermentation, but cold crashing and packaging as well.
Commercial fermentation vessels are often designed to hold a certain amount of pressure, which allows the brewer to perform a number of tasks in an oxygen-free environment. While various homebrewing hacks exists that provide work arounds to certain equipment limitations, the ones I’ve tried were of questionable effectiveness and left me feeling dissatisfied. Wanting a product that would integrate seamlessly with my previously purchased glycol chiller, I was enticed by the Ss Brewtech Unitank, which seemed to offer all of the features I was after.
Assembly
I purchased my 7 gallon Unitank direct from the Ss Brewtech website in January 2019 and received it a few days later.
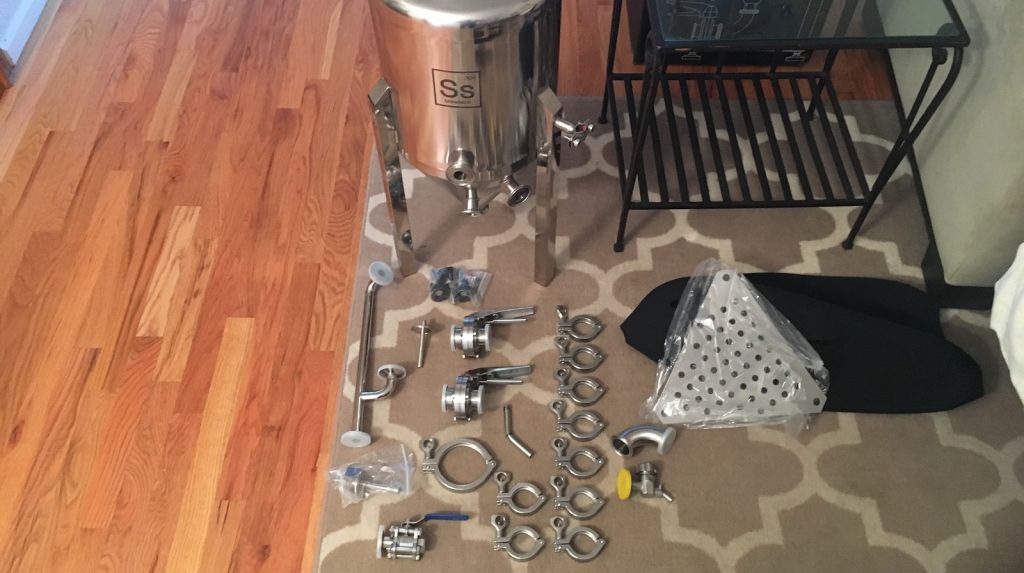
I immediately unboxed the unit and was struck by how many parts were included, which at first appeared a bit complicated.
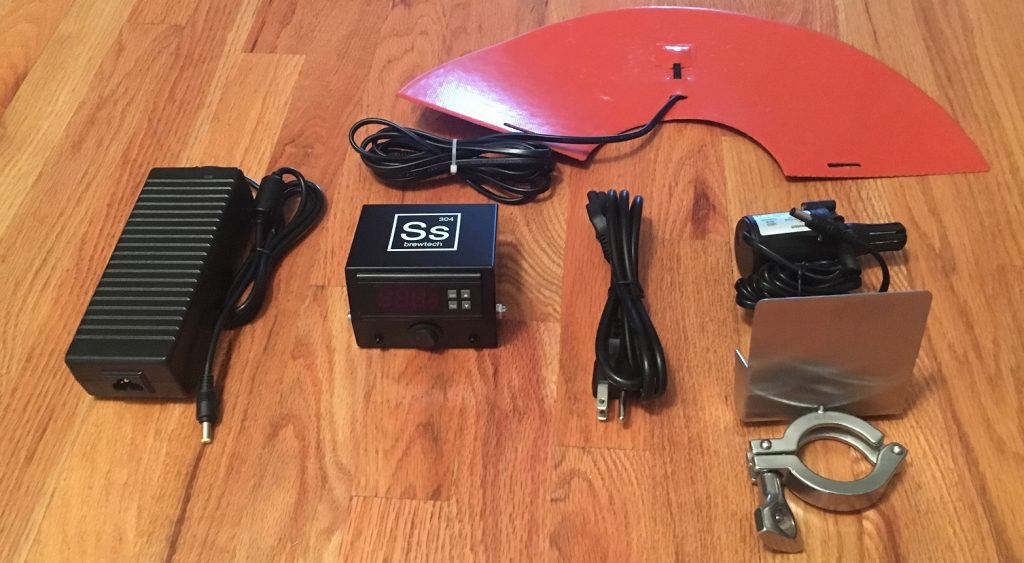
Chalking up my initial impression to unfamiliarity, I laid everything out and within minutes developed an understanding of what all the parts were for. Seeing as I independently control the fermentation temperature of each vessel, I ordered the FTSs² Chilling & Heating kit with my unit and started off by installing it.
With that in place, I attached the bottom stand and feet as well as all of the tri-clamp fittings.
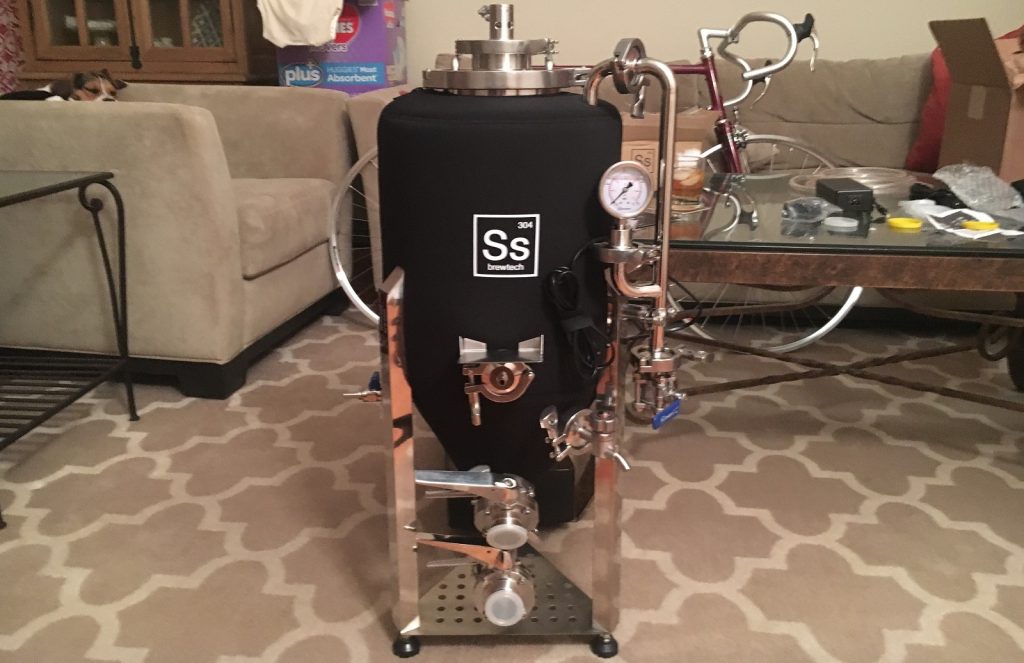
From unboxing to a fully assembled Unitank, I was in about 25 minutes. Not bad at all. At this point, per Ss Brewtech instructions, I filled the vessel up to the sample port, hit it with 5 psi of CO2, and left it alone for 24 hours to check for water and air leaks. Satisfied the following day, I performed a deep cleaning and passivation to make the Unitank ready for action!
Detailed Feature Overview
As a return Ss Brewtech customer, I feel like it goes without saying that I think their products of really high quality, and this is certainly the case for the Unitank. The stainless steel is sturdy, the welds are clean, all connections rely on tri-clamp fittings, and everything fit together exactly as intended. I’ve no doubt this unit will be with me for as long as I’m brewing.
Welded Chiller Coil
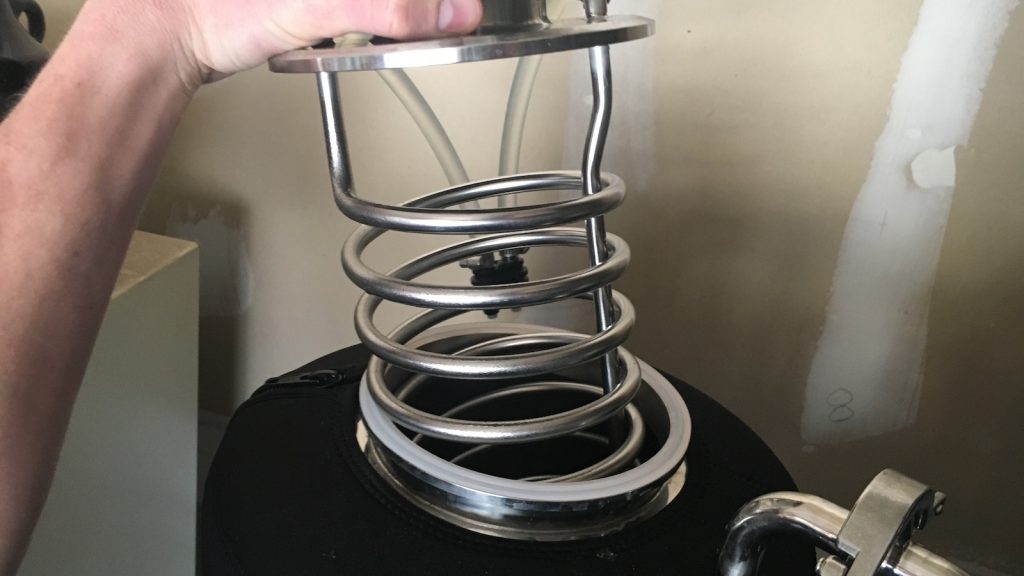
Quality commercial fermentors are often jacketed, with glycol coils residing in a wall between the fermenting liquid and the outside of the vessel, allowing for precise temperature control. The Unitank does not share this feature, but rather a coil that gets glycol or cool water pumped through it remains submersed in the fermenting beer.
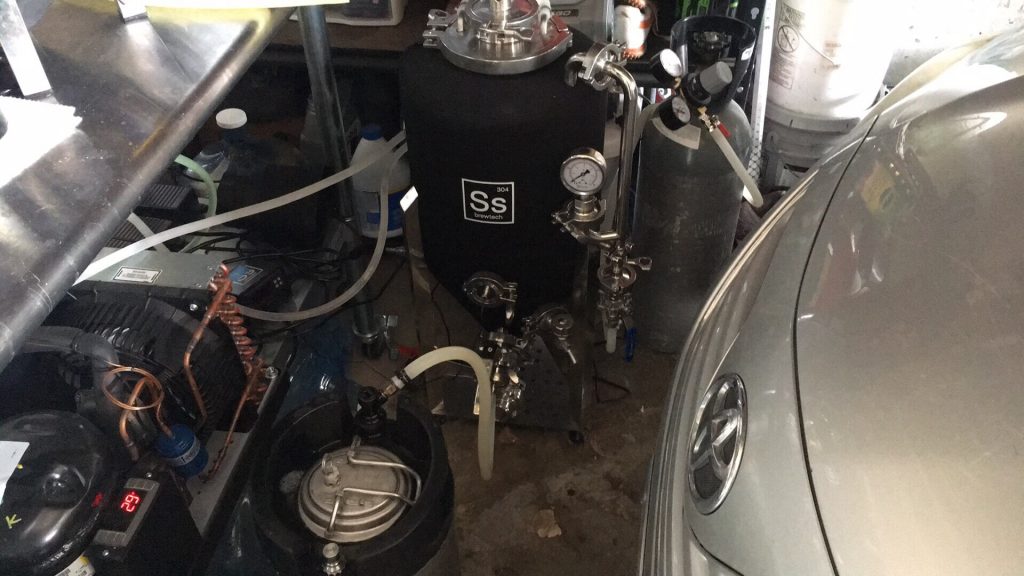
The chilling coil is welded onto the 6″ tri-clamp main lid opening, which has barbs coming out of the top for attaching tubes from a chiller of one’s choosing. The coil itself is large enough to control temperatures of batches as small as about 3 gallons/12 liters, though likely wouldn’t be very effective on smaller volumes. Using my Ss Brewtech glycol chiller with the Unitank is truly a godsend!
Combination Dry Hop/CIP/PRV Port
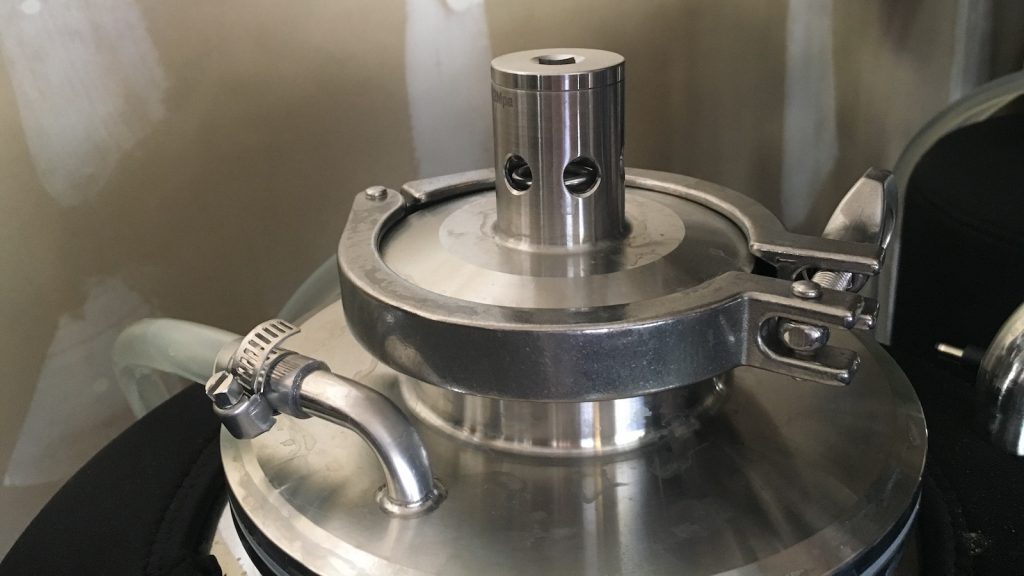
Positioned in the center of the larger lid is a 3″ tri-clamp port where another lid gets attached offering a wide opening that allows ample clearance for making dry hop additions. Attached to the top of this lid is a built-in pressure relief valve (PRV) that disallows the pressure in the Unitank to get above 15 PSI. Note: this is not a spunding valve.
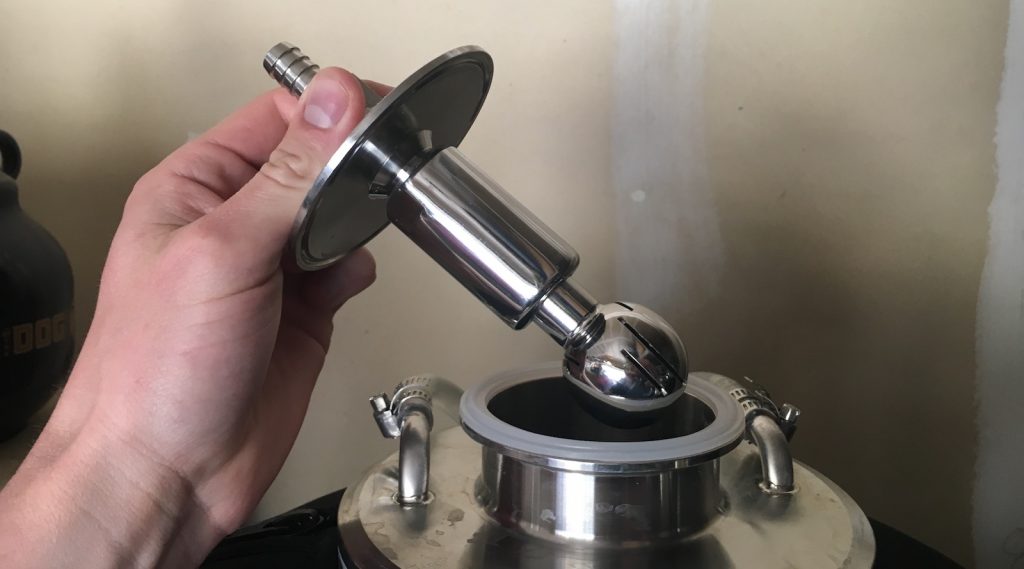
Once fermentation is complete, the PRV lid can easily be replaced by a clean-in-place (CIP) ball lid that allows cleaning solution to be pumped through the vessel, which removes the hassle of soaking and scrubbing.
Stainless Blowoff Cane
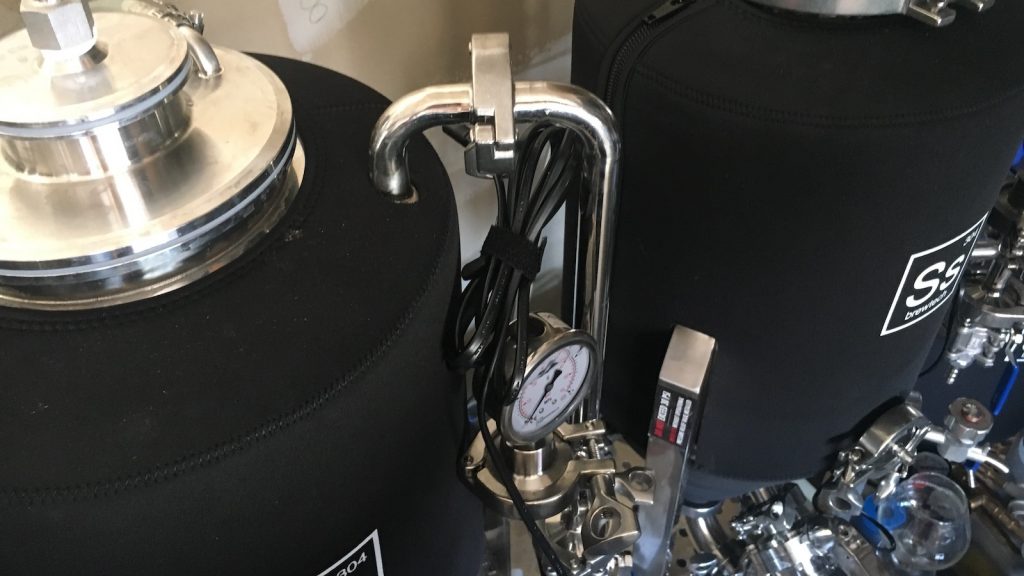
Similar to many commercial fermetors, the Unitank relies on a stainless steel blowoff cane that has a pressure gauge halfway down that allows one to accurately view head pressure during fermentation, spunding, and fermentation.
Beneath the pressure gauge is another tri-clamp fitting onto which a 3 piece ball valve gets attached. Using a 3/8″ barb fitting, I attached some tubing to the valve and use it for blowoff during fermentation.
As fermentation is winding down, I simply close the ball valve to stop CO2 from escaping, thus allowing for natural carbonation. When the beer is ready to be packaged, I push CO2 from a tank through the same valve for convenient closed transfer kegging.
Butterfly Racking Valve
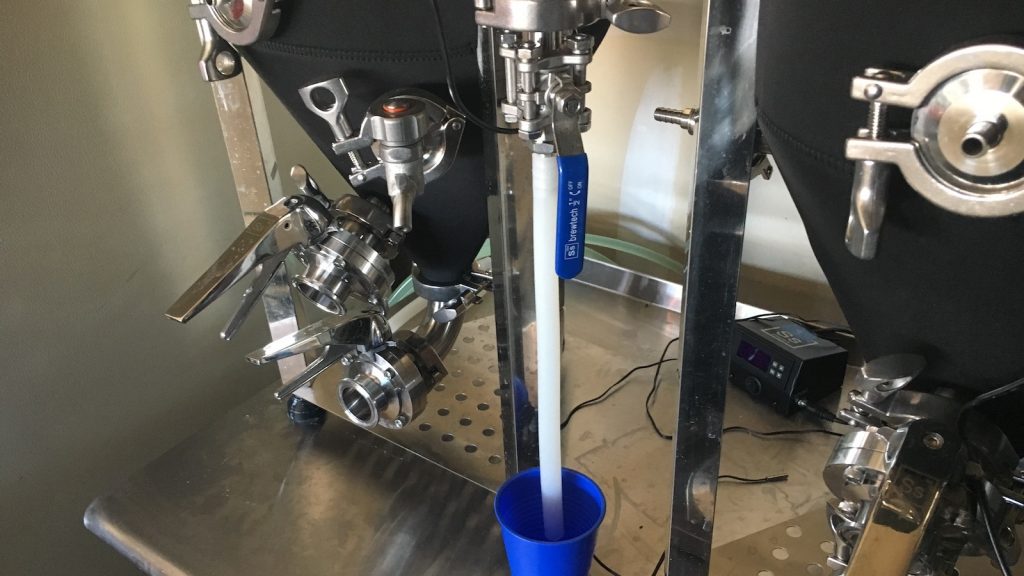
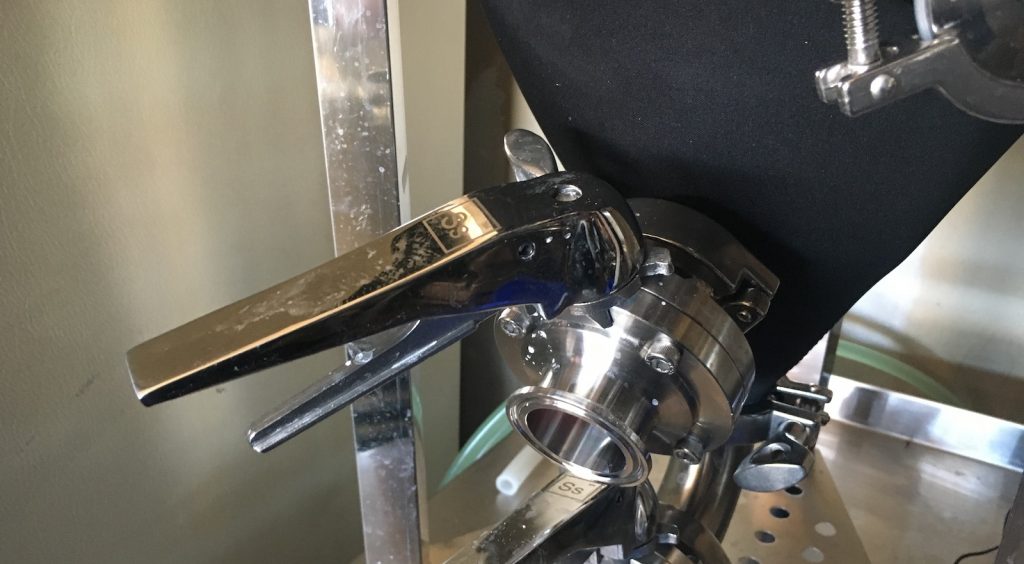
The finished beer is transferred out of the Unitank through a sturdy 1.5″ tri-clamp butterfly valve that sits just above the yeast cone.
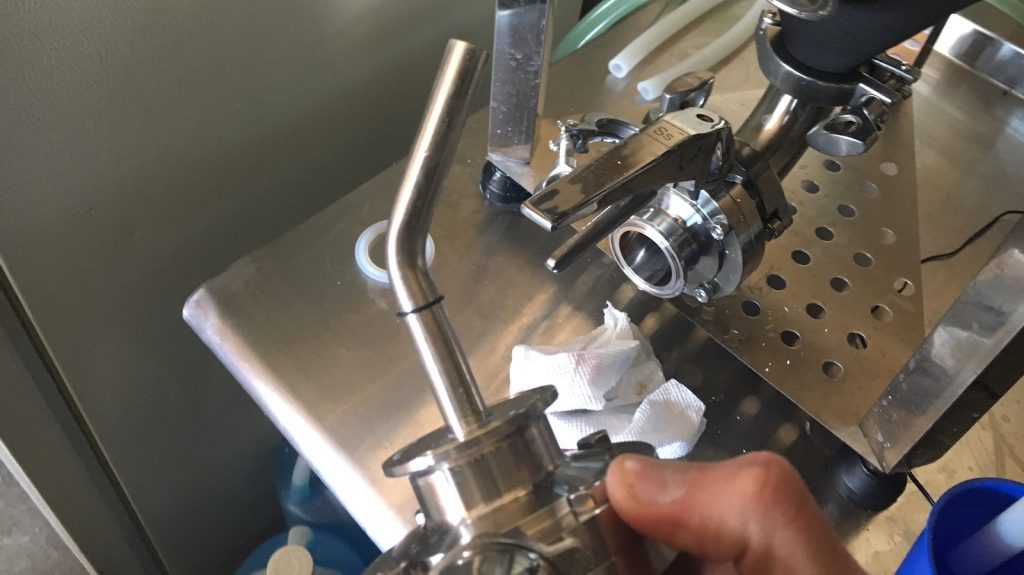
A diptube attaches to the inside of the valve and can be easily positioned by slightly loosening the tri-clamp and rotating the valve, allowing for placement above the trub line and thus transfer of clean beer.
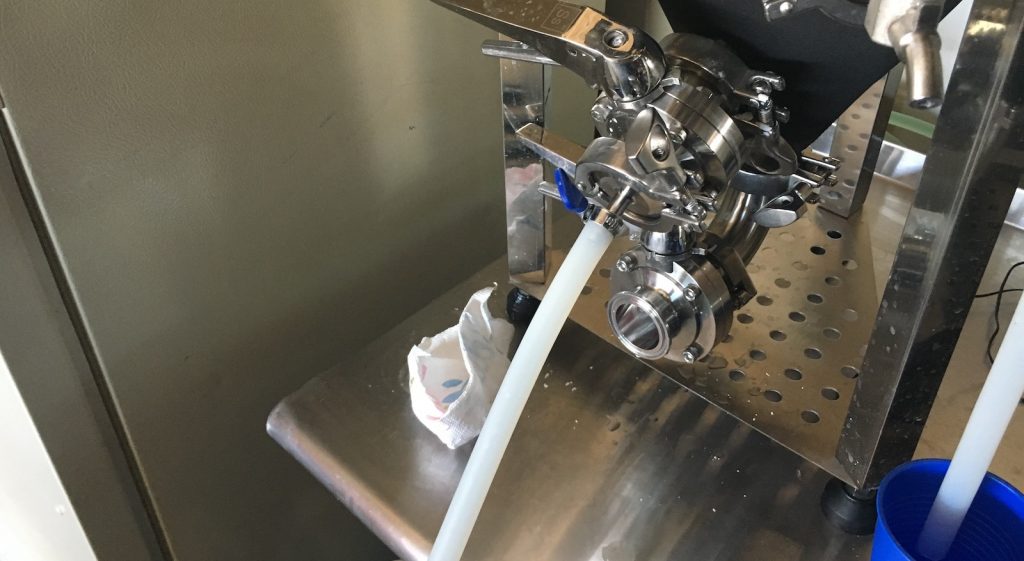
Any number of tri-clamp fittings can be attached to the outer portion of the butterfly valve, making it quite versatile and capable of fitting with any setup. I’ve been using a 3/8″ tri-clamp barb, which I connect one end of my standard kegging tubing to while the other end is attached to a liquid disconnect that goes to the keg.
Butterfly Bottom Dump Valve With 90° Elbow
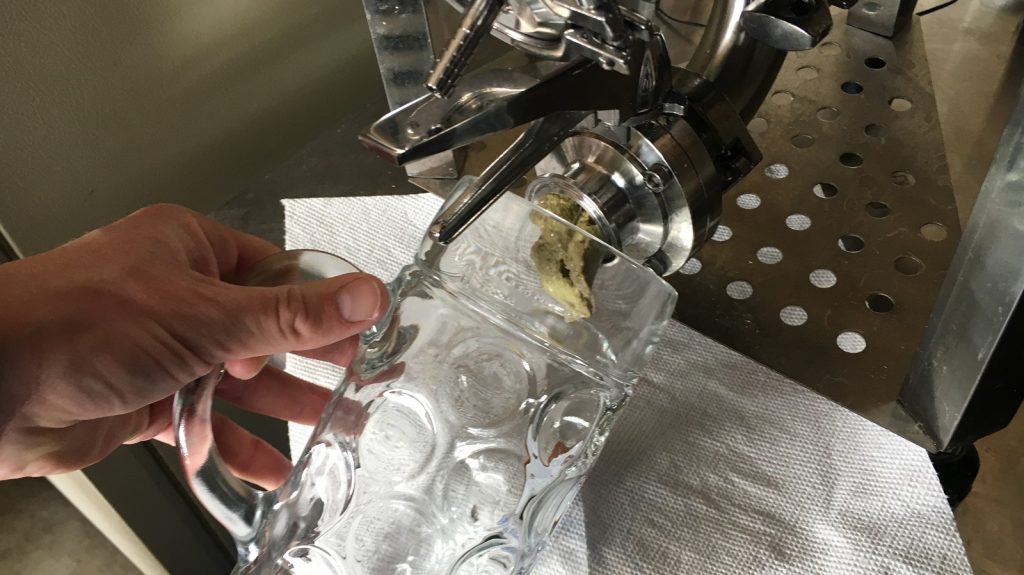
One of the coolest features of any conical fermentor is the ability to dump yeast from the bottom, and the Ss Brewtech Unitank definitely did not disappoint! At the very bottom of the vessel is a 1.5″ tri-clamp port onto which a 90° elbow connected to a second butterfly valve gets attached. This valve can be opened at any point to remove whatever has settled to the bottom of the Unitank.
The dump valve can serve numerous purposes from removal of cold break prior to fermentation to harvesting clean yeast, and while it’s not always the cleanest process, it’s definitely a great feature!
Sampling Valve
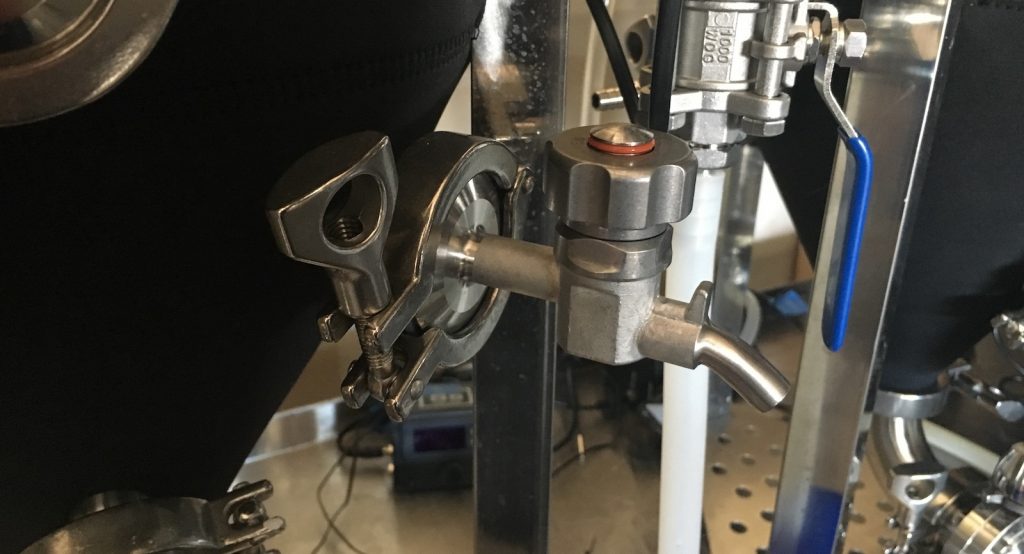
The Unitank comes standard with a 1.5″ tri-clamp sanitary sampling valve that makes pulling samples for hydrometer measurements or just to enjoy incredibly easy.
It may not seem like a big deal, but being able to pull samples without opening the vessel is one of the things I’ve come to appreciate most about the Unitank.
Carbonation Stone
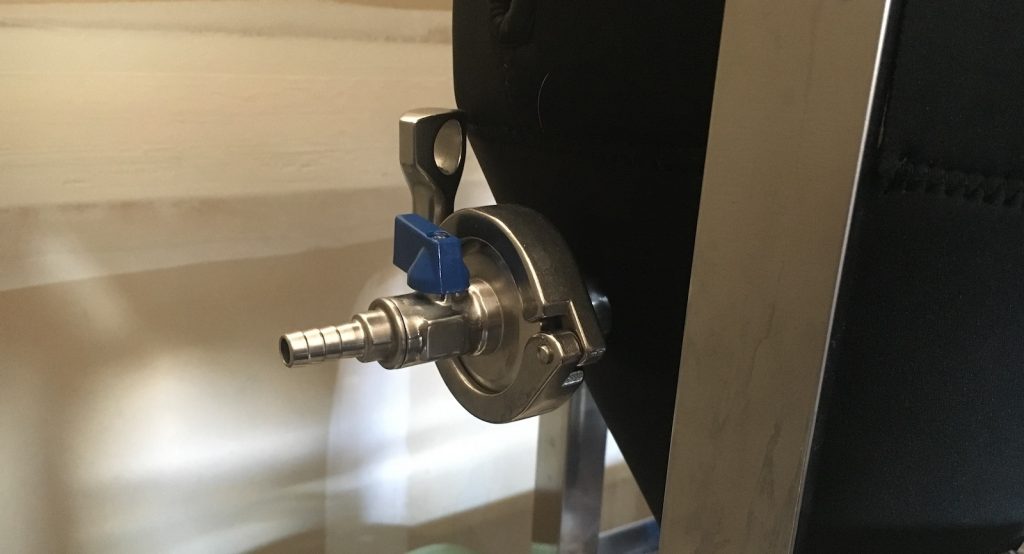
On the opposite side of the vessel is yet another 1.5″ tri-clamp port where a carbonation stone attached to a ball valve gets secured.
This feature serves two functions, the first being oxygenation of wort prior to pitching, which is done by connecting tubing from an oxygen tank to the barb and opening the valve. Once fermentation is complete, CO2 can be pushed through the valve and stone to rapidly carbonate the beer prior to packaging. A nifty feature that I’ve not played around with much, as I’ve been spunding most of the beers I ferment in my Unitank.
Thermowell With LCD Thermometer
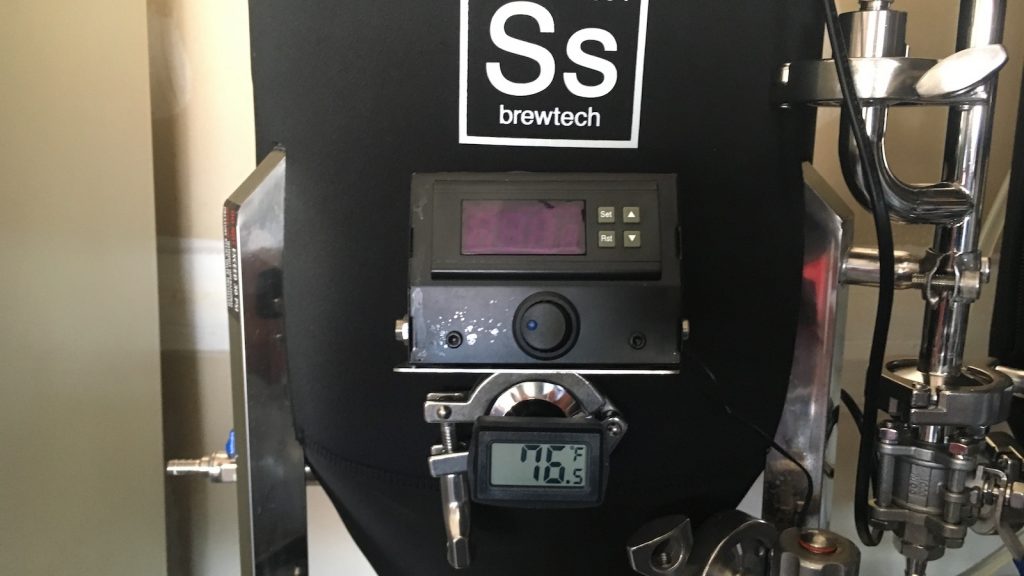
Located just above the sample port is a spot for the included thermowell and LCD thermometer, which makes monitoring the temperature of fermenting beer very convenient.
For those who aren’t fermenting in an enclosed chamber, this is a great way to know exactly what temperature the beer is at during fermentation. I’ve tested these probes numerous times and have consistently found them to be within 1°F/0.5°C of the beer temperature as measured by my Thermapen.
15 PSI Operating Pressure With 30 PSI Max
One of the biggest selling points of the Ss Brewtech Unitank when I was shopping around was how easy it makes pressurized fermentation and transfers. While 15 PSI should not be exceeded during fermentation, the fact it’s rated to 30 PSI provides an element of security and allows for somewhat higher pressure burst carbonation.
Neoprene Insulation Jacket
To assist in the maintenance of stable fermentation temperatures, particularly since these units are often freestanding, Ss Brewtech includes an insulative neoprene jacket that wraps around the Unitank. In my experience, this drastically improves temperature stability while making the vessel look badass.
Stainless Lower Shelf & Adjustable Feet
Providing both stability and place to set small items, the Unitank comes with a stainless shelf that attaches to each of the three feet. Another nice feature of this unit is that the feet are adjustable, allowing one to add a few more inches of clearance to the bottom of the vessel, which can make dumping trub and yeast a bit easier. Ss Brewtech also sells leg extensions that can be used to raise the Unitank up another 10″, though I’ve not found this to be necessary with my setup.
| The Verdict |
I did my best to provide an objective review of the Ss Brewtech Unitank without pushing too much opinion, my hope being that my experience might help readers form their own opinions based on their individual brewing situations. Indeed, the Unitank has a lot to offer and is certainly more than just a standard fermentation vessel, which is reflected in the cost. Despite my attempts to refrain from being too subjective, I’m bound to be asked by more than one person if I think the Unitank is a worthy purchase. So, to get it out of the way now…
Hell yes!
This opinion comes with some caveats, namely that the Unitank isn’t necessarily an entry level fermentor and really shines when used alongside other gear. While the unit might fit in some enclosed chambers, it’s really designed to be used in conjunction with an external cooling source such as a glycol chiller. Similarly, performing fully closed transfers, which is terrific for reducing cold-side oxidation, requires a CO2 tank.
One small gripe I have with the Unitank is that it lacks internal volume etchings, a really helpful feature found on much cheaper fermentation vessels. I imagine the reason for this is due to the small opening making it difficult to perform the etching process, and since tracking volume transfer based my kettle etching is simple enough, this really is just a minor annoyance. Also, the unit is quite front-heavy, and while I’ve yet to experience it tipping over, I experience a tinge of anxiety every time I fill it up. Extending the foot out a bit, while increasing the overall footprint, would likely serve to improve stability.
As someone who relies on external chilling, I sought an easy way to detach the vessel from my from the glycol chiller loop and ended up snagging a FTSs Quick Disconnect Kit, which integrates seamlessly with the Unitank. The standard setup works fine, it’s just slightly more cumbersome and requires a bit more time to disconnect, nothing huge.
All in all, the Ss Brewtech Unitank has been an absolute joy to use and has positively contributed to certain aspects of my process I find important, namely reduction of cold-side oxidation. The ability to ferment, carbonate, and serve in a single vessel is unbelievably convenient for someone who loathes packaging as much as me. I’ve served many beers direct from the Unitank and they are fantastic, just dump the trub, cap the vessel, and let it carbonate for a few days before drinking.
It may not be for everyone, but for the brewer interested in quality gear that not only reduces oxidation, but can serve as both fermentation and serving vessel, the Ss Brewtech Unitank is a righteous option.
Ss Brewtech Unitanks are available in various sizes direct from SsBrewtech.com as well as MoreBeer. If you have any questions about this product, please don’t hesitate to leave them in the comments section below!
Support Brülosophy In Style!
All designs are available in various colors and sizes on Amazon!
Follow Brülosophy on:
FACEBOOK | TWITTER | INSTAGRAM
If you enjoy this stuff and feel compelled to support Brulosophy.com, please check out the Support page for details on how you can very easily do so. Thanks!




15 thoughts on “Product Review | Ss Brewtech Unitank”
The price?….. Sure, I could find it on my own, but a review should include associated costs.
exactly my thoughts
Agreed.
I have a good number of brews completed with the Unitank. In my experience, using the last few gravity points to naturally carbonate with the spunding valve (bought separately but is a MUST) set at 1.1 bar allows for cold crashing with no O2 exposure and with one week of conditioning under pressure, the clarification on a lager fermented with WY2206 was insane. I use no finings (or gelatin) hot or cold side at all in my process. The clear up time compared to my normal SS Brewtech conical fermenter is much quicker in the Unitank, although I did not do a side by side brulosophy style experiment.
Also, having done NEIPAs with the Unitank (dry hopping at the same point as allowing natural carbonation) I got really really good stability – with the beer showing no signs of oxidation (darkening/murky) or aroma loss when consuming 10 weeks after hitting FG. Important to note, I rack into kegs pre-filled with sanitizer and pushed out with CO2.
I have two of these, and they are fantastic. My only gripe is that carbonating sucks. No matter how gently I push gas into the tank, within minutes the headspace pressure equalizes and then the gas flow stops. Which means you’re basically carbonating just like you would in the keg at that point. Ss basically told me to burst carb, letting the PRV release the pressure, for 24 hours and then drop down to serving pressure for several days. Which is exactly what I do for kegs, so I’m not sure this provides any value. The dream is to be able to carbonate in hours not days. I still think it’s an excellent purchase though, especially if you have a glycol chiller.
Loving mine as well. Would also love a post about your equipment and process using cip to clean it. My process has been manual to date. It’s definitely a bunch more work than a brew bucket, but still worth it.
Jake,
What features, other them pressurization would distinguish the unitank from a Chonical Brewmaster edition?
Thanks.
I’ve been concerned with the amount of labor involved with cleaning the Unitank after use. Would love a quick run through on the clean up procedure that you follow.
Besides a little more integration – the unitank cleaning should be like the BME’s. I just the CIP spray ball and it is literally hands off cleaning. It takes about an hour, but the pump does the work with the spray ball. Not using a CIP system… may make cleaning rather laborious.
I love the idea. How log does it take to clean everything after you are done? So many parts, a couple of hours plus?
I have the non-unitank version of the SS Brewtech vessel. Using the CIP spray ball that shows up in this review (mine is a 1.5″) and using hot PBW/Oxyclean with a pump, my tank comes clean in 10 minutes. When done I throw all the other tri-clamp parts that have come in contact with the beer into the leftover cleaning solution for another 10 mins, then dunk the parts in some sanitizing solution and put everything back together again and rinse with cold water. All told, 30 minutes with most of that time letting the pump run and doing very little.
I imagine there are more side-parts to deal with here, but roughly the same concept.
I love the review! Very helpful.
You mentioned that the PRV is not a spunding valve, can you elaborate? Does it just become a spunding valve when you close the blow-off tube’s ball valve?
I’m sure this is a dumb question, but when cold-crashing, does it not create negative pressure because you are carbing it at the same time? No need for the Bru’Loon lock?
Thanks!
Ben
If the system is sealed, pressure builds to 30 PSI before the PRV releases the pressure. A spunding valve is a separate tri-clamp fitting which you can set to desired pressure. I use a tilt blue tooth hydrometer to monitor the gravity. During fermentation I ferment with little to no pressure but when the fermentation is nearly done, I’ll set it to 1.1 bar to carbonate. Once FG is stable and the beer is done fermenting, I then cold crash. The pressure drops slightly during the crash.
Great article! Could you do one on how to carbonate the beer after the fermenting process is done?
Nice review article. I’ve also recently purchased a 7 gallon Unitank and am considering how best to perform the pressurized transfer to my corny keg like you describe. It sounds as if you purchased an extra 3/8″ TC fitting and attach it to the butterfly valve/racking arm and then transfer with no spunding valve or filter? If so, I’m assuming you connect the hose to a ball lock valve (flare) on the other end?