Author: Marshall Schott
When I presented my idea for The Brü Bottler to my wife a few months ago to buy a bunch of parts in bulk, put them together by hand, then package and ship them myself, all with the noble goal of providing homebrewers an inexpensive yet effective solution for bottling from taps, she responded with an emphatic, “I think that’s gonna be more work than it’s worth.” She expounded on this by pointing out all of the time I’d have to invest in the process from cutting stainless tubing and piecing each bottler together to managing payments and shipping. Of course, in typical prove-you-wrong fashion, I disregarded her concern and went for it. I started by cutting 25 pieces of stainless tubing that were 4′ in length into 12″ pieces, it took 6 hours altogether, leaving me with 2 blisters on each hand and very sore wrists. Measuring and cutting the vinyl hose was easy, it only took about 45 minutes. Once the stoppers and nozzles arrived, I took to the task of piecing everything together, which involved sliding both ends of the vinyl tubing over the slightly larger diameter barbed nozzle and stainless wand.
This. Was. HELL.
Blisters, sore hands and shoulders, burnt fingers. I hated every second of it. But I eventually finished, it took 8 hours over 3 nights. I was done, that felt good.
Prior to releasing The Brü Bottler, I figured the 25 units for each faucet type would take me a couple months to sell off, that I’d be able to casually package and ship a few per week without much stress. I couldn’t have been more wrong. Within hours of the announcement, every available unit was spoken for and my inbox was filled with brewers asking when more might be available. What the hell had I gotten myself into?!
With the help of my generous wife, the following two weeks were spent organizing payments, figuring out the best way to address envelopes in bulk, packaging the bottlers, and eventually getting them shipped. The day the last one was dropped off at the post office was glorious, though I continued to be contacted by people curious when I might have more available. That’s when it hit me…
My wife was right.
I’ve neither the time nor interest in maintaining what is essentially a manufacturing gig, it pulled me away from what I enjoy doing, writing about brewing stuff, and made my hands hurt. So, I guess this is a long way of saying: I’m out! I will not be selling The Brü Bottler henceforth.
| Building & Using The Brü Bottler |
Fortunately, building a single bottler isn’t that difficult, and given the apparent interest, I thought I’d give a DIY as well as a walk-through on how to use it.
Acquire The Parts
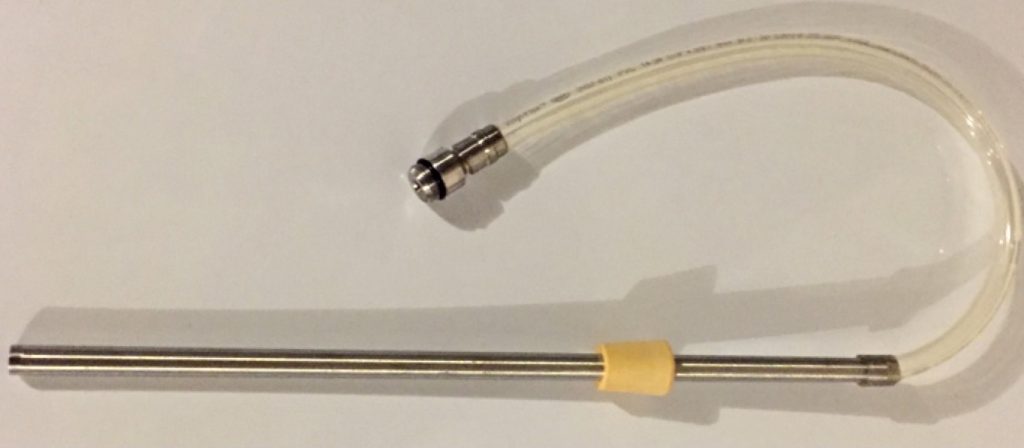
The Brü Bottler consists of essentially 4 parts that can be found online for reasonable prices, and some of which you may already have lying around in your brewery. Here’s a list with linked images to places I found that sell the parts for a decent price.
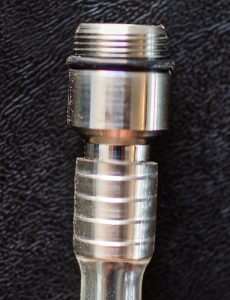
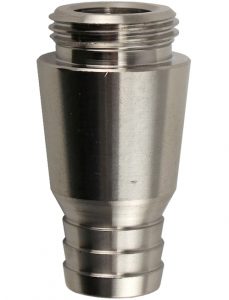
Growler Filler
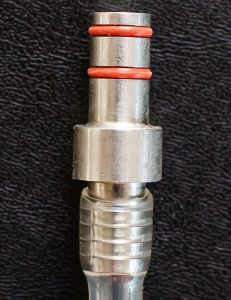
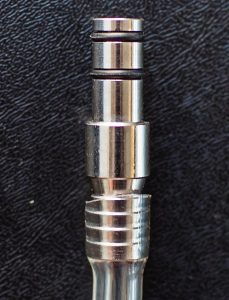
The most popular compatible faucets are made by Perlick, which do not have threaded spouts like the Perlick 400, Vent-Matic, and Intertap options. Because of this, growler filler nozzles come with o-rings that keep the filler snug inside the faucet. Unfortunately, it seems not all faucets of the same type are consistent in terms of the spout’s inner diameter, meaning the nozzles might be either slightly loose or a little tight. I tested various nozzles for Perlick 500 and 600 series faucets, the ones pictured/linked here are those I found worked best.
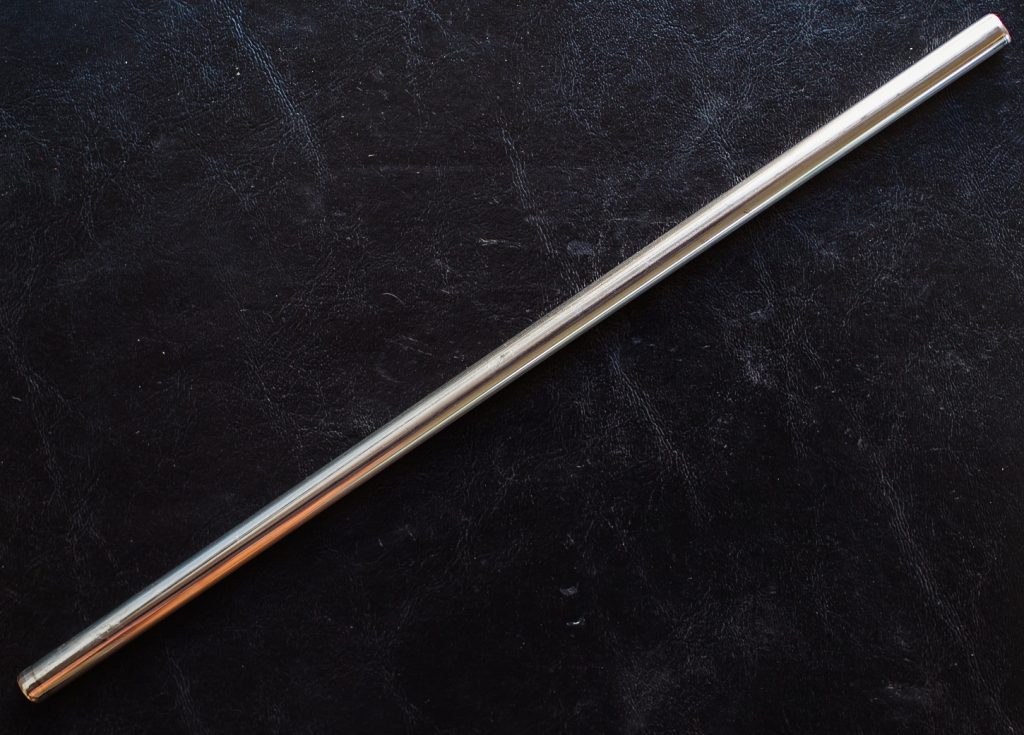
Stainless Wand
After testing out stainless wands of varying outer and inner diameter, I finally settled on 3/8″ OD, because it fits nicely in standard rubber stoppers, and 1/4″ ID, which allows for enough restriction to ensure a clean and smooth flow. If you’re looking to save a couple bucks, the tubing piece of a 3/8″ plastic bottling wand works just as well, though it’s not as durable and more susceptible to scratching.
Vinyl Tubing
For The Brü Bottlers I sold through the site, I went with a 15″ length of 3/8″ OD x 1/4″ ID vinyl tubing, which fit rather tightly over the 3/8″ OD stainless wand. 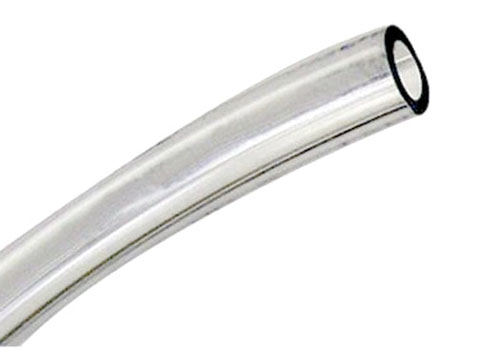 However, I’ve heard from a few folks that they swapped out the tubing for a longer piece in order to allow more options for filling location, such as on top of one’s keezer.
As most brewers know, tubing doesn’t last forever and has a tendency to get pretty nasty even with good cleaning and sanitation practices. Because of this, I recommend buying some in bulk, it’s cheap and makes swapping out tubing-gone-bad really convenient.
Rubber Stopper with Hole
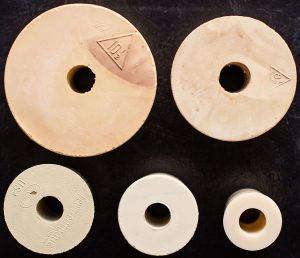 Not every stopper is created equal, so make sure you only use those with a standard 3/8″ airlock hole, as it will fit the stainless wand just right. Depending on what you plan to fill, you may need to get a few different sized stoppers, which is fine because they’re pretty cheap. Most standard beer bottles use a #2 stopper, some glass growlers accept a #6 stopper perfectly while that may be too small for others, and I’ve even used a #10 stopper to fill larger mouthed stainless growlers with ease. As someone who hates not having something when I need it, I’d recommend picking up a bunch of different sized stoppers– #2, #3, #6.5, #8, and a #10.5 ought to have you fairly well covered.
Assemble The Bottler
Assembling a bottler is pretty easy and shouldn’t take longer than a few minutes (putting 75 together sucks). Since the inner diameter of the vinyl tubing is smaller than the outer diameter of both the stainless wand and growler filler, putting them together can be a pain in the ass. To make this easier, I recommend soaking either end of the vinyl in boiling water for 1-2 minutes to soften it up before putting it all together. To ensure a solid seal, I push the vinyl tubing approximately 0.5″ onto the stainless wand and all the way onto the barbed end of the nozzle.
Once both ends are connected, you can run the warm sections of tubing under cold water to stiffen the vinyl and create an airtight seal. Then, all you have to do is slide on the right sized rubber stopper for the vessel you’re filling.
Using The Brü Bottler
Sort of like riding a bike, using The Brü Bottler might take a little getting used to, but once you’ve got it, it’s a cakewalk. What follows is the method I’ve found works best for me, you can riff on it to suit your own needs.
Step 1: Clean and Sanitize
In order to avoid contaminated beer, it’s important to clean and sanitize The Brü Bottler as well as the bottles you will be filling. I recommend first soaking the unit in a good cleaner such as CraftMeister’s Alkaline Brewery Wash followed by a second soak in the sanitizer your choosing, I prefer StarSan. Ready a small bowl of sanitizer for your bottle caps near your bottling area as well, it’ll make capping go smoothly. Finally, adjust the stopper on The Brü Bottler so that the tip is ½” above the bottom of the vessel you’re filling.
Step 2: Prepare Your Bottling Station
As with most bottling processes, using The Brü Bottler often results in some dripping of beer, which can be easily dealt with by placing a towel under your faucets. If you will be bottling alone, I recommend also preparing a clean and sanitized pitcher within which you can place the stainless wand while capping between fills. I tend to prefer filling bottles pulled directly from a bucket of StarSan, but the vessels can also be prepared ahead of time; laying a paper towel dampened in StarSan over the bottle openings can help keep contaminating critters out.
Step 3: Setup The Brü Bottler
Before attaching the nozzle to the faucet, I like to pour myself at least 6 ounces (or a pint) of the beer I’m bottling in order to chill the faucet, which will help to reduce foaming. Next, I attach the bottler to the faucet and open the tap briefly to replace the air in the The Brü Bottler with cold beer.
Step 4: Fill, Cap, Repeat
Then it’s time to start bottling! Place the stainless wand into the vessel and with one hand firmly holding the stopper in place, open your faucet. A few ounces of beer will immediately flow into the vessel then quickly slow down as the back pressure equalizes with the serving pressure. I like to maintain a complete seal until the flow of beer stops and any foam subsides, then I allow the pressure in the vessel to push the stopper out just enough so that I can control the flow by gently pushing the stopper back into the vessel’s opening. Once the bottle or growler is filled all the way to the brim, I close the faucet, remove the bottler from the vessel, let the stainless want dangle in a sanitized pitcher, cap, and repeat. The Brü Bottler is sized such that, if filled to the top, a perfect amount of beer will remain in the vessel once the wand is removed.
For those who wish to keep the mess as contained as possible, filling over a cheap dish pan is an effective solution. Personally, I fill over a plastic table and don’t mind the few seconds it takes to wipe it down with a sanitizer when I’m all done. Whatever floats your boat.
Step 5: Cleaning & Storing The Brü Bottler
When I’m finished filling, I give the bottler another quick soak in cleaner followed by a hot water rinse. I then briefly spin the The Brü Bottler over my head, using centrifugal force to pull most of the water out, after which it gets hung to dry.
That’s really all there is to it. If you have any questions or thoughts on The Brü Bottler, feel free to leave them in the comments section below!
*IMPORTANT* The Brü Bottler DOES NOT WORK on standard chrome faucets! Do not try unless you want to be sprayed in the face with beer.
Support Brülosophy In Style!
Follow Brülosophy on:
FACEBOOK | TWITTER | INSTAGRAM
If you enjoy this stuff and feel compelled to support Brulosophy.com, please check out the Support Us page for details on how you can very easily do so. Thanks!



48 thoughts on “The Brü Bottler: Update + How To Build Your Own”
The one (very messy) time I tried to fill from my faucets I found I needed to turn the pressure down to near zero – what do you do?
Counterpressure is what makes this not messy. Sure, you might get some dripping between bottles, but utilizing counterpressure, I’m able to fill bottles completely to the top with nary a spill.
Where did you get your ss pipe?
http://amzn.to/29AHpnw
I’ve actually assembled one of these based on a video I saw and didn’t realize that they probably got the idea here initially.
Since it’s what I had lying around, I use a plastic bottling wand with the pressure filler tip. This makes it necessary to fill from the bottom always, but it also stops the flow when not filling and you can thus leave the faucet on between bottles. To cap on foam I spritz a bit of beer in the bottle by pressing the tip lightly against the inside of the neck once the bottle is full.
My only complication from this approach is that I’ve had a kind of metallic bite from bottles that sit for a few weeks after filling. Decanting the beer, which I usually do anyway, gets rid of the taste, which I imagine is from CO2 forced into solution. If anyone here has an idea of how to remedy, it would make this approach better for long-term storage.
Does your bottling wand hold the higher (serving) pressure or are you reducing the psi when you fill?
It holds the serving pressure, 10-12 PSI, the benefit being not having to go into the kegerator and fiddle.
Any thoughts about why the metallic bite and how to get rid of it?
I’ve never experience that, I really wouldn’t know what’s causing it or how to fix it. Sorry.
Hi Marshall.
What is your trick to serve beer at 12 PSI without too much foam?
What is the length is your tubing from the keg to the faucet?
Tks!
Mauricio
10′ beer line in a 40F keezer, that’s it!
This might be obvious and I might be missing the point of this exercise, but I have been bottling from kegs for a while now. I use a picnic tap and a plastic bottling wand. The wand fits snugly into the picnic tap faucet. To provide some counter-pressure add a number 2 bottling stopper to the wand. This works really well and is super easy. Do a quick youtube search and you will come across others that are doing this.
This method doesn’t use a regular kegerator faucet which may be the original point of this discussion, but it is much easier and most of us already have this equipment lying around. If you are bottling a good portion of a keg, this seems a much easier and less expensive method.
The brü bottler allows you to fill directly from the faucet, no changing of psi, no fussing with disconnects. It may not be preferred by all, but I like it much better than other bottling methods.
I think my set up is like Bryon’s and it works just like the Brü bottler except using a picnic tap instead of a faucet. So no changing of PSI etc. Plastic bottle fillers fit very tightly in a picnic tap and if you leave the self closing tip in place there is very little dripping. I take it off now because if your not carful you can blow it off and then it’s a mess. BTW a bigger stopper and this works really well for Growlers also.
It really depends on how you are set up though. I just got a freezer and temp controlled it into a fridge. Once everything is chilled and set up for taps a tap to bottle filler would have more appeal. I have been drinking at cellar temp which I rather like, till the summer hence the fridge. So it is very quick and easy to pop on a picnic tap. The other plus is the controls are all at the bottle and the picnic tap is self closing.
One thing you don’t warn about and should probably be mentioned is that during the learning curve you will probably stick the stopper in a bit too hard at some point and then when you go to ease it open it will kind of release all at once and instead of a gentle hiss you will get a spray of beer up your nose (or just on the ceiling if your lucky) so be forewarned and dress for the party after you do the filling.
Did you look at using any of the stainless straws (like they are using in the Yeti cups) instead of the SS pipe?
Thanks Marshall. I just bought an actual kegerator with perlick faucets, so I might try this technique very soon.
Did I miss something or is the bottle not flushed with CO2 before filling?
Some people do that, I have in the past and haven’t noticed any benefit, so I skip that step these days. The bottler doesn’t have a way to flush directly. It would seem to me that bottom-filling to the brim pushes a large majority of the O2 out of the bottle anyway. I’ve had bottles filled with this method sit for months, warm and cold, that never ended up with oxidation character.
Filling slowly displaces the air, sure, but the O2 will react and oxidization will occur. Does it matter? Can people tell? I’d love to test it.
Of course. What I’m saying is that I don’t think purging with CO2 ahead of time removes as much O2 as some people think, so a similar level of oxidation is likely to occur.
The beer may be replacing the oxygen but the foam-oxygen interaction during the fill means capping on oxygen enriched foam. A classic beer spoiler. Any enlightened packaging brewery in your area should have a DO meter or you could just force age a bottle and sensory compare.
Tasty,
I am in talks with a local brewery now for a similar topic and use of their DO equipment.
Just wanted to say thanks for putting these together. I used mine for the first time last week and it worked great. I figured I’d leave one bottle unopened for 2 weeks and another for a month and see how well the carbonation holds.
Have you found that you are using up your CO2 faster this way?
Not at all. It’s not like I’m bottling all that often, maybe 5 or 6 times per month is all.
Don’t you hate it when your wife’s right?
Given how common she is right, I’ve not only gotten used to it but have sort of come to appreciate it 🙂
How long will the beer maintain the original carbonation level?
I have beers aging that I bottled 3 years ago using this method, they are still perfectly carbonated.
I’ve still got my “pre-production” model from last November, and I’ve probably used it to fill 100 or so bottles and growlers of different sizes since then. By Best of Show hoppy sour beer was filled with it and sat for about 6 weeks or so in unknown conditions prior to the judging date. The most I’ve done in one sitting was about a case of 12 oz bottles and 2 – 32 oz growlers, across 6 different taps, with zero problem.
I tend to just use vinyl tubing (1/8th I believe) cut an an angel at the bottom. Since They fit perfectly into cobra taps, I also hooked up one cobra tap directly to my c02 tank.
After sanitizing my bottles and my tubing, I first hook it up to c02 and purge the bottles of O2, and then fill them with beer.
Its worked great so far, and I haven’t had any issues with competitions I’ve used it for, and its cheap to keep clean (just throw away the tubing after a few uses and replace it with fresh stock).
What is your preferred source for the stainless steel wands?
Amazon. Any 3/8″ OD ought to work fine
Thanks for the tutorial. Wished I’d done something like this before buying a beer gun. I do have one question though. Is the vinyl tubing just for spare or are you removing the tubing from the growler filler and adding a longer piece? Sorry if I overlooked this in the post.
I bought fillers without the tubing, so it’s all new. Whatever comes with some of them might work.
I built my bru bottler this weekend and I have to say I think my last straw will be going up for sale. One challenge is operating the faucet while holding the adapter in. It’s doable but a bit awkward. Have you found a good way to keep the non-screw in adapters (like the 600) in?
Honestly, wait until winter, it’ll probably hold itself.
Where did you get the stainless tubing?
Amazon: http://amzn.to/2fJGPa1
I am fed up with the time it takes to assemble and clean my beer gun. Takes far far too long. I am going to make one of these asap. Thanks for the great info.
Do you purge your bottles before filling them or just go right to filling? I also see a lot of people drill a tiny hole in the stopper to let some pressure out. I see yours doesn’t — curious — why did you decide on not .
Why doesn’t this work with standard chrome faucets?
Because those standard faucets have a small hole that relieves pressure… or a stream of beer when the faucets is blocked 😕
Thanks, Marshall! As always, a sensible and inexpensive solution that works beautifully.
Just to add a little more data to the pool: I ordered the Perlick 500 series growler filler (using your link, of course), which employed the Krome Dispense adapter (C719) attached to 12″ of Bevflex PVC tubing (5/16″ ID x 9/16″ OD). The adapter fit easily (but snug) into my Perlick 525 taps, and it took little to no effort to fit the SS wand into the 5/16″ ID tubing. About a 60 second assembly (actually getting the rubber stopper on the SS wand was the hardest part). I just filled a few bottles at serving pressure (12 PSI) and did not observe any leaks. Works perfectly, thanks!
Hey Marshall, how in the world do you manage to insert a 1/2” OD growler filler (Intertap) into a 1/4” ID tubing? Is there some voodoo involved? I used boiling water and a pair of long-nose pliers, but after half an hour, I’m nowhere near success. Cheers!
Blisters. It was painful.
Cooper okay for the wand? Can’t find stainless anywhere
Copper** or pvc?