Author: Marshall Schott
The first beers I made were fermented with liquid yeast, my process looking something like this:
1. Take yeast out of fridge a few hours before brewing
2. Once wort was chilled to about 75°F, open vial and pitch
3. Place fermentor in closet and hope the airlock is bubbling the next day
While those first few beers were nothing spectacular, they still came out pretty damn good, at least to the point I never dumped a batch. It wasn’t until I really got serious about brewing at home that I even heard of yeast starters, which I initially viewed as being more work than it was worth. After a couple batches that just didn’t come out the way I planned, I figured one of the more simple things I could try was making a starter.
I’ve never looked back.
I fairly regularly field questions about whether making a starter is really all that necessary. My honest response is always the same: no. The truth is, you can make a perfectly good beer by pitching a single vial or pack of liquid yeast into wort. In fact, I recently heard from a dude who said he took 1st place in category with a beer he didn’t use a starter on, which is fucking great! And I’m certain he’s not the only one with a similar story. So what’s the point? Why invest the time and money making yeast starters when it is obviously possible to make a delicious beer without one?
Now, I’m no microbiologist. Not even close. I could pretend to know more than I do about budding and conjugation (thanks Wikipedia), but the simple fact of the matter is I’m hugely ignorant when it comes to these issues. What I do know is that I love, in an almost lustful sort of way, what yeast does for beer. I’m fascinated by the amazing plethora of flavors different types of yeast can create and how it acts differently depending on the environment. After hundreds of batches, fermentation still seems like magic to me. I abide by the doctrine that brewers make wort, yeast make beer.
While starters may not be necessary, they absolutely serve a function. I’m not sure new brewers ought to stress too much about this part of the process, at least in the beginning, though the investment is fairly minimal for what I believe to be a good payoff. Below are some of my main reasons for making yeast starters:
– Visibly observing yeast activity in a starter provides me with assurance the yeast is viable and ready to go to work turning wort into beer.
– While in the starter, yeast go through a growth phase, meaning there are significantly more cells being pitched into my wort, leading to decreased lag and a quicker fermentation with less chance of off-flavor development.
– Pitching a starter has significantly increased the consistency of my brewing, making it much easier for me to replicate a batch.
– Free yeast for future use! How would I harvest clean yeast if I didn’t have a starter to steal it from?
I’m sure with a very little searching, numerous other reasons for making a starter can be found, along with much more scientific sounding explanations why one should make them. My point is this: in my brewing, making starters seems to have had one of the biggest impacts on the quality and consistency of the beer I make.
How I Make Yeast Starters
I see a lot of starter how-tos that differ from my process in various ways. With my penchant for simplification, I’ve settled on a method that seems to require a little less effort and has worked well over the years. The first step is determining the proper starter size, which is a function of the OG of your wort, batch size, and yeast age. Yeast Calculator is my calculator of choice. All you have to do is plug in the aforementioned details, select a “method of aeration,” and it’ll spit out the details. Easy-peezy. Just remember to a make a larger starter if you plan to harvest yeast for future use!
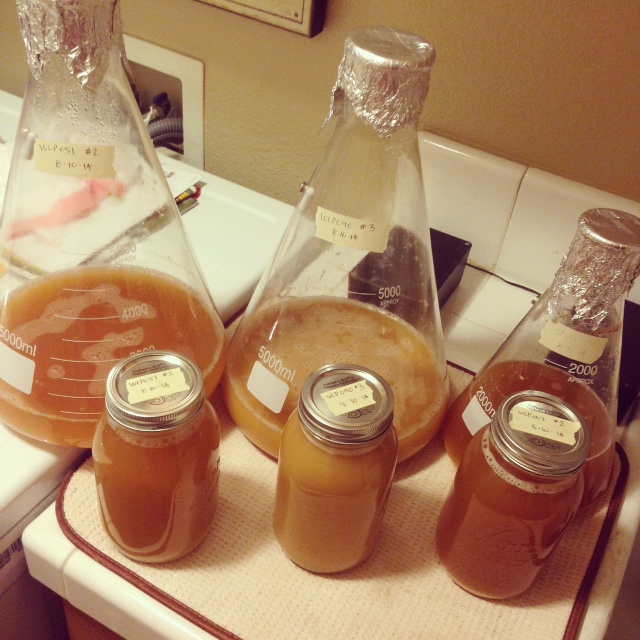
Yeast starters require little in the way of equipment, of which there are many options. I personally prefer using 5 liter Erlenmeyer flasks for myriad reasons, such as the ability to make larger starters for lager beers and larger batch sizes. I also have a 2 L flask that I occasionally use for smaller batches of beer. I’m a huge fan of StirStarter stir plates due to their very affordable price-point, durability, and lifetime warranty (they make a new larger model now as well). While not really a piece of equipment, FermCap-S (anti-boilover agent) is an absolutely necessary part of my yeast starter kit that has saved me from more volcanic eruptions (and clean-ups) than I can count. That’s about it. For those who aren’t ready to invest in a fancy flask and stir plate, a clean and sanitized growler shaken every time you walk by will get you by, as well. If you’re good with electronics and have the desire, you might also consider building your own stir plate.
Step 1: Weigh out DME and add it to your clean flask (a funnel helps)

Step 2: Add hot tap water from the faucet (if good quality, otherwise use cold), swirling the flask at first to fully incorporate the DME

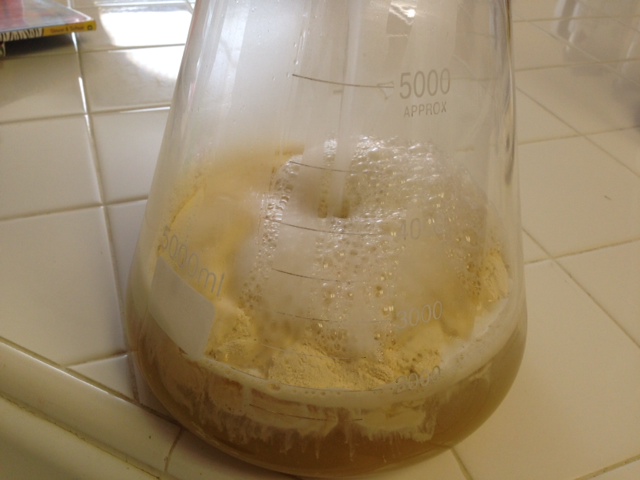
Step 3: Once proper amount of water is added (I usually go a hair over my target to account for boiloff), swirl a bit more to make sure there is no DME stuck to the bottom of the flask, then add a couple drops of FermCap-S

Step 4: Place flask on stove, turn burner to high

Step 5: Watch the flask and turn burner down to low-med once bubbles start rising from the bottom of the flask.
Step 6: Once wort is boiling, set timer for 10 minutes… and watch for potential eruptions! A quick blow down the shaft of the flask will kill any large bubbles that may form.
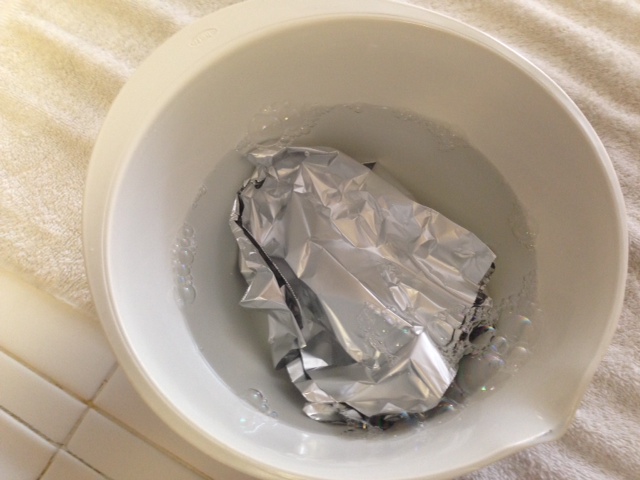
Step 7: While wort is boiling, make a small bowl of sanitizer solution for the foil and stir bar

Step 8: When the timer goes off, carefully move the flask (OveGloves are a godsend) to a sink with the stopper in place, drop sanitized stir bar in, cover top with sanitized foil, then surround it with ice and cold water.

Step 9: Once wort is chilled to about 70°F, pitch room temperature yeast, set the flask on the stir plate, and get things spinning.

Step 10: About 36 hours later, and after stealing some yeast for future use, I usually move the flask to the fridge to crash overnight so I can decant the beer off before pitching. Don’t forget to attach the stir bar to the side of the flask with a strong magnet before crashing.

In the end, starters may not be totally necessary for beer production, though I think most experienced homebrewers would agree that it is one of the easiest ways to improve beer quality and consistency. If you’re looking to step up your game, I strongly encourage you to consider making a starter for your next brew.
Cheers!
ATTENTION: There is some concern Erlenmeyer flasks run the risk of shattering if placed directly on stove-top burners, particularly electric coils. If you share this concern or have small children around, you might consider boiling your wort in a pot before adding it to your sanitized flask.
Support Brülosophy In Style!
All designs are available in various colors and sizes on Amazon!
Follow Brülosophy on:
FACEBOOK | TWITTER | INSTAGRAM
| Read More |
18 Ideas to Help Simplify Your Brew Day
7 Considerations for Making Better Homebrew
List of completed exBEERiments
How-to: Harvest yeast from starters
How-to: Make a lager in less than a month
| Good Deals |
Brand New 5 gallon ball lock kegs discounted to $75 at Adventures in Homebrewing
ThermoWorks Super-Fast Pocket Thermometer On Sale for $19 – $10 discount
Sale and Clearance Items at MoreBeer.com
If you enjoy this stuff and feel compelled to support Brulosophy.com, please check out the Support Us page for details on how you can very easily do so. Thanks!


35 thoughts on “Yeast Starters: Some Thoughts & A Method”
Another great post. I follow the same process with a couple of exceptions:
1) I throw my stir bar in while boiling the starter wort to further reduce the risk of infection. I figure if the stir bar can handle the autoclave, then a boil won’t hurt (I haven’t noticed any ill effects so far).
2) After turning off the heat, I allow the liquid to stop boiling before transferring to the water bath. Once the water warms up from the initial heat transfer, I’ll drain and refill the sink and then add ice. I have found that if I add ice too early, it melts away too soon. In addition, I figure waiting to add ice offers a lower risk of shattering the flask since the temperature difference isn’t as great.
Keep up the great work!
Great tips! The main reason I don’t add the bar to the boiling wort is I fear it may create a nucleation point for super-heated wort and eventually explode in my face, leaving me looking like someone threw a personal-pizza at me… blrughh
You’re right–I definitely notice more boiling activity around the stir bar.
Wouldn’t having a nucleation point in the liquid during the boil prevent the wort from super-heating to begin with? That’s why they recommend putting a wooden skewer in the water when using a microwave to boil.
I cannot verify, but I have heard from a few different places that flasks will shatter much more readily on glass-top or electric coil type stoves than gas burners. I was just thinking that using a water bath to distribute the heat would reduce such risks. You could perhaps use a large 1 gal pot, fill it a ways with water, put the flask inside of this, then set the whole thing on the stove to boil. Also, heat resistant glass like Pyrex is a must!
– Dennis, Life Fermented Blog
I’ve always wondered this and just avoided it if I could. I have a gas grill with a side burner so I just use that for my yeast starters. It works pretty well, although I can’t get it low enough to not have a vigorous boil. I usually put it half way in the flame to compensate.
Any suggestions on which calculation to use when using a stir plate? I’ve found the difference between the two can be as much as 100 billion cells in certain situations.
I’ve been using Kai’s equation and it seems to work great!
Duh! How did I not think of this? Great tip, thanks!
Can we get a link to this?
A link to what?
@Paul: I think this is what you’re looking for – http://braukaiser.com/blog/blog/2012/11/03/estimating-yeast-growth/
I do almost exactly what you do with the exact same changes as somekindofnick. One additional thing I do that neither of you mentioned is that on the morning of my brew day after I decant my starter I replace the sanitized foil and put it back on the stir plate. This helps to break up the yeast cake, get it up to room temperature, give it a nice boost of O2, and make the yeast and remaining liquid very homogeneous which really helps when trying to split the yeast evenly between two carboys. When I’m ready to pitch the yeast into my measurement vessel I usually just put the keeper magnet on the upper side of the flask and take the stir stick out after it’s empty.
How do you steal some yeast for future use? Can you explain your process for this or point me in the right direction? Thanks for all the tips!
I thought I linked to it (it’s also up at the top), but here it is either way: Harvesting Yeast from Starters
Any recommendation on a specific brand/model for a good quality Erlenmeyer flask (5L)? Right now I boil in a small pot and transfer to a 1gal glass jug for the stir plate. Works fine but I wouldn’t mind simplifying it even further. I’ll admit, though, that I’m a little leary about a flask either cracking during the heat/boil (I have a gas stove) or when it gets plunged in the water bath. Seems like an item where quality could vary a fair amount. Any thoughts are appreciated. Thanks.
I’ve been using 2 of THESE FLASKS from MoreBeer, one of them for nearly 3 years and probably right around 100 starters, and have yet to experience a single issue. I believe a proper Erlenmeyer flask is made of Pyrex, which isn’t nearly as susceptible to breakage with drastic temp changes.
Sorry dude…I just saw you linked that above. My bad. Thanks for the heads up.
Great post. Just a couple of questions for you. 1. I’ve been torn on upgrading from 2L to 5L flasks. Did you have to adjust your stir plate to accommodate the larger flask? 2. Do you need a larger stir bar for the bigger flask? My plate won’t work with larger stir bars.
I sometimes underpitch a single vial with no starter intentionally. On occasion, particularly I’ve used this in wheats and belgians, stressing the yeast like that in my opinion can cause some more of those yeasty byproducts that I’m looking for in a particular batch.
Hey Dan! I’ve been using the same stir plates for my 5L flasks and they work fine. The stir bar is 1″ and works great, I tried a higher one and it kept flying off.
How does the stirplate handle the 5000ml flask? I’ve read that the stirplate is rated up to 2000ml. Do you add anything extra to prevent wobbling?
It’s always worked fine, though there is a very slight wobble, but I’ve never had a spill. You could always get the larger stir plate to allay any worries 🙂
I’m finally looking into making yeast starters so that I can finally start using liquid yeast instead of dry. I’ve found several sources saying that aerating yeast starters is very important and that this is more crucial than using a stir plate. I notice that you don’t aerate (with pure oxygen/air through aquarium pump/shaking) the starter wort before pitching the yeast. Would you say that from your experience this step would be unnecessary? Thanks.
Since my beers come out pretty good, as do many folks who just use a stir plate, I’d say that constant aeration is unnecessary. Unhelpful? I’ve never tried, so I don’t really know.
Thanks, but hot tap water will have some realy nasty fine particulate contaminants.
My pleasure! My hot water doesn’t 🙂
Do you have a post on how you wash your yeast for re-use?
I don’t rinse (wash) yeast for reuse, I usually overbuild starters and harvest from that. If I want to use yeast from the bottom of a carboy, I just pull off about a pint of slurry and pitch that in the next batch, no rinsing necessary 🙂
Most stir bars can be boiled, so I put mine in at the beginning. I also add about half the water to the flask first, then add the DME while using the stirplate on high to get it all mixed up. Top off the water, and then onto the stove for 10-15 minutes.
Very nice instructions! One comment though (from someone with some microbiology background), the foil caps look very thigh. Once growth picks up in the flask the volume above the liquid will be filled with heavy CO2 and the yeast will be oxygen starved, producing alcohol and wasting precious carbon that instead could have been used to build biomass.
If the target is to get maximum cell growth adequate respiration is essential and the foil caps should be replaced with loose fitting caps or gauze fabric tied over the mouth of the flask. This is how cell cultures are grown in laboratories. You don’t need to worry overly much about contamination, the air flow will be out of the flask, not into it, meaning any spores are unlikely tho find their way into the culture.
Cheers
Anders
I boil my stir bar, no problems. Because the stir bar is already in there, I also put the flask on the stirplate pre-heat to mix everything up before I go to boil it. Works much better than shaking the flask by hand.
Quick tip for your stir bars: Make sure you have at least 2, and store them together. Stir bars can lose their magnetism, but storing them together allows them to maintain their magnetic fields.
Newer bars with Neodymium magnets in them won’t have this problem, but others are susceptible to losing their magnetism over time, or from simple things like boiling or dropping on concrete. Snap them to another couple of bars, and they’ll return to life.
Great post, as usual!!
I was wondering if replacing DME by cane sugar would be OK, it’s a lot cheaper here in Brazil!!
Great post! Based on this, I’ve been overbuilding my liquid yeasts like this for a while now.
One optimization I do is instead of chilling your starter wort in a sink ice-bath, simply place a wide (non-magnetic) bowl on the stir-plate, add the flask, and then a small amount of ice to the bowl.
then just turn on your stir-plate and your flask will chill super quickly because of the circulating wort.