Author: Marshall Schott
In his ubiquitous manuscript, How to Brew, John Palmer states:
“It is a good idea to remove the hot break (or the break in general) from the wort before fermenting. The hot break consists of various proteins and fatty acids which can cause off-flavors, although a moderate amount of hot break can go unnoticed in most beers.” (Ch. 9, Sec. 1)
Despite stating that “moderate” amounts of break material can go unnoticed, the primary point of this statement appears to be that hot break in the fermentor is generally not a good thing. Many homebrewers go to great lengths to separate this gooey gunk from their wort with concerns of imparting undesired off-flavors, developing a stuck fermentation, or ending up with a hazy beer.
Then there are those those few rogue (lazy) brewers who couldn’t give two shits about kettle trub making it into their fermentors, claiming their beers attenuate just as well, taste just as good, and end up just as bright as beers fermented without trub. These folks annoy some of us, what with their flippant remarks about how we’re working too hard for something that has minimal, if any, impact on the finished beer and only results in the unnecessary expenditure of time, effort, and money…
Okay, I’m sort of one of these guys. It’s not that I’m against geeking out on equipment, I just appreciate simplifying the process while maintaining a high quality finished product. For more cynical folks like me, claims that kettle trub making it to the fermentor leads to lower quality beer are suspect, particularly when those claims aren’t necessarily backed up by any real-world evidence (that I’ve been able to find). As such, we’re left wondering: does it even matter?
In one study, researchers measured the impact of kettle trub on levels of isoamyl acetate (banana) and ethyl acetate (nail polish remover), splitting the same wort into 3 fermentors with the following trub volumes:
Low trub: .13 mg/ml
Moderate trub: 1.7 mg/ml
High trub: 15.9 mg/ml
To put this in a more understandable context, let’s consider what this would look like for a typical 5 gallon batch of beer:
Low trub: 0.1 oz (essentially nothing)
Moderate trub: 1.13 oz (probably close to what homebrewers who care can achieve)
High trub: 10.56 oz (quite a bit)
They found the wort with the most trub produced a beer with significantly lower levels of the aforementioned ester compounds. Huh?! We’re talking 106 times more trub than the beer in the low trub condition, equivalent to nearly 3/4 lb of kettle sludge in a 5 gallon batch. With all of my skepticism, not even I expected this. Fascinating.
Still, this is only a tiny slice of a huge pie and many questions remain: does kettle trub have an impact on clarity, flavor, or head retention? How do differing levels compare in regards to fermentation lag, vigor, and completion time? Do I really need to worry about this shit? These are the questions I aimed to at least attempt to provide some answers to in this exBEERiment.
| PURPOSE |
To compare the impact different amounts of kettle trub have on myriad aspects of 2 beers made from the same wort and fermented with the same yeast.
| METHOD |
I brewed a 10 gallon batch of Cream Ale on May 4, 2014 that would be fermented with Danstar Nottingham ale yeast, so no starter was prepared ahead of time.
Summer Cream Ale
Recipe Details
| Batch Size | Boil Time | IBU | SRM | Est. OG | Est. FG | ABV |
|---|---|---|---|---|---|---|
| 11 gal | 60 min | 15.8 IBUs | 3.9 SRM | 1.046 | 1.010 | 4.7 % |
| Actuals | 1.046 | 1.009 | 4.8 % | |||
Fermentables
| Name | Amount | % |
|---|---|---|
| Pale Malt (2 Row) US | 13.5 lbs | 72.97 |
| Corn, Flaked | 4 lbs | 21.62 |
| Acid Malt | 8 oz | 2.7 |
| Honey Malt | 8 oz | 2.7 |
Hops
| Name | Amount | Time | Use | Form | Alpha % |
|---|---|---|---|---|---|
| Summer | 14 g | 60 min | First Wort | Pellet | 5.5 |
| Summer | 99 g | 20 min | Aroma | Pellet | 5.5 |
Yeast
| Name | Lab | Attenuation | Temperature |
|---|---|---|---|
| Nottingham (-) | Danstar | 75% | 57°F - 70°F |
Download
| Download this recipe's BeerXML file |
I mashed at 150°F/66˚C for an hour, collected the wort, and started the boil as usual.
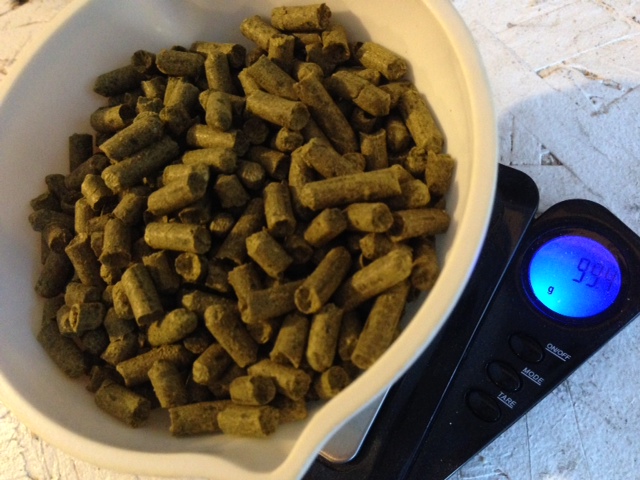
My decision to use 100% Australian Summer hops had mostly to do with the fact I had purchased 4 ounces a few months prior and thought “light melon and apricot” would compliment this style well, as non-traditional as it may be. While designing the beer, I figured it would also be cool to forgo all boil additions, settling on doing only FWH and flameout additions, the latter of which amounted to nearly 3.5 ounces.
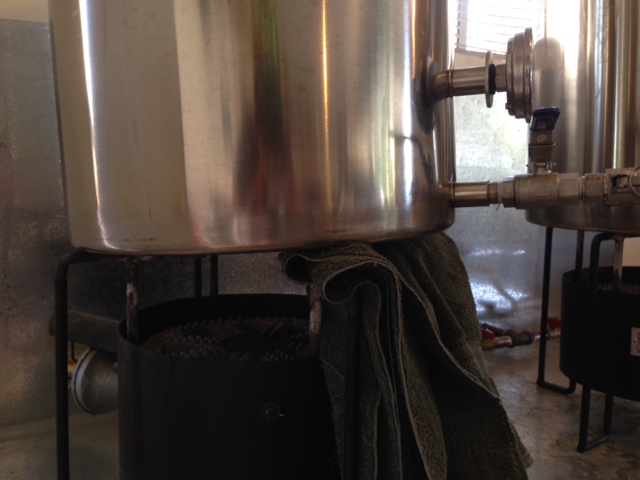
Once the boil was complete and the wort was chilled to 72°F (my groundwater is warm this time of year), the first carboy was filled halfway with excessive amounts of kettle trub intentionally added; a long spoon was used to coax trub from the bottom of the kettle out of the ball valve. I then covered the kettle and let it sit for about 15 minutes to allow the break material and hop matter to settle out, propping the front end up with a towel so that it settled on the opposite side of the valve.
I gently opened the valve to clear any leftover trub then transferred 5.25 gallons of very clear wort to the second carboy, Non-Truby. I finally finished filling Truby, making sure to transfer as much kettle trub as possible. I’ve never left such clear wort in my kettle before.
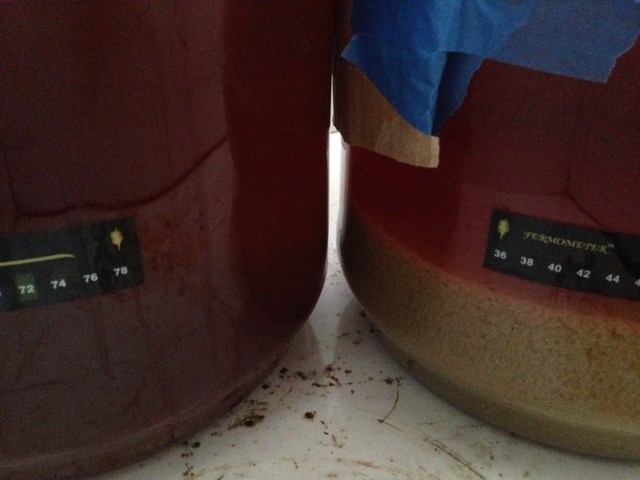
Both carboys were placed in the fermentation freezer and allowed to chill to my target pitching temp of 62°F/17˚C. The difference was pretty remarkable after only an hour in the cool chamber.
It took about 4 hours for the wort in each carboy to reach pitching temp, at which point the trub had compacted into a more solid mass. As hard as I tried to keep the trub out of Non-Truby, there remained a small amount of material that settled out, still significantly less than what was sitting at the bottom of Truby.
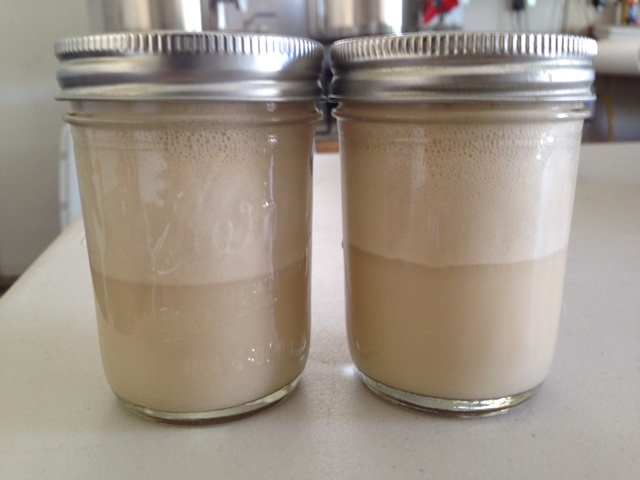
I rehydrated 1 sachet per carboy of Danstar Nottingham yeast in about 250 mL of 90°F water, allowing it to proof for 20 minutes. It was 68°F/20˚C by pitching time.
I’ve never actually used this yeast, I tend to stick to liquid varieties, but I’d heard it works really well at cooler temperatures and I’m always game for trying something new. Moreover, since each sachet had the same date on it, I figured this would potentially increase the equality between each batch in terms of pitch rate compared to trying to split a starter from a single vial of yeast. Not much was happening 12 hours post-pitch, I understand dry yeast tends to lag a bit longer than liquid, even when rehydrated.
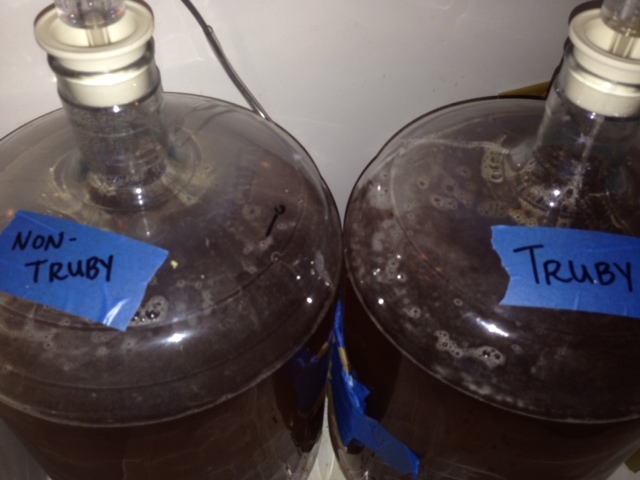
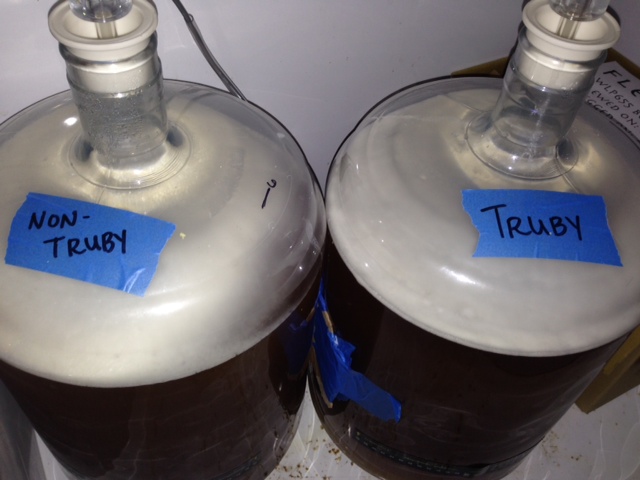
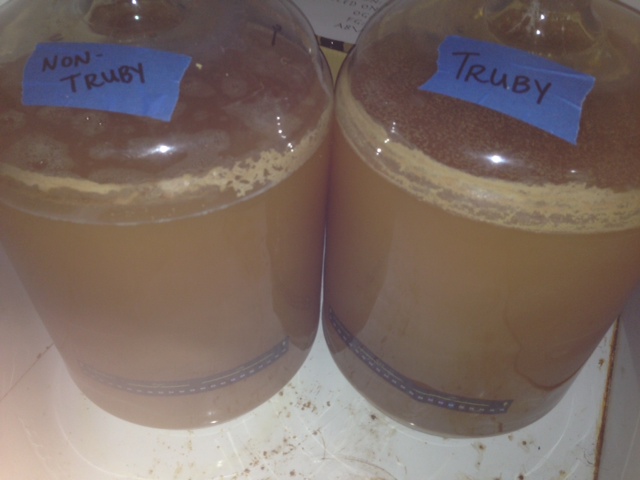
Just a few hours later, 18 since pitch, both beers were waking up.
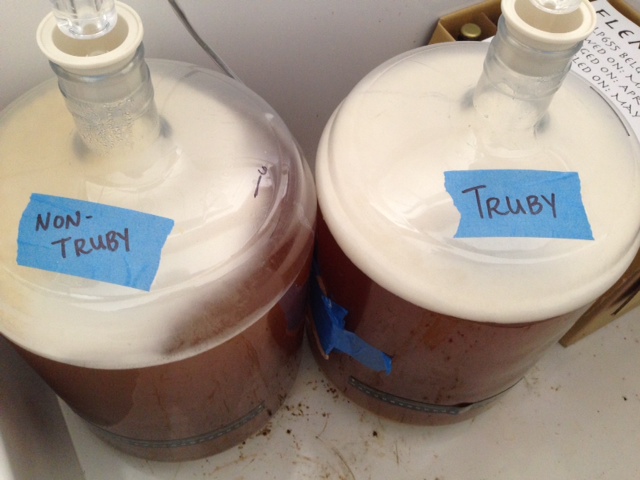
One thing I noticed was Non-Truby had slightly less krausen development (look toward the right side) while Truby was completely covered.
The difference was very slight and both beers were ripping along nicely by 36 hours post-pitch.
A few hours went by where both airlocks were blurping at the same exact rate, as if they had been purposefully synchronized. I felt like I’d seen a shooting star. Anyway…
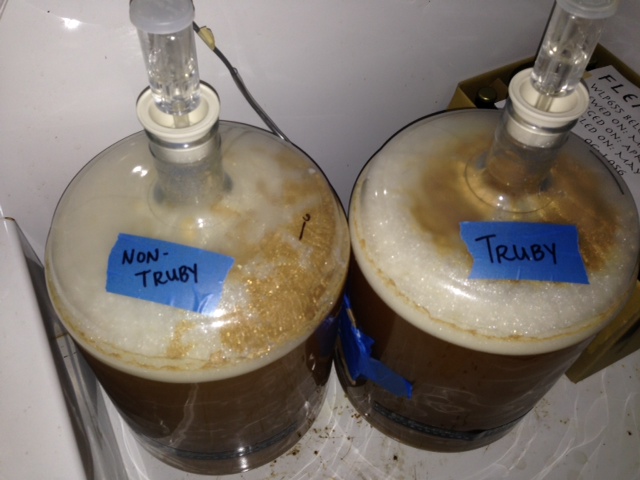
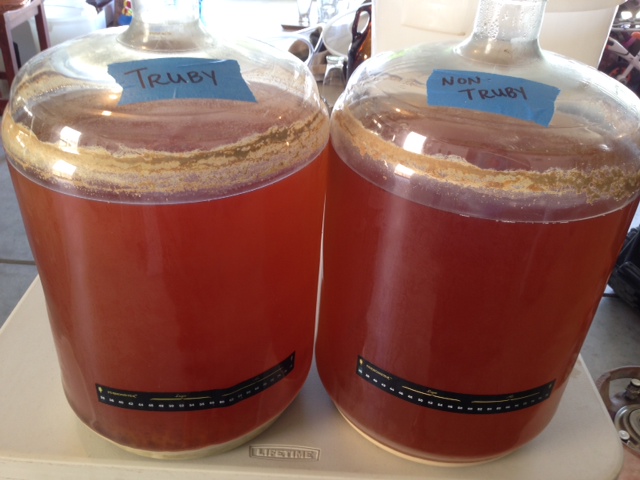
After 3 days fermenting at 62°F/17˚C, both beers were showing signs of reduced activity, so I bumped the ambient temperature of the chamber up to 70°F/21˚C to ensure complete attenuation. The beers were sitting at 67°F/19˚C the next evening and the krausen had dropped on both.
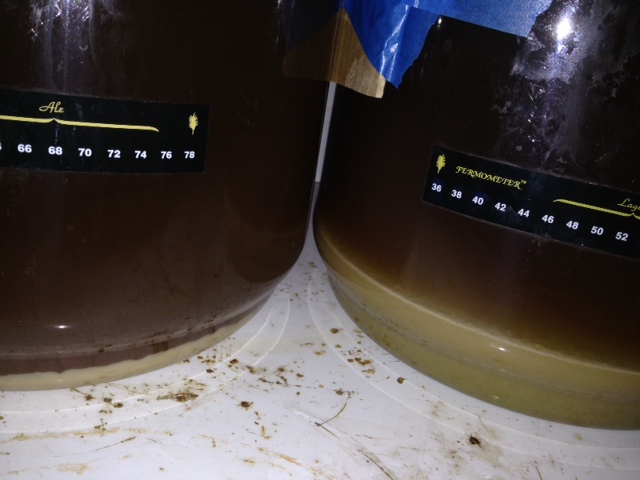
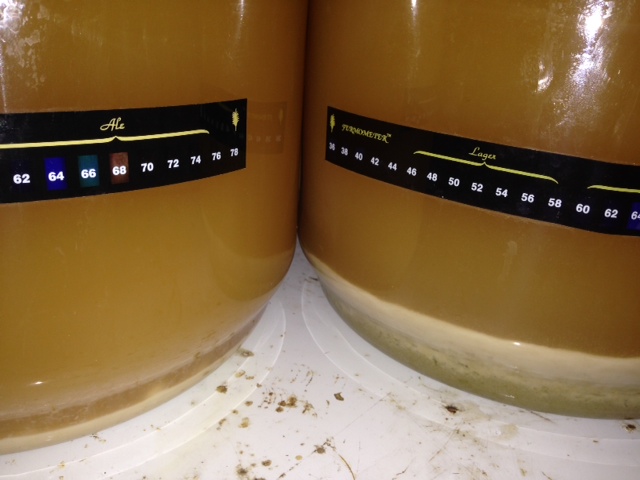
The difference in material at the bottom of each beer was pretty drastic.
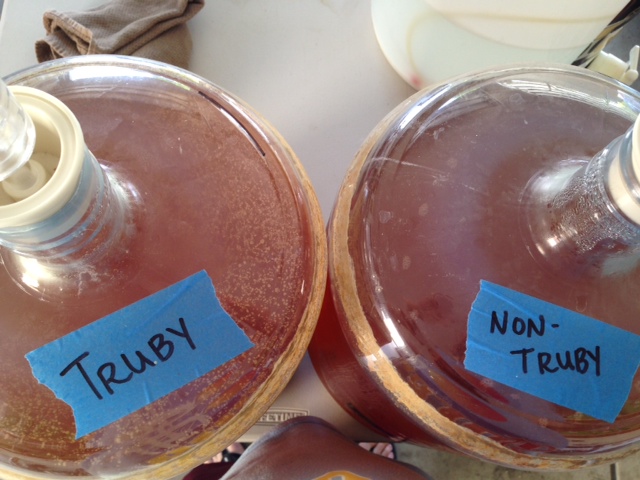
If you look closely in the photo above, you’ll notice 2 fairly distinct layers in the carboy to the right. I’ve always assumed the yeast covering the greenish bottom layer of trub would limit any flavor or aroma impact it might have on the finished beer, I’m curious how true this is. Another very subtle difference was noticed on closer inspection of the top of each beer, with Truby appearing to have slightly more particulate matter floating around.
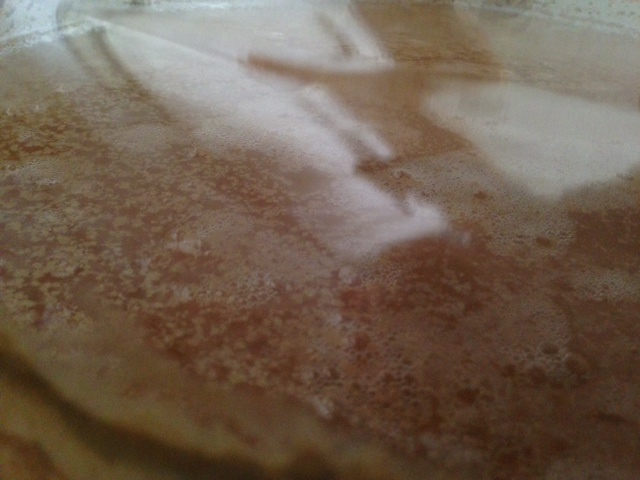
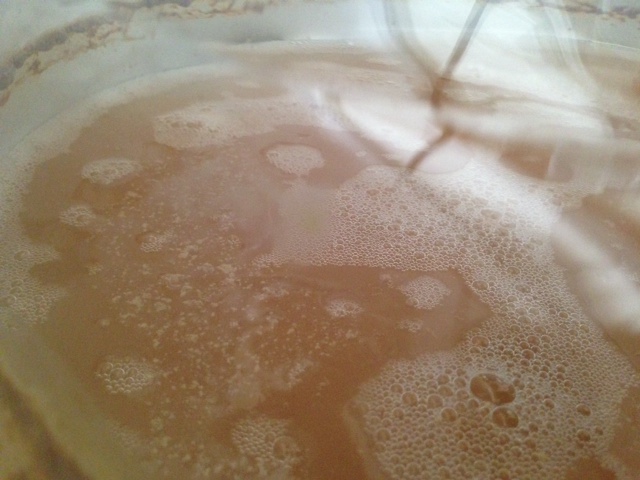
By the following morning, the beers were closer to 70°F and looked similar to the night before. The airlocks on each were totally inactive.
I tested the FG of both beers 5 and 8 days after pitching.
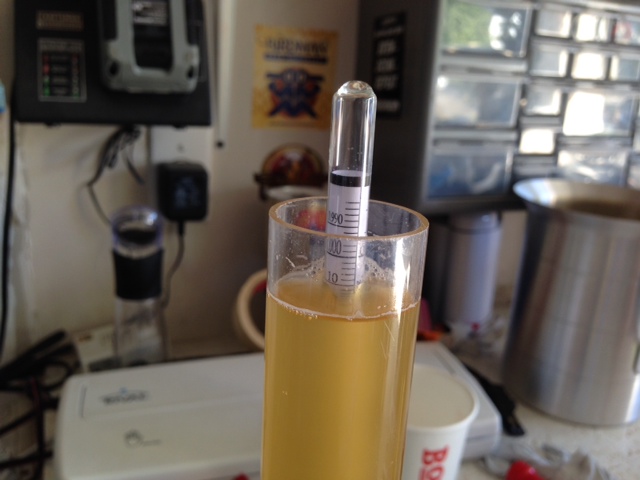
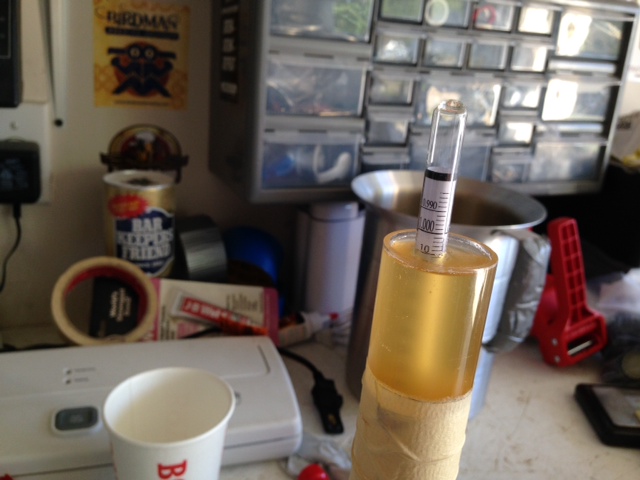
On both occasions, the beers read the same (precise photos of hydrometers are tough to take). I tasted each and detected no diacetyl, so I dropped the ambient temp in the chamber to 30°F/-1˚C to cold crash.
I was interested to find exactly zero difference in clarity between Truby and Non-Truby. In fact, they looked, smelled, and tasted the same to me. The Australian Summer hops were coming through with definite hints of apricot and sweet melon. By the evening of the 11th day since pitch, both beers were sitting right at 32°F/0˚C and dropping clear.
The only real difference seemed to be in the amount of stuff sitting atop each beer.
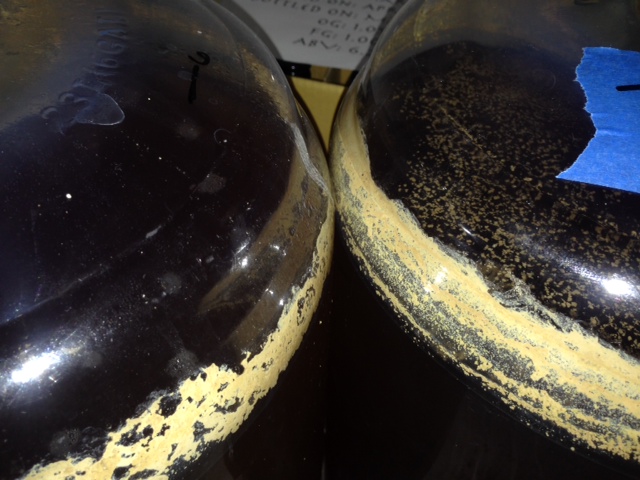
Kegging commenced on the 13th day after the beers were made. Both beers were removed from my fermentation chamber and left to settle for a few minutes.
Some slight differences between the beers became more evident in this brighter environment.
The trub at the bottom of Truby was obviously thicker than the creamy cake at the bottom of Non-Truby.
The stratification again suggests the hop matter and hot break from the kettle settled before the yeast.
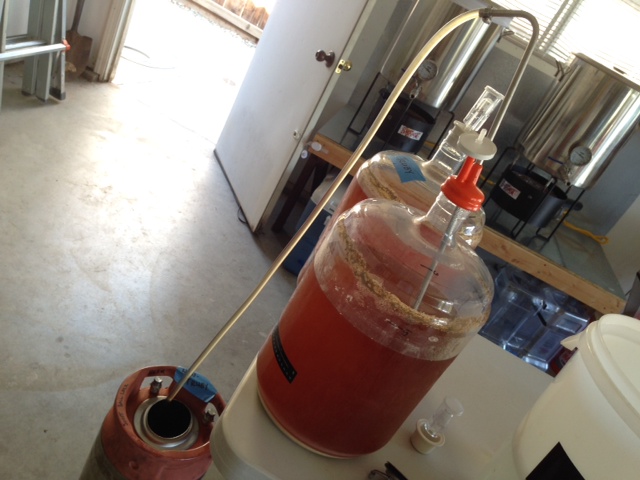
As had been the case for days prior, the top of Truby had noticeably more particulate floating on the top, while Non-Truby had almost none. I was developing some expectations as to how the finished beers might look at this point. The beers were kegged using one of my favorite homebrewing tools, the sterile siphon starter.
The yeast cakes in each carboy looked very different once the beer was removed.
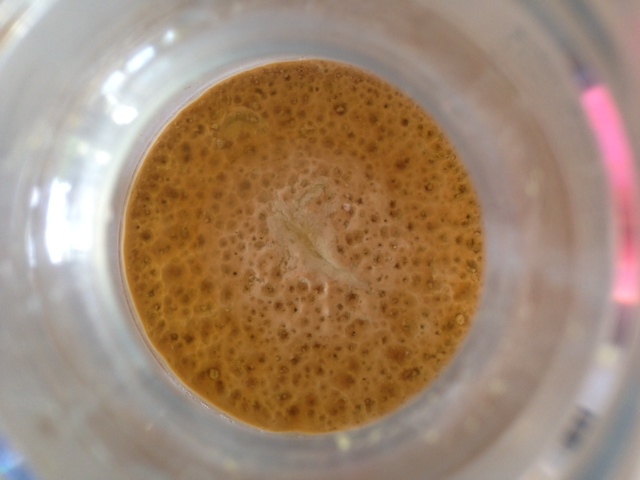
The leftover trub in Truby resembled something like a neuronal network of sorts, while Non-Truby was much smoother with interesting bubble-like formations. The swipes on each cake occurred post-racking during the removal of the siphon; I was sure not to transfer any muck from either batch to the kegs.

I stole a sample of each beer before kegging to see if there were any differences when experienced from a smaller glass.
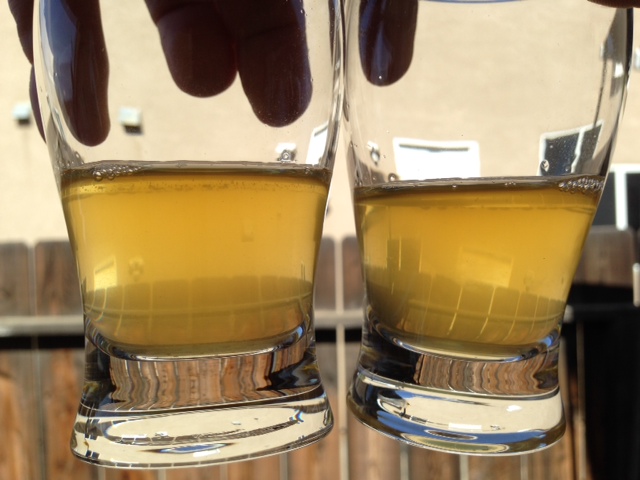
Both seemed to be dropping bright at a relatively similar rate, though I did perceive some subtle differences in clarity.
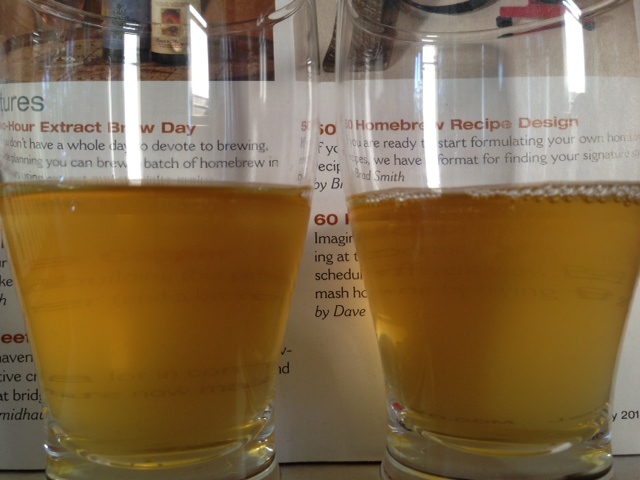
Both beers were put on 30 psi of CO2 for 36 hours, purged, then reduced to 12 psi. This is where they sat for a week while I spent a week camping at the river with family and friends, a time in which I shamelessly admit to swilling massive amounts of Heineken and Bud Light.
My wife sure has a knack for taking pretty pictures of our adorable kiddos.
I returned to two perfectly carbonated Cream Ales that had been allowed 9 days in the 38°F keezer to drop clear. A good friend and fellow camper, Ryan, was the first to taste and evaluate the beers, another friend dropped by the following day to do the same, then I finally took a couple bombers with me to the House of Pendragon taproom to share with a panel of tasters.
I feel compelled to say something here about the survey process and all that jazz. These exBEERiments were never intended to be super scientific in nature, I simply don’t have the resources, knowledge, or desire to design and perform actual experiments. While I made every effort to reduce potential bias by tasters, I absolutely understand this may have been done better. I promise to continually work toward improving the way I survey my exBEERiment tasting panels, though I still want this to be fun too. I used a simple survey for this first panel tasting and realized immediately areas that need to be reworked. In the future, I’m thinking of using an online survey platform where panel members answer questions on their mobile devices. I’m also starting to think the triangle test may not be totally necessary or even very helpful. Please, if you have any suggestions, do kindly share them with me! Without further ado…
Each taster was initially poured 3 small samples for a triangle test, the makeup of which was random for each taster. Each tasting session occurred privately and the surveys were completed by me. Once the triangle test was completed, one of the beers was removed, leaving 1 each of Truby and Non-Truby. Tasters were not informed if their response to the triangle test was correct. They were then instructed to complete the rest of the survey with the two beers left, understanding that they were in fact different from each other. Each taster was asked to indicate which of the 2 beers they thought was better in terms of appearance, aroma, flavor, and mouthfeel, and they were encouraged to provide subjective feedback as well. They were also asked to attempt to identify which beer was “experimental” (the one that had something out of the norm done to it, in this case Truby) as well as which one they preferred overall. Tasters were not made aware of what beer was in either glass until their survey was complete. In all, 6 people were included in the tasting panel.
| RESULTS |
Ryan, the first taster, was quick to accurately identify the different beer during the triangle test, which was Non-Truby, explaining it was more hazy than the other beers. He went on to report that Truby had a “crisper, sharper bite” to it, while Non-Truby was slightly smoother. When asked to indicate which of the beers was experimental, Ryan correctly chose Truby, stating his hunch the extra material in the carboy likely helped to clear the beer. Ryan’s overall impression was that both beers were “incredibly similar with the exception of clarity and that sharpness in the flavor,” stating that his slight preference was for Truby.
The next person to evaluate the beers was John, an avid homebrewer and beer lover. Like Ryan, he rather easily identified the different beer in the triangle test, which in this case was Truby, as it was “slightly though noticeably more clear” than Non-Truby. He went on to say, ” [Truby] has a little more tangy taste to it, it’s just a little more tangy up front and a little different on the back end, just mildly more bitter, but not much.” In terms of aroma and mouthfeel, he said they were almost identical. He was accurate in identifying Truby as the experimental batch, which he reported he had a slight preference for compared to Non-Truby, stating, “It’s really kind of nice.”
Aaron is a Cicerone Certified Beer Server at the House of Pendragon taproom who has also passed the written portion of the BJCP exam and currently serves on the Board of Directors for our local homebrew club, the San Joaquin Worthogs. After tasting the 3 beers presented to him for the triangle test, he was unable to accurately identify the different beer, choosing one of the 2 Non-Truby glasses instead. Perhaps it’s important to point out that the beers from here on out were being sampled from 4 oz Belgian-style taster glasses, which may have impacted perceptions of clarity. Once comparing just the 2 beers, Aaron did correctly identify the experimental batch. He reported minimal to no perceptible differences in aroma or mouthfeel, though after closer inspection stated that Truby was slightly more bright than Non-Truby. Flavor-wise, Aaron experienced Truby as being “a little more phenolic with a more biting apple-like flavor, maybe some acetaldehyde.” He was the first to report a preference for Non-Truby, explaining he appreciated its slightly less biting bitterness.
David is another server at the House of Pendragon taproom who is studying to become a Cicerone Certified Beer Server. While he does not currently homebrew, he has a great appreciation for good beer. He was unable to accurately identify the different beer during the triangle test and he also incorrectly guessed which of the beers was experimental. He commented that Truby was more clear, but that Non-Truby “just has more aroma to it and it’s a little more bitter at the end, I like that.” When asked to choose which one he’d rather drink a full pint of, he chose Non-Truby.
Chris was next to complete the evaluation, he is a regular homebrewer who is known by his friends for having a rather discerning palate. Chris was able to accurately identify the different beer in the triangle test as well as the experimental beer. He reported the clarity on Truby as being better, though noted that Non-Truby appeared to have slightly better head retention. To Chris, Truby had “a more pronounced aroma and tastes crisper” than Non-Truby, which he thought had “fuller mouthfeel and a better blend of flavors.” Apparently he liked the crisper flavor of Truby over Non-Truby’s better blend of flavors, as it was the beer he said he preferred.
Jeremy was the last participant on the tasting panel, he has enjoyed drinking delicious craft beer for many years. While he was inaccurate in his attempt to identify the different beer in the triangle test, he was able to detect which of the beers was experimental. He described Non-Truby as being “a little hazier, which I like, with more subdued aroma, smoother mouthfeel, and a more firm flavor, almost like sourdough.” He experienced Truby as having a “more lively” aroma with a “crisper, lighter” flavor. Overall, he preferred Non-Truby.
A quick recap of responses from the “official” tasting panel:
– 50% (3/6) accurately identified the different glass in the triangle test
– 83% (5/6) accurately identified Truby as the experimental batch
– 50% (3/6) preferred Truby over Non-Truby
– 100% (6/6) perceived Truby as being clearer than Non-Truby
– 50% (3/6) perceived no difference in aroma while 33% (2/6) thought Truby had better aroma
– 67% (4/6) reported Non-Truby as having better flavor in general
– 33% (2/6) thought Non-Truby had better mouthfeel while the others perceived no difference
While not included on the actual tasting panel, numerous others have also compared these 2 beers. Truby has consistently been voted the clearest beer with the sharpest/crispest flavor. Interestingly, there seems to be somewhat of a split when it comes to overall preference.
My Impressions: In the multiple times I’ve sampled both of these beers, I’ve regularly come to the same conclusions, namely that Truby is clearer with more noticeable hop aroma and a perceptibly enjoyable crispness. Like some of the others who have compared these beers, I agree that Non-Truby has a smoother flavor, slightly less biting, but all things considered, I actually find myself pulling the tap handle for Truby more often than Non-Truby.
| DISCUSSION |
Kettle trub making it into the fermentor certainly seems to have an impact on the finished beer, the most striking and perhaps surprising being on clarity. The assumption that clearer wort in the fermentor leads to clearer beer in the end appears to be false, at least based on the results of this exBEERiment, with all samplers agreeing that Truby was brighter than Non-Truby.
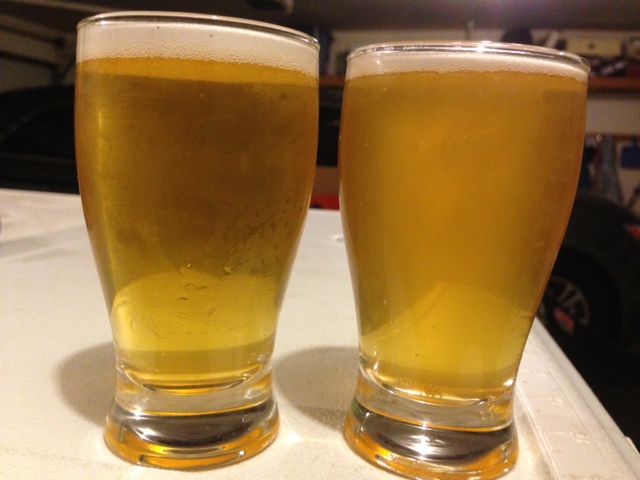
Given the subjective nature of taste preference, it behooves me to resist making any recommendation for what other brewers should do as a matter of principle. For those who tend to prefer clearer and crisper beers with potentially sharper bitterness, consider not worrying too much about the amount of kettle trub you transfer to the carboy. Alternately, those who enjoy slightly smoother bitterness and don’t mind a bit more haze in their beer may want to continue investing a little more effort in transferring only the clearest wort to their fermentor.
As with most things in this great hobby, what one brewer considers normal or even required practice may be viewed by another brewer as being totally unnecessary. Obviously, the experimental condition in this exBEERiment was purposefully overblown, as I was most interested in the impact massive amounts of trub would have compared to minimal amounts. I think this exBEERiment not only demonstrates that worrying about this issue is hugely unwarranted and that great beer can be produced regardless of the amount of trub that makes it into the fermentor, but that there is potentially some benefit to fermenting with a fair amount of break material.
If you have any questions or comments, please do not hesitate to share in the comments section below!
Cheers!
Support Brülosophy In Style!
All designs are available in various colors and sizes on Amazon!
Follow Brülosophy on:
FACEBOOK | TWITTER | INSTAGRAM
If you enjoy this stuff and feel compelled to support Brulosophy.com, please check out the Support Us page for details on how you can very easily do so. Thanks!









125 thoughts on “exBEERiment | Kettle Trub: Low vs. High In A Cream Ale”
I read this article a month or two ago and was intrigued. Since then I’ve been saving the bottom 2-3 liters of each batch (ie: everything that would usually be discarded from the kettle is used), fermenting them in 5L demijohns and generally they’ve ended up tasting much the same.
So I ummed and ahhd over it during my whole brew day this week and finally decided to bite the bullet and brew, no chill, and then ferment in the one vessel. I Brewed A Cali Common in my robobrew. After my final hop addition (when I’d usually transfer to a cube) I just sealed it up, and added an airlock (with hop bag mesh on top and bottom just in case). After about 22 hours it was down to pitching temp, and it was actively fermenting within another six hours.
I have a spare boiler, so tying it up (for the fermentation) wasn’t a big deal, and it’s so easy to clean after. I must say, it felt strangely guilty just how quick and easy my clean-up was.
I’ll let you know how it turns out. Cheers for this, and all the exbeeriments you’ve been doing, I’m an avid follower.
Just reporting back on the above: my Cali Common turned out great, and I’ve since brewed a Black IPA, a Pale Ale, a Saison and a Bock this way. They’ve all turned out as excellent beers. Thanks again Malcolm.
Oops, I mean Marshall!
Marshall,
Thank you for this well done experiment and the thorough write-up. I think your tasting methods are perfect for the typical home brewer’s needs…I just want to know if it will taste good.
I just brewed my first batch this past Sunday (today is Wednesday) and I made a couple of mistakes, one of which was to leave everything in when I poured the wort into the fermenter. I was also a little low on volume so my OG is pretty high. I was most worried about the trub though. This article eases my mind. Thank you. The yeast are pretty happy so I think I’ll have a great Double IPA in 5 or 6 weeks. Thanks!
Brad Tanner
Thank you for doing the work on this exBEERiment. You just saved me about $45 that I was going to spend on a hop spider.
I didn’t see any mention of kettle finings in your recipe, but if you used them, it might account for trubby being clearer. Those finings might have fallen into the trub post-boil, then been stirred back into the mix by yeast activity during fermentation. ???
Definitely maybe!
Great writeup!
I think this is a great example of a disconnect between the commercial and homebrew world. In large scale trub is problematic for pumps, takes up fermentation space, and probably most importantly interferes with serial cone yeast cropping. Later the lore developed about it making beer clearer.
As a lazy homebrewer who breaks all the rules I almost always keep the trub. I have noticed these same things about my beer too. Always bright, dry, and crisp. Since I drink mostly pale ale, I like these things but have always struggled to get body in my darker beers, and mouth feel and haze in wheat beers and neipas. Now I’m thinking changing my habbits for those styles!
Makes me wonder how a fuller bodied recipe might change the results of the exbeeeeeriment…?
Thank you Marshall for this great exBEERiment and all the others ones.
Do you think Gelatin fining (cold crash, 0.2g/L) would work as usual or would it tend to bind with trub rather than with yeast in suspension?
Julien R.
I’ve found gelatin fining works as usual in high and low trub beers.
Marshall, you ever have gelatin not work that well? I am having some trouble sometimes. I made a Kolsch recently with WLP029, and I cold-crashed it for a few days, then added the 0.5 tsp of gelatin dissolved in warm water and let it sit about 2-3 days. i racked to keg, carbonated, and it is still very cloudy after like 5 days in the keg. I have had it work better in the past though. weird.
Not to be presumptuous, but the only time that’s happened to me is in a batch I believe was either contaminated or kegged before it was done fermenting.
Ah, interesting. I used the WLP029 at 60F, as I thought that was the best temp for that style. I later read on White Labs site that they have had people have problems at lower temps and recommend 65-68 for the yeast! I tried boosting the temp up to dry it out, but I only got 72% attenuation for a 155F mash temp. It definitely could be drier. Maybe the yeast are still partially active. I’ll have to brew one again in the future and try doing it at 68F or try another strain. It has a very unique flavor though, interesting. It is super fruity, pear, apple, maybe some other fruits, but it has that classic lagery character too. It’s very interesting. I think I prefer it to Pils but like Helles a little better. Anyway, thanks. That might be my problem.
Cool experiment and great writeup. My blissful ignorance has apparently served me well. I’ve always thrown the trub into the fermenter — even going so far as to tipping my brew pot to get every last bit. I’ve always enjoyed my resulting beers. And I always wondered what the hell recipe calculators referred to when they had an entry for “trub loss.”
So no longer ignorant — just blissful frpm here on out.
Time and time again I find myself on your site answering my late-night brewing concerns – this article probably wasn’t written when I initially wondered the same thing, and here I am in 2016 still questioning it! I know my beer tastes good and has desirable clarity, but reading this article gives me some peace of mind.
The experiments you do are really great. I think the biggest concern with leaving the trub in is it could alter your recipes intended bitterness slightly. I think I remember you noting that the trub beer was infact a bit more bitter and sharp. I would say if you are doing an IPA or any other beer with lots of hops…it probably doesn’t matter one bit. In the end, if the beer tastes good that’s really all that matters.
I’m a bit late to comment, but better late than never.
When a beer is cloudy, it has a perceivable difference in hop flavor. I recently formulated an “East-West” IPA recipe. I used NEIPA hops and some oats, but did not use any wheat. I also used a West Coast (Chico) yeast vs the Vermont NEIPA style yeast. It was almost all late and dry hops. I should mention I always use Whirlfloc, which almost always leaves a brilliantly clear beer.
Initially, when the beer went into the keg, it was a bit cloudy. I force carbed this to get ready for a competition, so was able to sample in 48 hours.
For the first couple weeks, this had all the elements of a juicy, NEIPA. Great, good tasting breakfast juice cloudy sample. But by 3 weeks, it had cleared completely and you would swear it was a good example of a west coast IPA – citrusy, maybe piney, with a little lingering bitterness. It was TOTALLY different!
The cloudiness in a beer hold hops in suspension, and fills the mouth with hop flavor that figures differently than when clear. While more pronounced in a heavily late hopped IPA, I can’t help but wonder if both of your beers had gone completely clear, would they taste the same?
People couldn’t tell these beers apart, perhaps this helps address your question?
https://brulosophy.com/2015/01/05/the-gelatin-effect-exbeeriment-results/
Thanks for this piece,
I’ve made batches and split batches taking care to equilize trub and fermented long or short and
I’ve wondered if it really makes a difference since all my beers drop bright.
Some other considerations:
Lost Space in the fermenter, protein bitterness, and maybe fridge/shelf life would probably be my main concerns with ultra high trub content.
I produce incredibly bright beer without finings using only a 2day cold crash. (some beers need a couple days in keg to meet commercial clarity) I have a relatively efficient plate chiller so I pump (everything) through a screen first to keep it from plugging up, but I don’t separate the trub intentionally. I get some it in fermenter, but some catches on the hops on the fb in the kettle, and some in the inline screen. My understanding is that the yeast benefit from some of the nutrient in the trub (may or may not be true) but number of yeast may play into this as well. I use 5 packets of dry yeast in a 10-12 + hr starter for 1/2 bbl (finished product) batch. If trub compounds help yeast, then it would actually be very beneficial to underpitched beer (most homebrew is underpitched imho).
When I’ve tasted samples from the top (brighter part of a carboy) and the cloudy stuff near the trub/yeast layer, the cloudy stuff was not pleasant overly bitter (even for IPA) and I’m happy to keep that out of the beer. It has been my sense that less of that stuff steeping in the beer would make a better beer, but I’ve never noticed any difference in finish clarity based on trub content.
Great help to me. I brew and ferment in my Anvil kettle. I was removing and cooling wort in different kettle, I would wash my Anvil kettle and pour cooled wort back into it. I will now try cooling wort in Anvil kettle and pitching yeast. Thanks
Many thanks to this great exbeeriment. Last weekend we brewed (in Germany) 50 liter of a dark “Weizen-Doppelbock”. It was the first time I used my new 50 Liter vessel and – what a great surprise – the 7 kW gas burner needed a little bit more time to heat up the wort than known from my 25 Liter vessel. This would normally not be a problem, but as we we were invited to attend a barbecue in the evening I was simply running out of time, and after the whirlpool I let the wort cool down over night. To my certain surprise the trub cone was collapsed in the next morning and all trub was equally distributed on the bottom. I could not fill the wort from the top to the fermenter at that time, thus everything including the trub was transferred to the fermenter. Fermentation with a WYeast 3068 starter began rapidly but I was concerned about the quality of the final beer as the fermenting wort indeed looked a bit strange. In a German “hobby brewer” forum I found a link to your xbeeriment, and I really felt relaxed. I was already concerned that the wort is maybe lost. Today fermentation at 25 °C (77 F) is almost completed, all trub including yeast has settled at the bottom of the (temperature controlled) fermenter. This weekend I will transfer the beer to a keg and carbonize it. In 2 – 3 weeks from now I will know if the quality is the same as of the one I brewed in the beginning of this year – but I am optimistic.
Again, many thanks for your great exbeeriments, Marshall, you have a new follower.
Excellent project! This is something that I have been trying to figure out, to see if it really matters. I use hop bags or screens to prevent hop sediment from entering my fermenter so why filter the turb? I’ve done both, just like your experiment i did not see (taste) anything bad with the turby wort beer. As a matter of fact , i just finished emptying turby wort into my fermener lol.
Excellent write up! I don’t remember seeing it anywhere but it looks like if bottled you would have gotten about 6-8 bottles less with “Truby”! Would that factor in for you?
Not really, as I keg, and I’d say it’s probably more like 2-3 bottles.
Thanks Marshall! I have been dumping right from the brew pot and have had great results!
that colour in the carboy though
I found your exbeeriment as I was considering ways to keep trub out of my fermenter.
I haven’t seen any comments to this but for me it’s mostly because I re-use my yeast and haven’t had much luck getting the two to separate.
Any ideas to that end?
Search the site for “slurry” and you’ll find some xBmts we’ve done on this topic.
Thank you Marshall for this exBEERiment! I will definitely try on my next batch here in Brazil.
I have one question regarding the use of hops. Did you use a hop bag? I mean, did you also leave the hops with the trub?
Thanks again
No hop bag!
I ferment small batches in a mr beer keg which I drain from the spout. I like doing secondary because the trub settles higher than my spigot after a week.
Whether “truby” or “non-truby” affects beer depends on wort preparation and fermentation size.
There is no doubt that hot trub releases significant FFAs into the beer over 10-12 hours.
There is no doubt that yeast coated with cold trub are stressed, and produce more acetylaldehyde and SO2. They also repitch less times.
There is no doubt that astringent iso-humulone degradation by products complex with hot and cold trub.
HOWEVER: CT settles at about 100mm/hr, so homebrewers do not have CT problems, it is over 50% settled before fermentation starts. People with 4 metre high beer levels in CCVs have problems, fermentation starts and keeps CT in suspension.
HOWEVER: High termal stress is not a homebrewers problem. You get about 0.3m2/hec heating area. ( unless you use electric elements to boil? DON’T!) Every time you double the size of a brewhouse, you square the heating area and cube the volume. A 10 bbl gas-fired kettle has 0.1m2/hec heating area and degrades a lot more iso-humulones and LPT1, so they are more likely to have astringency and foam problems. HT and CT is more critical for them to reduce FFAs and astringency.
Hi! Do you think that the full trub would affect a beer with a lot of hop? Or just that the yeast layer is a sort of a protective layer?
I wouldn’t recommend it, but I’ve heard from many who do it without issue.
Thanks for the answer! Brulosophy is a great site, greetings from France!
Hi, Thanks from the whole world for your test. the theories that go against established ideas are not so widespread on the internet or it is difficult to find them. Your article and those on no chill simplifies my life as a simple amateur brewer in France.
Do you use silicone rubber for hot or cold wort transfers? My hot lines whirlpool and transfer lines are staining, cold lines not! Anybody else have this issue and should I be concerned if sanitized appropriately?
Thanks for this – a nice read. I came across it since in this mornings Grainfather brew the rubber end cap came off the filter, so more trub that i hoped for was pumped into the fermenting vessel. I only found out when cleaning up, but the runnings did look murky-ish. I was thinking of racking in a day or two but will not.
The brew is a New england IPA – the first I have tried. Some 5 minute hops, lots of hop stand hops and some dry-hopping to come. Does that make a difference?
Truby honest, I really enjoyed the experiment. Tnx so much