Author: Marshall Schott
Simple can be harder than complex: You have to work hard to get your thinking clean to make it simple. But it’s worth it in the end because once you get there, you can move mountains.
~ Steve Jobs ~
I often tout the virtue of keeping things simple when it comes to brewing, that great beer can be made without the use of overpriced kettles, pumps, CFCs, or a $5000 miniature version of a commercial brewery. Then I share photos of my home brewery or have someone over for a brew day and often receive comment about how my version of “simple” may not necessarily jibe with others’ interpretation of the term. I’ve accepted that the concept of simplicity is both subjective and relative. I get that cheap extract kits are about as simple as it gets… that’s just not what I’m talking about here.
This article comes at the request of numerous folks who expressed interest in learning more about my setup and process. I provided links to many of the products I mention and laid out my general brewing process. It’s totally possible my entire setup and approach will look different a few years from now, so it goes.
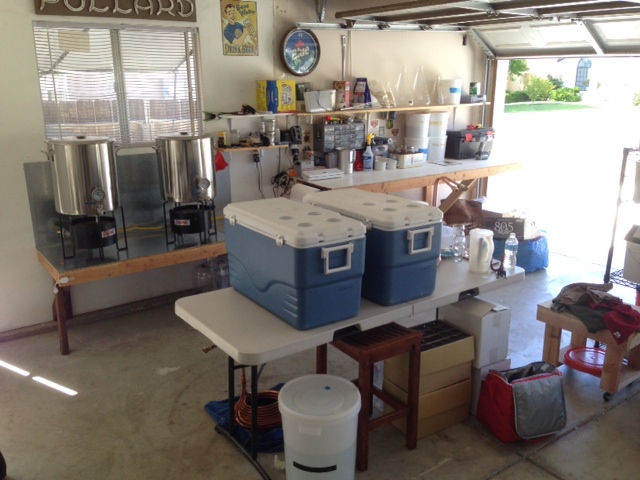
I may be in the minority here, but I feel incredibly fortunate to have a very understanding and supportive wife who has let me lay claim to the third bay of our garage… and she doesn’t even like beer. Just over 2 years ago, I built a brew bench into the wall and ran natural gas to feed my burners. As big of a project as this might sound, it has definitely contributed to the simplification of my brewing and took all of an hour and $120 to complete.
At it’s most complicated, my brewery consisted of a 3 burner brewstand on wheels, 2 keggles, 2 cooler MLTs, one large and one small pump, a plate chiller, numerous hoses with camlocks attached to each end, and 3 propane tanks. Setup alone would take me about 20 minutes while clean-up, which involved flushing my pumps and plate chiller, usually took about an hour. I kept some stuff, sold off other bits, and used the money I made to buy equipment that would make my brew day easier. These days, setup takes me about 2 minutes, clean-up about 10.
The first thing I do when I’ve got a brew day planned is make a starter a day or two ahead of time. For this, I’ve got a couple 5000 mL Erlenmeyer flasks, one 2000 mL flask, and two Stir Starters. I tend to use the larger flasks most of the time, primarily because I make a lot of lager and hybrid beers, plus it makes harvesting yeast from the starter a bit easier.
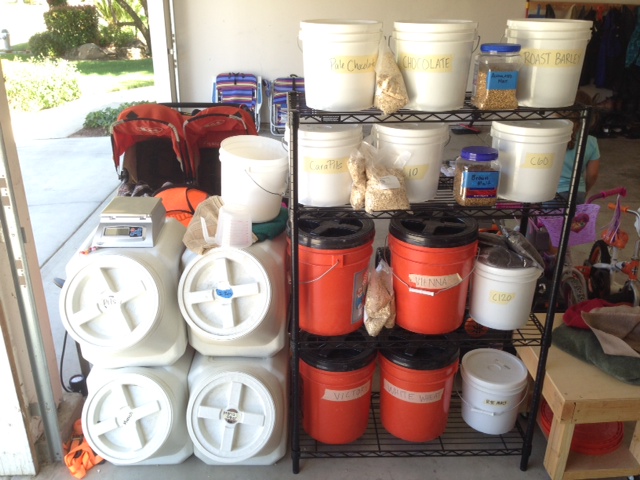
I buy all of my ingredients in bulk as it saves me a pretty significant amount of money given how often I brew. I use the 40 lb Vittles Vault stackable containers to store my base grains (2-row, Maris Otter, Pils, Munich Light), which I buy by the sack. For all other grains, I use the orange buckets from Home Depot (Homer) with Gamma Lids attached to the top to keep them airtight. I weigh out my grains using a KD8000 Baker’s Scale then mill them with a Monster Mill MM3 3-roller grain mill.
I’m lucky enough to have very soft and clean water, great for making beer with. I use a potable hose connected to my outdoor spigot and run all my brewing liquor through an external carbon water filter. I replace the filter once every 8-10 months.
I heat my strike water 7-10°F over my calculated temp in order to pre-heat my MLT. When that temp is reached, I move a few gallons over using an aluminum 1 gallon pitcher, just until it’s light enough to lift, then I don a pair of OveGloves and pour the rest of the strike water into the MLT. My MLTs are converted 70 qt. Coleman Xtreme coolers with stainless braided hose as manifolds. After letting the strike water sit in the empty MLT for about 5 minutes, I use an inexpensive Taylor thermometer and stir until my target strike temperature is reached. At this point, I dump in my grist and use a 24″ wire whisk to ensure there are no dough balls. When my target mash temp is reached, a timer is set for an hour and I come back to briefly stir the mash every 20 minutes or so.

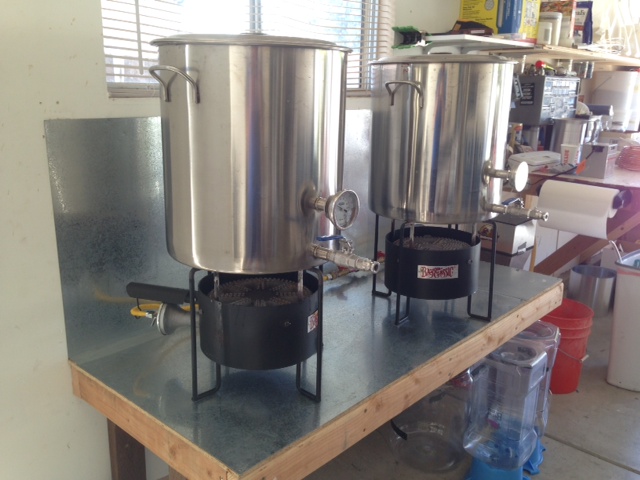
About 40 minutes into the mash, I start heating my sparge water, I want it to be 180°F before moving it to the MLT. When the mash is complete, I do a quick vorlauf then collect the first runnings in an old fermentation bucket, the one that came with the very first kit I bought back in 2003, then I pour it into the kettle. The sparge water is then added to the MLT, stirred, and allowed to settle for about 5 minutes before I collect the second runnings and add it to the kettle; I usually turn the burner on during this second runoff. Once all the sweet wort is collected, I stir and check my pre-boil SG using a refractometer with an actual specific gravity scale, just to make sure I’m on target. An inexpensive and accurate blade scale is used to measure out my hops, I prefer grams to ounces for the sake of precision. I use two 14 Gallon MoreBeer Economy Kettles with 1/2″ stainless ball valves and thermometers as HLTs and boil kettles. If you go this route, don’t forget the 1/2″ x 1.5″ nipple required to attach the valve to the bulkhead welded onto the kettle and a 1/2″ MPT barb to attach to the out port on the valve (I’m using old camlock fittings I had lying around, but I prefer the less expensive barbs).
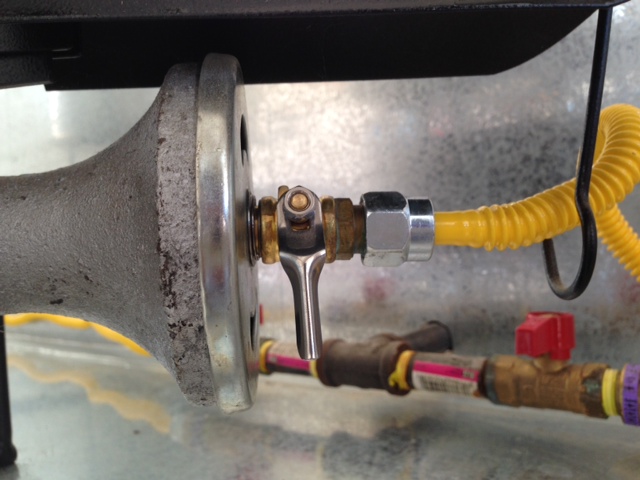
After researching many burner options, I settled on two Bayou Classic KAB-4 Burners, a decision I have absolutely no regrets about. These are just as good as other products supposedly designed for homebrewing, but they cost significantly less. Since I converted from propane to natural gas, I picked up some easy to use and inexpensive conversion valves from William’s Brewing.
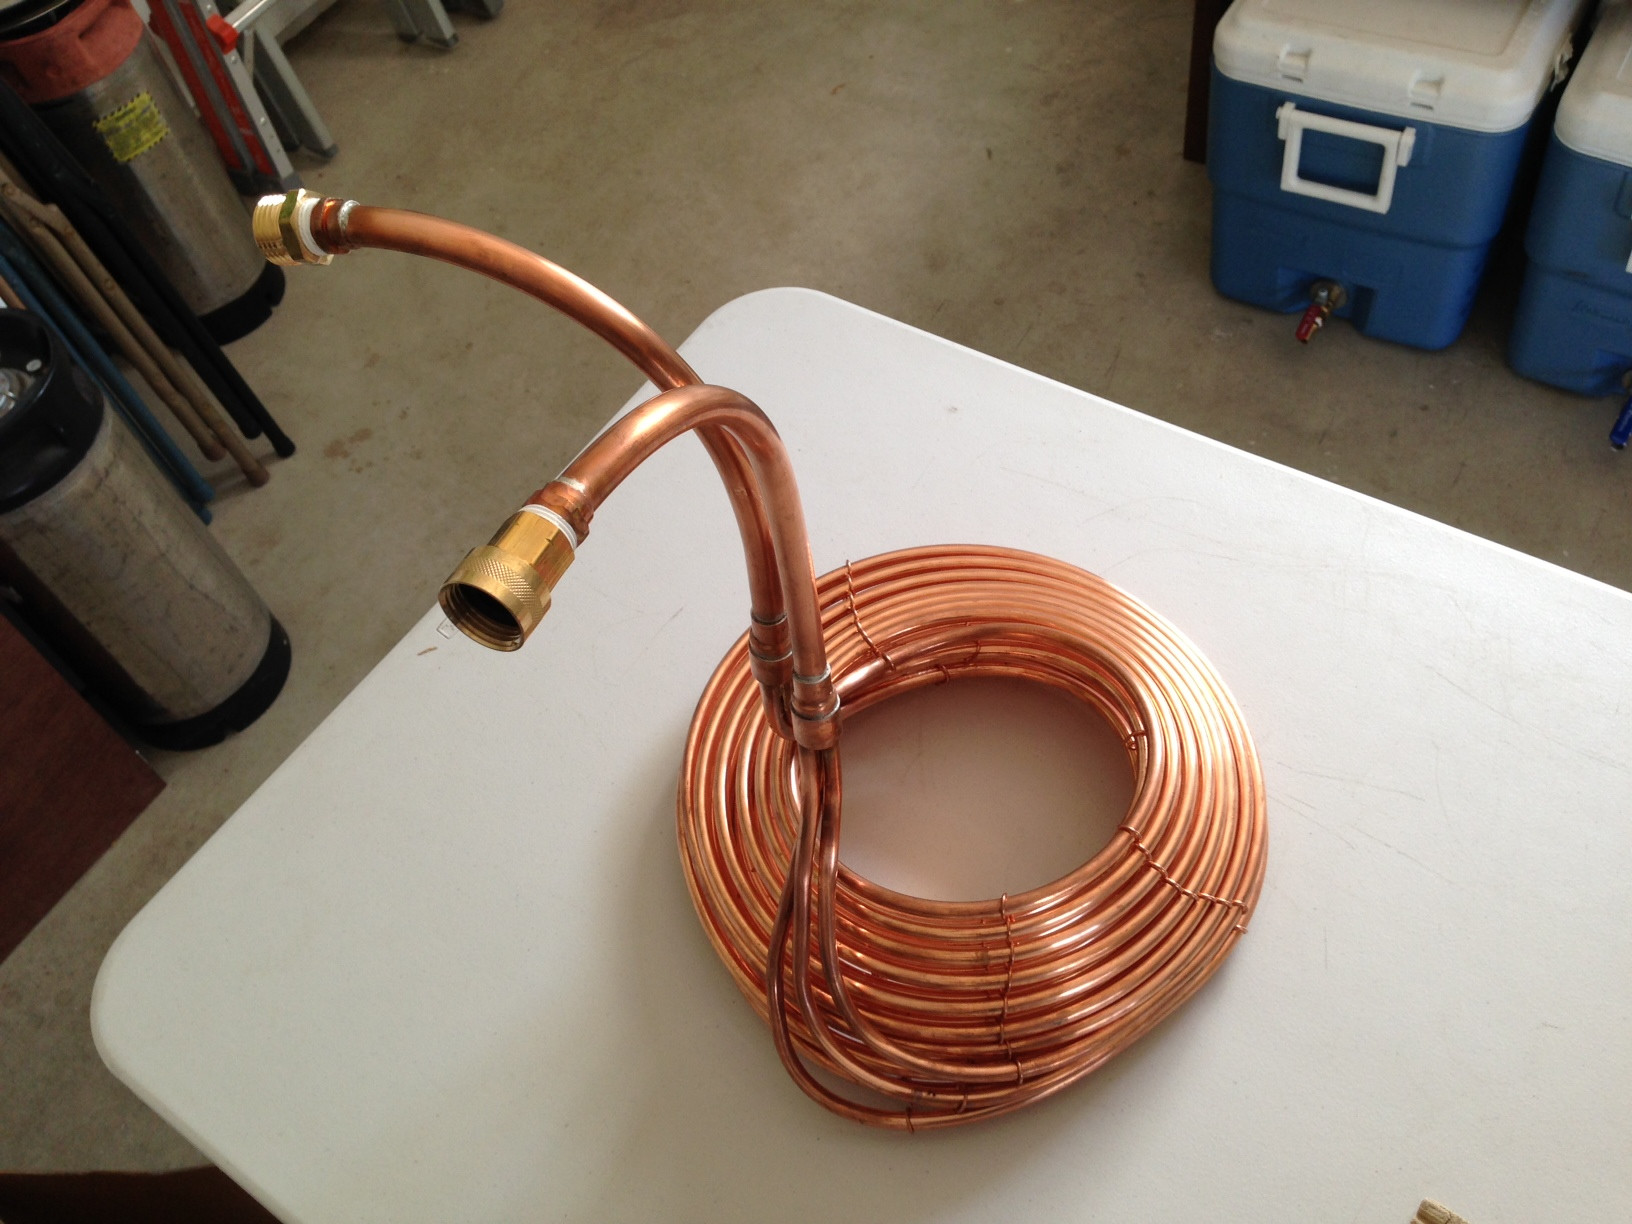
Easily, one of the biggest brew day headaches for me used to be chilling the wort. I recall thinking a plate chiller and pump system would reduce the hassle, so I dropped just over $200 building one. I couldn’t have been more wrong. I used that setup for about 6 months and realized I wasn’t enjoying brewing as much as I used to. As trivial as it may seem, I actually began to dread the thought of setting up, tearing down, and cleaning my wort chilling equipment. Despite all my efforts, it was inevitable that nasty black shit that apparently came from the plate chiller would end up in my boiling wort during recirculation. Before too long, I started researching simpler, cleaner, and more efficient methods of wort chilling. I stumbled upon a video by JaDeD Brewing showing how 5 gallons of wort can be chilled from boiling to pitching temp with an IC in times I never thought imaginable. I emailed him, he shared with me some tips I’d never heard of, and I bought a 50′ x 1/2″ copper IC. It only took one brew day utilizing these tips to convince me this is the best way to chill. My chilling times have actually been better than they were with a plate chiller! A few months later, I received an email from JaDeD asking if I’d like to be a beta tester for a newly designed IC, explaining it was for people who used larger kettles for both small and larger batches (I had asked him previously about the impact on efficiency when the top coils were not submersed in wort, as was the case with my 5 gallon batches). Of course I said yes and within weeks I had the first version of their King Cobra chiller. Suffice it to say, this thing kicks ass (here’s my review) and is worth every penny.
Once the wort is chilled, I measure the OG with my refractometer, document it in BeerSmith, then rack to my fermentors using a cheap plastic wort aerator attached to a 2′ length of 1/2″ high-temp silicone tubing. I prefer plastic fermentors to glass, relying mostly on the 6 gallon PET carboys from MoreBeer, though I also have a few 3 gallon PET carboys and 3 gallon Better Bottles for smaller/test batches. I actually prefer the flat-sided carboys because they’re easier to clean and cheaper, though the Better Bottles do have a slightly sturdier feel to them. While I’ve used carboy hoods in the past, I find myself grabbing the old rubber stopper and 3 piece airlock more often. Both do the trick just fine.
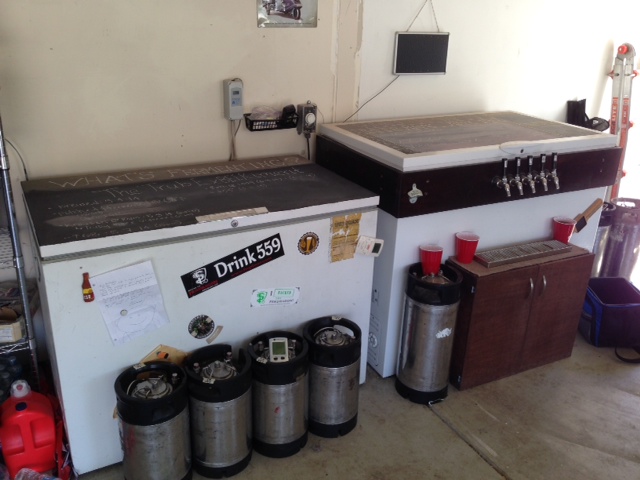
Full carboys are placed in my 15 cu. ft. chest freezer, an $80 Craigslist find, and regulated using a Ranco digital dual-stage temperature controller. I’m a stickler for precision when it comes fermentation temperature, hence my investment in a digital controller that measures in Fahrenheit and can both cool and heat.
I usually let the beer sit in primary about 10-14 days after the yeast is pitched- for more detailed information on my fermentation schedules, check out my Homebrewing Heuristics post. Once fermentation is complete, I rack the beer out of the carboy into a keg using MoreBeer’s Sterile Siphon Starter, a setup I find to be far more convenient and easy to clean than the more commonly used auto-siphon. I never transfer my beers to a secondary carboy. The only time I might consider doing so is if I planned to bulk age a beer for longer than 4-5 months, and even then, I’d likely just put it into a keg for UV-free ageing. Nearly all my beers are kegged, the only exception being those I’m asked to bottle condition for beta testing. Once the kegs are full, they’re moved to my keezer and hit with about 30 psi of CO2, after which I let them sit for a few minutes before purging to (hopefully) get rid of any oxygen in the headspace.
The gas to each keg is then reconnected and left to sit on 30 psi for 36-48 hours before reducing the pressure to ~12 psi. My beers are usually clear and well carbonated within 4-5 days of being kegged.
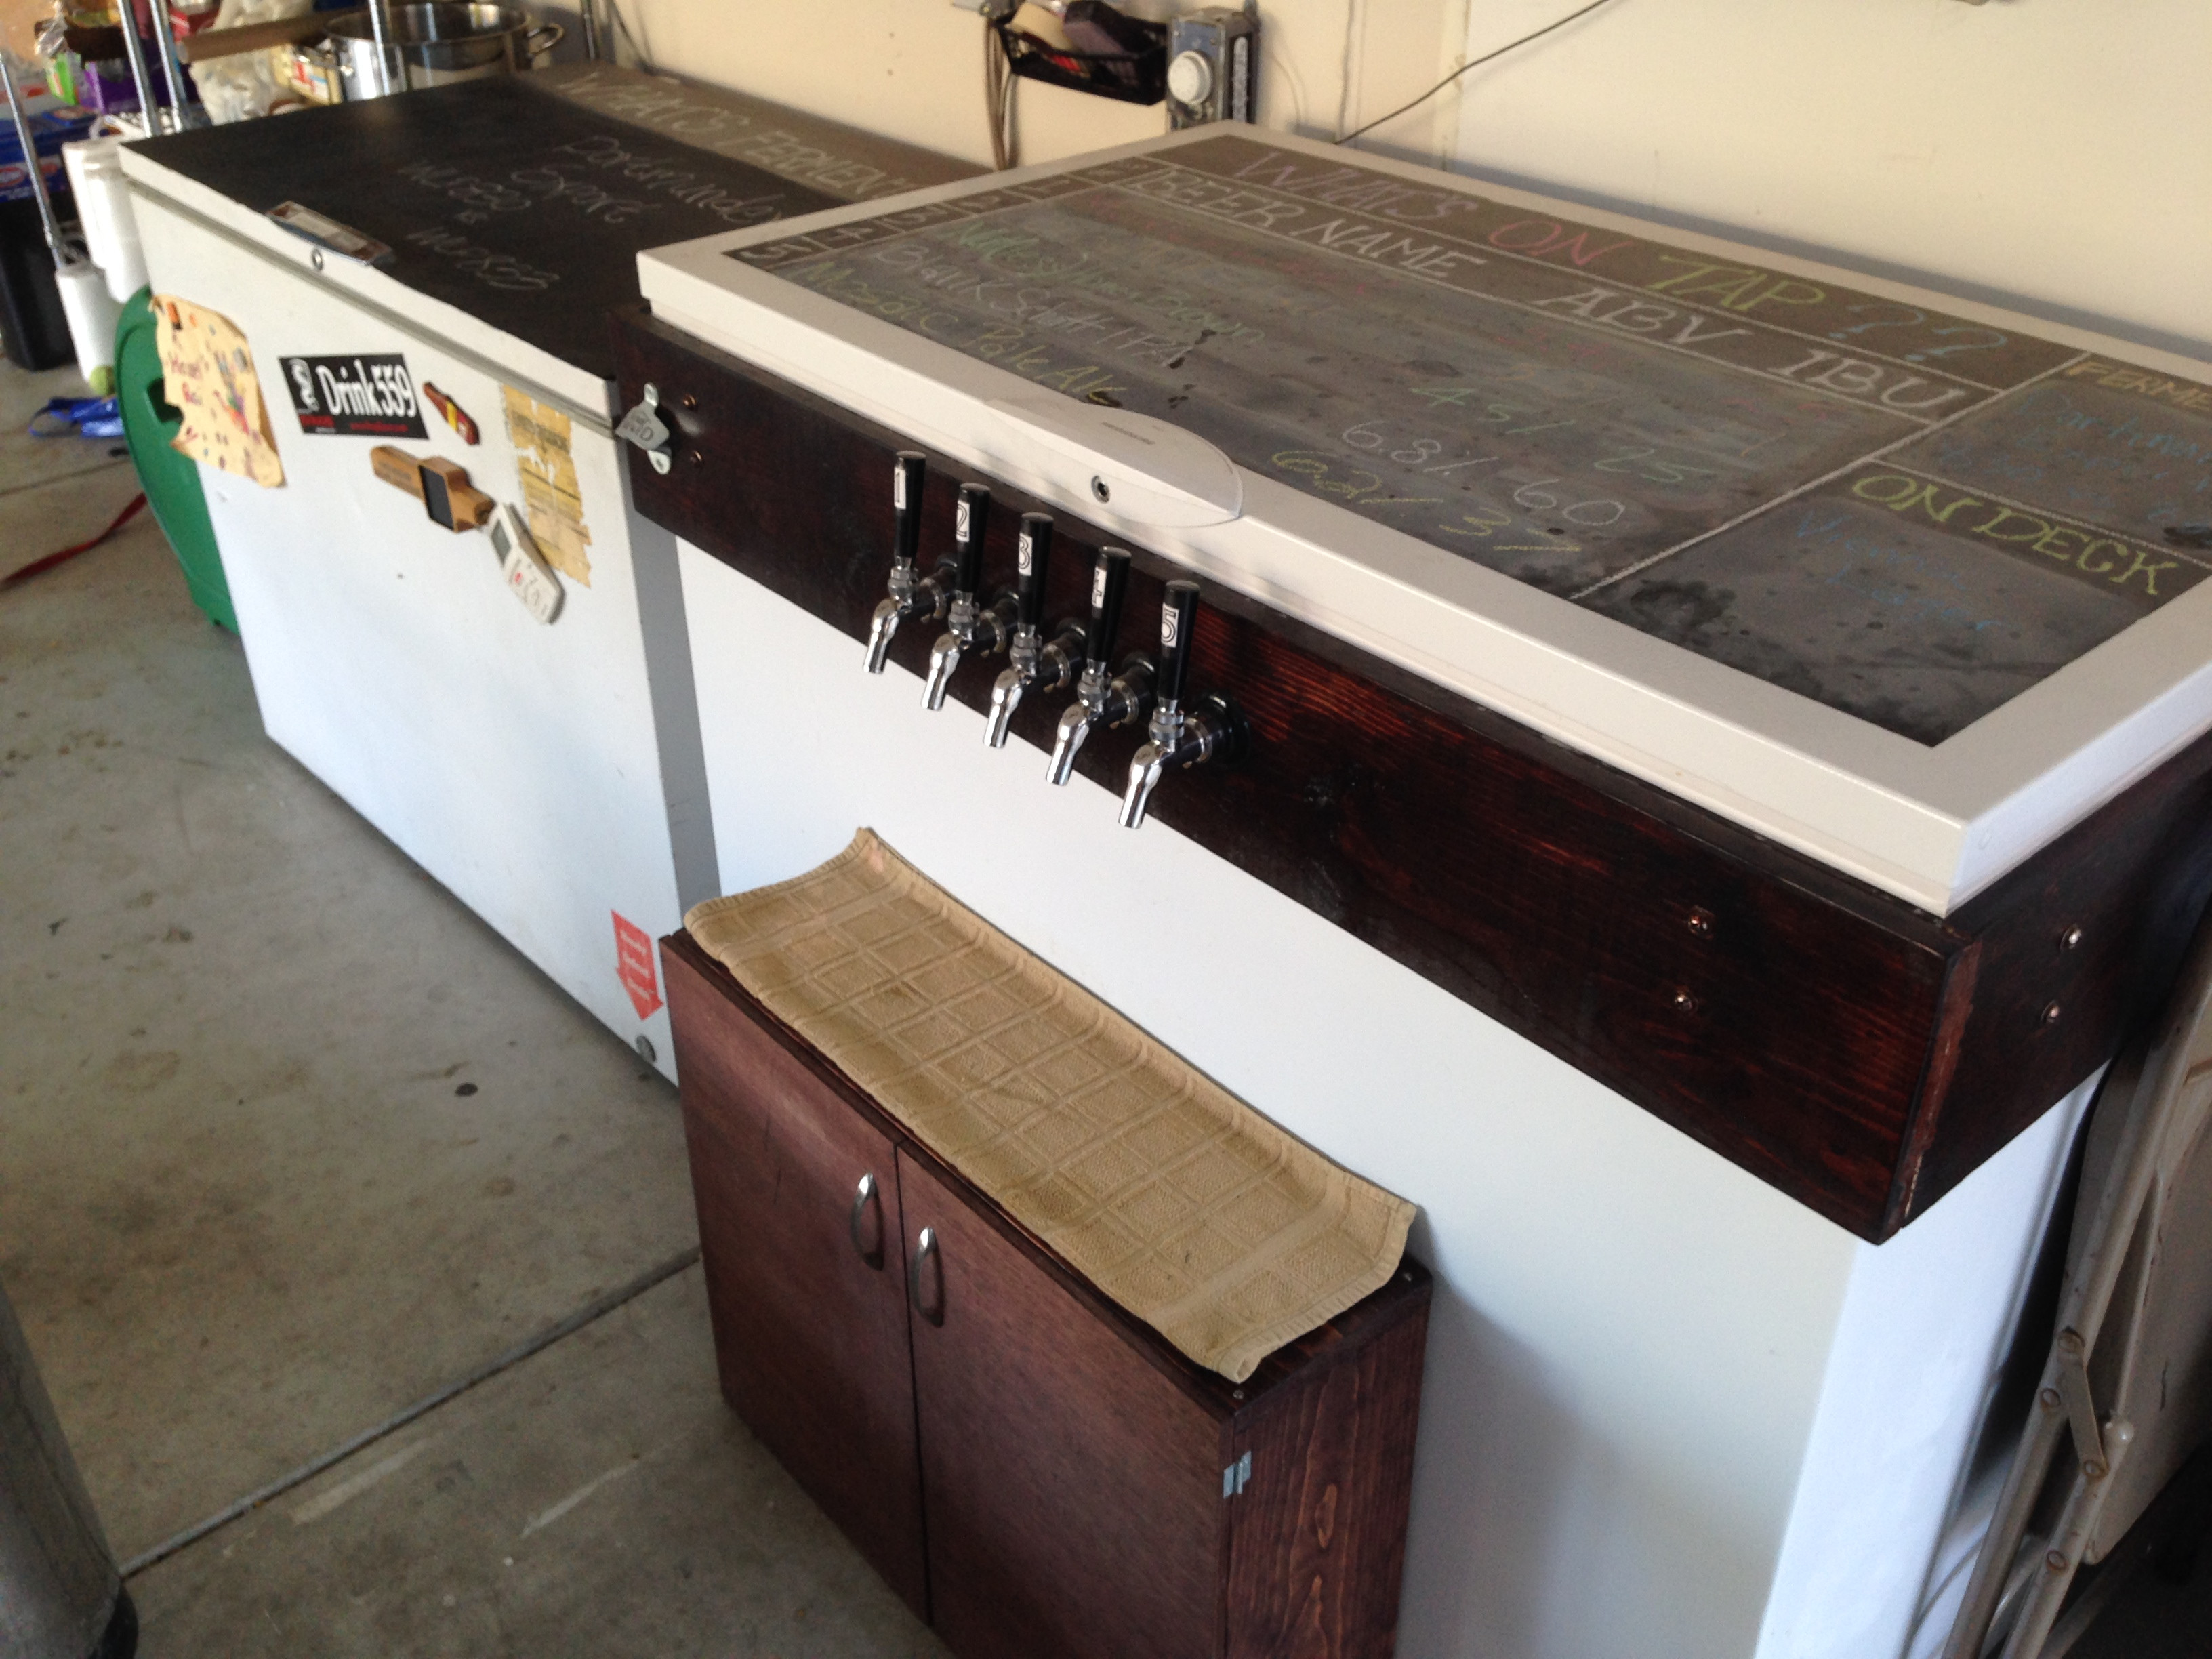
The small closet sitting in front of my keezer was built primarily as a place to set my 19″ stainless drip tray, it also makes for decent glassware storage.
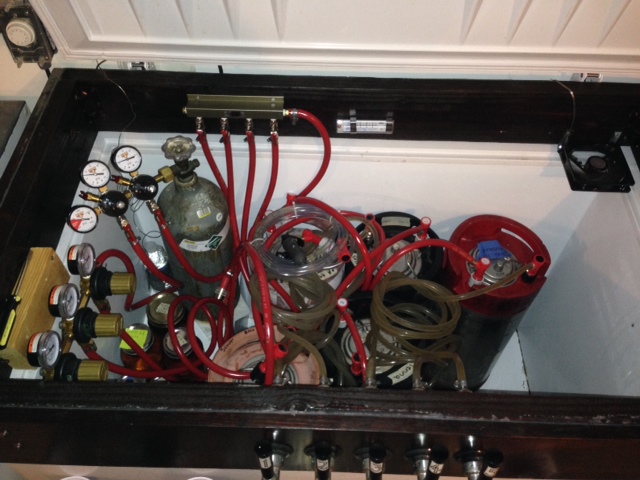
Following my keezer build post, I received a few requests for a more exhaustive parts list. Since building this, there are some parts I’d recommend due to being either better quality and/or lower in price. Here you go:
Perlick 525SS Faucets (not sure if they still make this exact model)
4″ Faucet Shanks
5 Gallon Refurbished Pin Lock Kegs (10)
3 Gallon Refurbished Pin Lock Kegs (4)
Barbed Pin Lock Gas-In Disconnects (7)
Barbed Pin Lock Beer-Our Disconnects (5)
8′ x 3/16″ SuperFlex Beverage Tubing (5)
3′ x 5/16″ Gas Tubing (7)
10 lb CO2 Tank
Dual-Body Three Gauge Primary CO2 Regulator
3-Way Secondary Regulator
4-Way CO2 Manifold
120 mmComputer Fan (air recirculation)
Universal AC Power Supply (for fan)
I use the secondary regulator mostly to carbonate newly kegged beers at higher pressures while the 4-way manifold allows me to serve at a lower pressure. I plan to replace the manifold for a 4-way secondary soon, I really like having the ability to independently control the psi going to each keg and highly recommend anyone building a keezer/kegerator consider this option.
I think that about covers it. When a keg kicks, I remove the posts (using a pin lock socket) and dip tubes then clean everything with OxiClean Free and very hot water. StarSan is my sanitizer of choice and I prefer plain old irish moss for kettle finings; I’ve never used finings post-fermentation, though I hear gelatin works well.
If you have any questions or comments, please do not hesitate to speak up! I’m always game for geeking-out on equipment, especially when it’s about simplification. Cheers!
Support Brülosophy In Style!
All designs are available in various colors and sizes on Amazon!
Follow Brülosophy on:
FACEBOOK | TWITTER | INSTAGRAM
| Read More |
18 Ideas to Help Simplify Your Brew Day
7 Considerations for Making Better Homebrew
List of completed exBEERiments
How-to: Harvest yeast from starters
How-to: Make a lager in less than a month
| Good Deals |
Brand New 5 gallon ball lock kegs discounted to $75 at Adventures in Homebrewing
ThermoWorks Super-Fast Pocket Thermometer On Sale for $19 – $10 discount
Sale and Clearance Items at MoreBeer.com
If you enjoy this stuff and feel compelled to support Brulosophy.com, please check out the Support Us page for details on how you can very easily do so. Thanks!



19 thoughts on “Simple Complexity | How I Make Beer (May 2014)”
Great write up on your process! I was thinking about writing up mine this summer.
Thanks, Matt! I never really intended to do this, actually, but I’ve received quite a few inquiries about my equipment and process. Hopefully it helps a few folks out. Cheers!
I read this and decided I do not have the passion, or forgiving wife. I’ll just have to drink yours! Ken J.
It’s not so much passion as it is obsession
Nice writeup Marshall. Thanks for sharing.
Great post Marshall, we share a lot similarities in our systems. Only real difference is I adore my Chugger pump (which I use to whirlpool immersion chill), and I use 10G round coolers. I do envy you have a permanent set up, until I move to a bigger home I have a “remove from closet, set up, tear down, return to closet storage” system 🙁 Cheers!
Thanks, Ed. I know people love their pumps, which I totally understand; my goal was to eliminate as much equipment (and clean-up) as possible while maintaining the quality of the finished beer. Plus, I like to think of the 5-10 minutes I spend stirring the wort and moving the IC around as “exercise” 😉
I really enjoyed this post – thanks for detailing your process! I brew with my brothers and when we want all-grain we tried the BIAB method and haven’t looked back. We initially used an immersion chiller, but switched to a pump and plate chiller and so far that has worked much better for us. We’re using propane for now, but thinking about making the switch to eBIAB. Your natural gas setup looks good, so we’ll have to think about that option as well!
Cheers, thanks for reading! I’m curious how you were using your IC? Most people I talk to are unaware of the tips for significantly increasing both chilling and water use efficiency of their IC. That said, I know plenty of folks who just like the automation of a pump and CFC, which is totally understandable.
The first time we used an IC we just stuck it into the wort and turned on the water. About 45 minutes later we were down to the upper 70s. The next time, after a bit of reading, we made sure the water was running full blast and stirred the IC counter to the flow of water. With 75 degree ground water I think we were closer to 25 minutes to get the wort to about 80.
With our plate chiller we get 5 gallons of wort down to the ground water temp in less than 5 minutes. The extra hassle of flushing it (and the pump / hoses) is annoying and I do worry a little bit about getting it perfectly clean since we can’t see inside of it.
Huh. I’ve been able to chill wort to 5°F above groundwater in less than 6 minutes using a typical 25′ x 3/8″ IC. Either way, I hear what you’re saying, for sure! Other than the setup, clean-up, and the hot break making into the fermentors, I really don’t have an issue with CFCs, I just personally prefer using an IC.
how do you dry hop? in the primary after ferm is complete? or in the keg? do you xfer from keg 1 to keg 2 if you dry hop in the keg?
I dry hop in primary for 2-5 days before kegging. Sometimes I double dry hop by adding a second dose of hops 2 days after the first then kegging 24-48 hours later. I always cold crash 1-4 days before kegging.
Can I ask how you heat the fermentation chamber?
Enjoyed the post, thanks a lot.
This right here: http://www.brewstands.com/fermentation-heater.html
Nice writeup! I love reading about other brewers’ processes- I always take something new away from it to apply to my brewing.
So, the only thing you do for wort aeration is the sprayer? No pure O2?
That’s it. Plus I make starters, which I believe helps. I’ve never had a stuck fermentation.
Thanks for the great read. I have a couple questions as I’m trying to determine what I need to do to my setup to make my life easier.
In your boil kettle, do you have a maximizer or mesh filter to keep most of the hops/trub in the kettle? If so what kind, and if not do you just dump it all in?
What are your cleaning/sanitization procedures like? I hate wasting PBW and Star San just to sanitize an auto siphon or something simple like that. Right now I’m trying to find a faster and more efficient method than keeping a 5 gallon bucket full of star san at all times. I’m thinking something like Mark’s Keg washer might do the trick, but I’m concerned it could just add one more thing to deal with every brew day.
Thanks,
Tyler
Hey Tyler!
I don’t use any hop filtration in my kettle or anywhere else, though I usually allow the kettle trub to settle for 10-15 minutes once I remove the chiller from the wort. I’m almost done with an exBEERiment that has to do with whether kettle trub making it to the fermentor has a negative impact, should be posted within the next couple weeks.
I clean with hot water and OxiClean, though this is reserved almost exclusive for my kegs and carboys; I scrub my kettles and MLTs with water and a sponge after use, then maybe once every 5-6 months I’ll use some Bar Keeper’s Friend to give my kettles a real good shine. I use StarSan for all my sanitization needs, making a 5 gallon solution that I use for 4-6 weeks (2-4 brew days) for everything I need it for. To keep bugs out, I loosely place a lid on top of the bucket. Hasn’t failed me in 3+ years. I have absolutely no interest in a keg washer, just another piece of equipment I don’t need, though I have a buddy who swears by his. I just take my kegs apart after each use (2 minutes), rinse them really well with hot water (I have a hose connected to my utility sink), then sanitize before next use. I’ve never had an infected batch… at least unintentionally 😉
Cheers!