
Author: Phil Rusher
Originally a term used to describe the strength of a beer, these days Stout refers to a set of styles, in fact the most recent iteration of the BJCP Guidelines lists 7 sub-types of Stout. While each of these are distinct in their own various ways, they all have a couple notable things in common, namely a very dark color from the relatively heavy use of roasted grains, which also contributes characteristics such as chocolate and coffee. It’s for these reasons Stout, at least in the beer world, has become synonymous with dark.
In typical arrogant fashion, Stone Brewing is credited as the first to seriously rethink the commonly accepted ideas of what makes a Stout a Stout. After a 2010 prank where Stone’s Greg Koch teased the idea of releasing a pale beer with Stout characteristics, then-brewmaster Mitch Steele decided to give it shot. He reasoned that by starting with a grist on moderately kilned base malt and swapping out the darker grains for adjuncts known to impart similar characteristics, one could produce a beer that mimics a Stout in all ways but color.
An seemingly short-lived trend, there’s something about the idea of making a Golden Stout that I find quite intriguing. Piecing together a grain bill that provides the expected malt character, balancing the roasted flavors contributed by adjuncts, and relying on a certain process variables to ensure proper body and mouthfeel. I was definitely excited to try my hand at this oxymoronic non-style of beer.
| Making Great Deceiver Golden Stout |
I approached designing this recipe from the perspective of keeping things as simple as possible while making sure to deliver what I felt would be the appropriate flavors for a Stout in a beer that was golden in color. I went with Pale and Munich-style malts for rich toasty notes, Pilsner malt to boost the strength without imparting color, and a charge of home-toasted flaked oats to add a silky mouthfeel.
Great Deceiver Golden Stout
Recipe Details
| Batch Size | Boil Time | IBU | SRM | Est. OG | Est. FG | ABV |
|---|---|---|---|---|---|---|
| 5.2 gal | 60 min | 43.2 IBUs | 7.5 SRM | 1.063 | 1.018 | 5.9 % |
| Actuals | 1.063 | 1.014 | 6.5 % | |||
Fermentables
| Name | Amount | % |
|---|---|---|
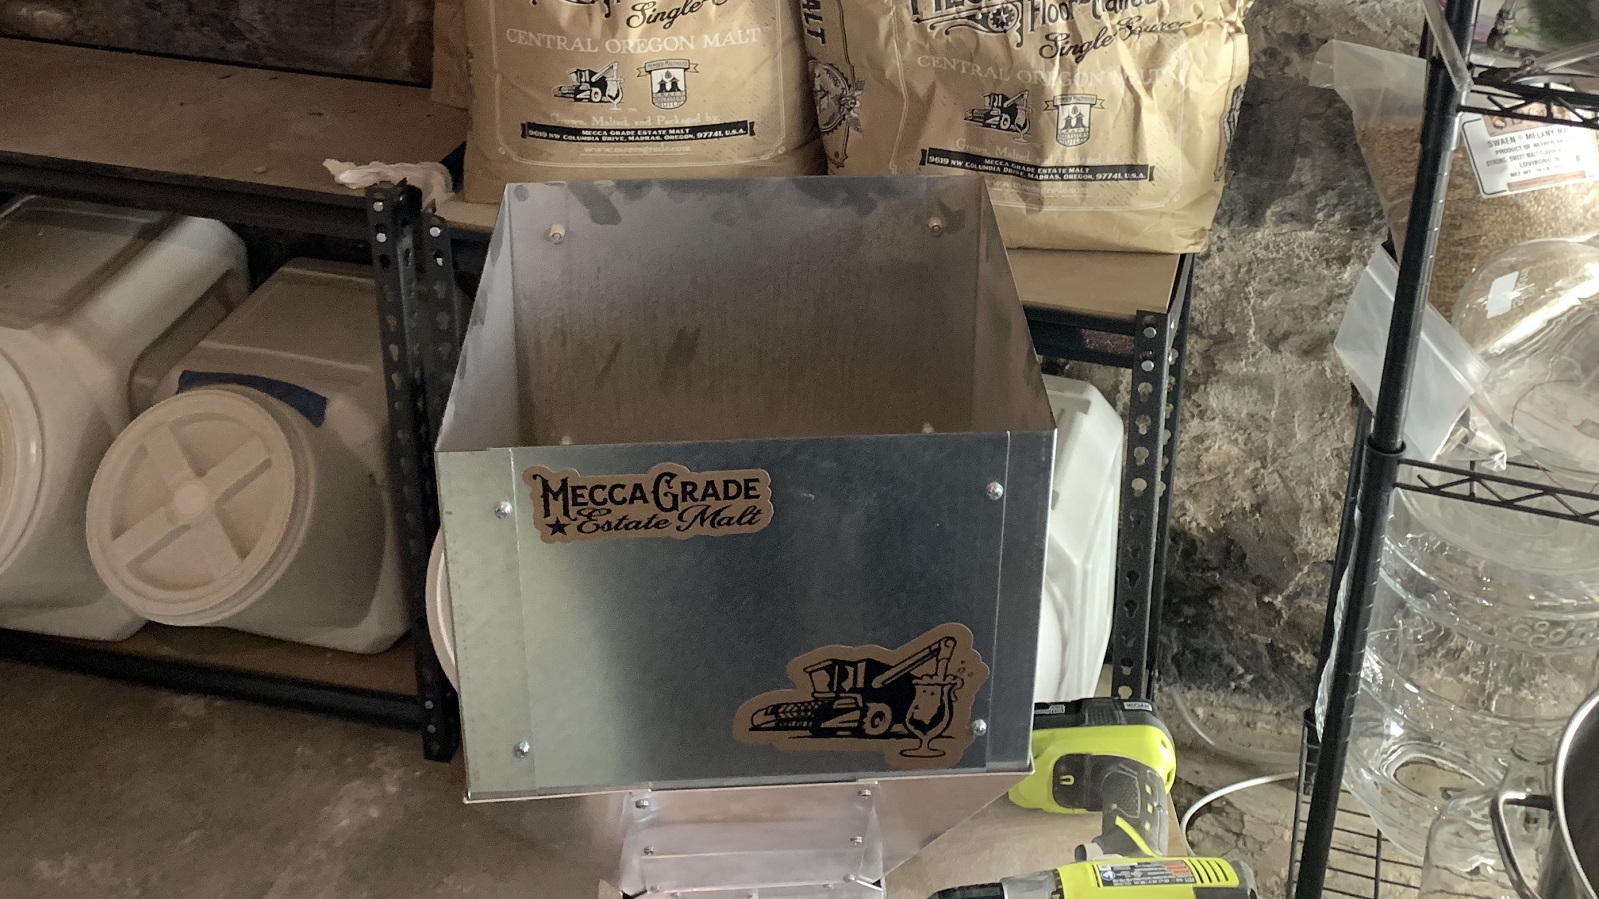
| Lamonta American-style Pale Malt (Mecca Grade) | 4.375 lbs | 31.82 |
| Pelton Pilsner-style Malt (Mecca Grade) | 4.375 lbs | 31.82 |
| Metolius Munich-style Malt (Mecca Grade) | 3 lbs | 21.82 |
| Flaked Oats, Toasted | 2 lbs | 14.54 |
Hops
| Name | Amount | Time | Use | Form | Alpha % |
|---|---|---|---|---|---|
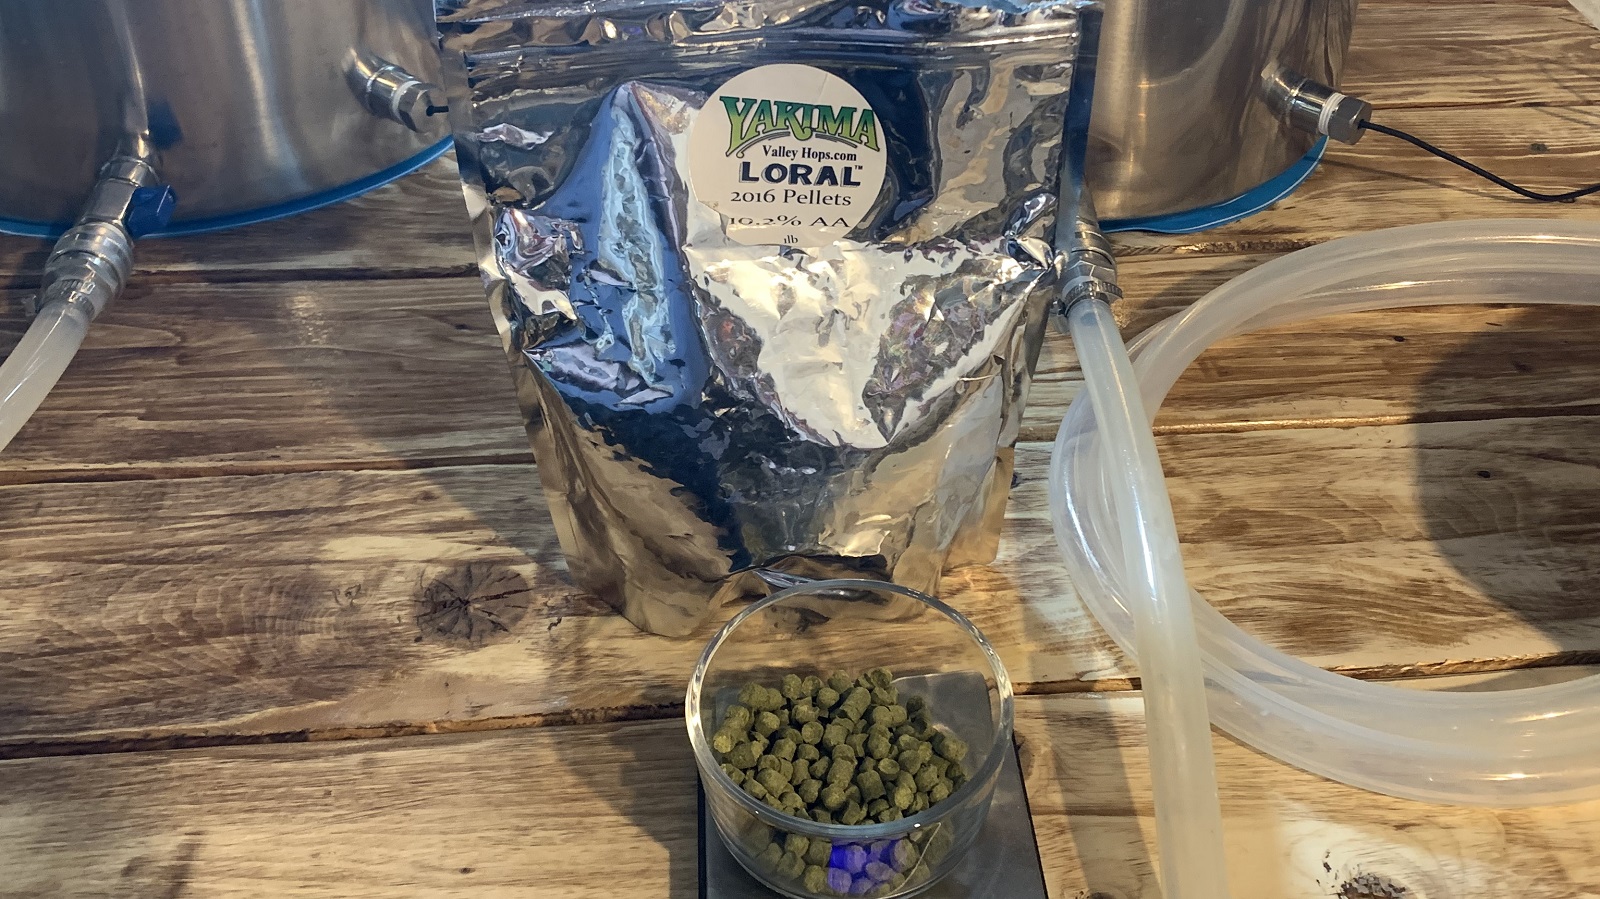
| Loral | 35 g | 60 min | Boil | Pellet | 10.2 |
Miscs
| Name | Amount | Time | Use | Type |
|---|---|---|---|---|
| Cacao Nibs | 3.00 oz | 6 days | Secondary | Flavor |
| Coffee Beans | 2.00 oz | 6 days | Secondary | Flavor |
Yeast
| Name | Lab | Attenuation | Temperature |
|---|---|---|---|
| Urkel (L28) | Imperial Yeast | 73% | 52°F - 58°F |
Notes
| Water Profile: Ca 50 | Mg 7 | Na 21 | SO4 55 | Cl 70 |
Download
| Download this recipe's BeerXML file |

PROCESS
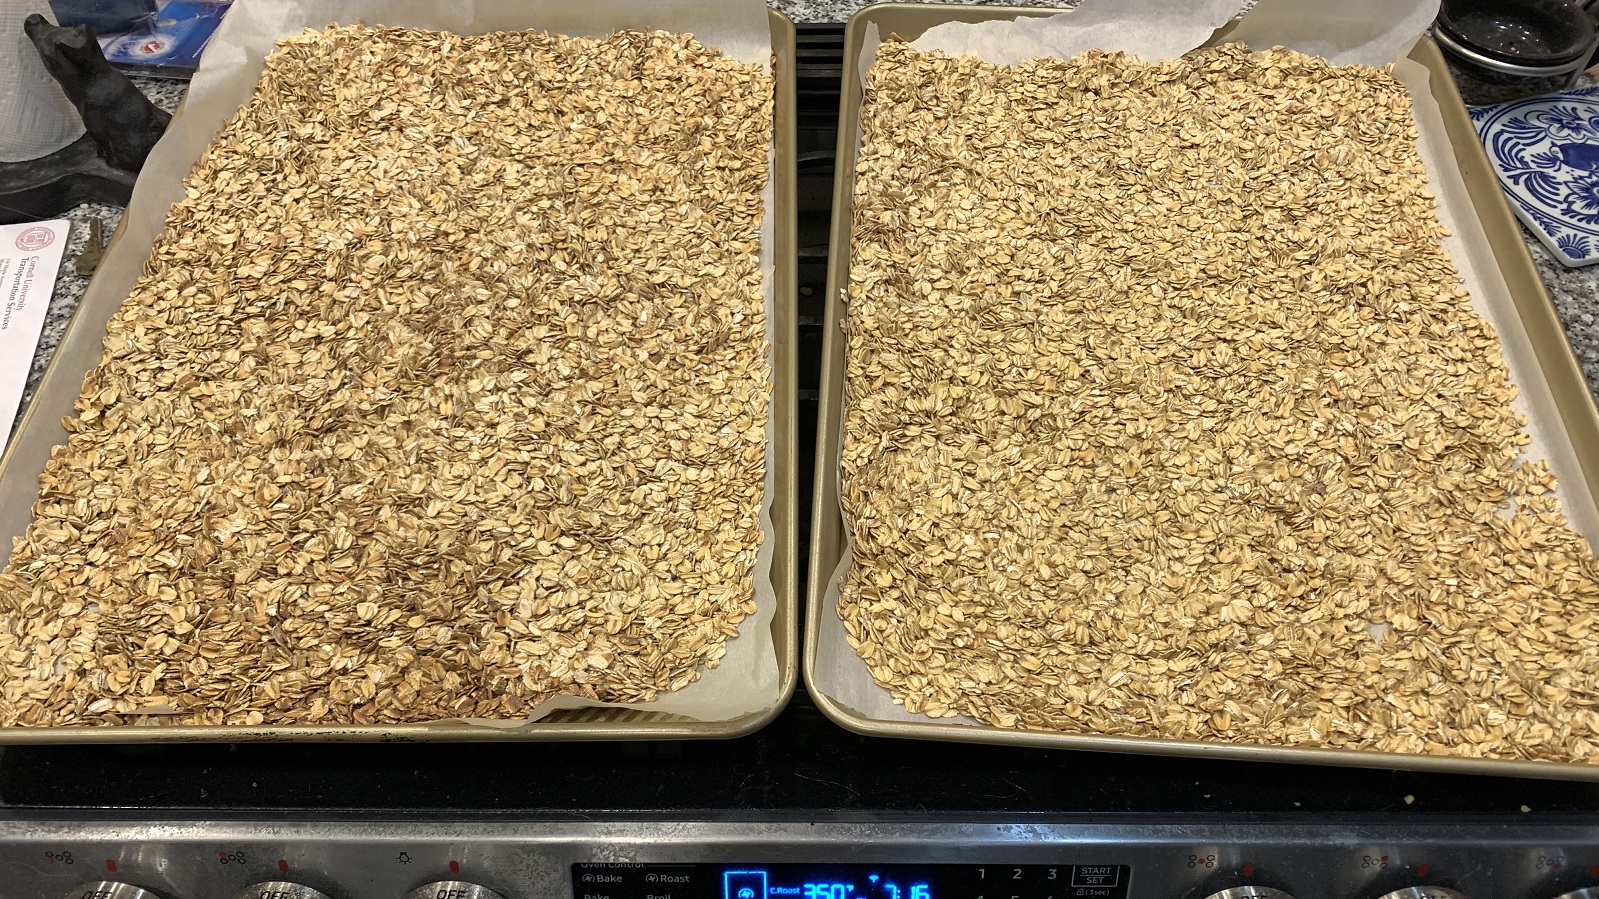
The night before brewing, I prepared the flaked oats by toasting them in my oven at 350°F/177°C for 30 minutes before moving them to an airtight container.
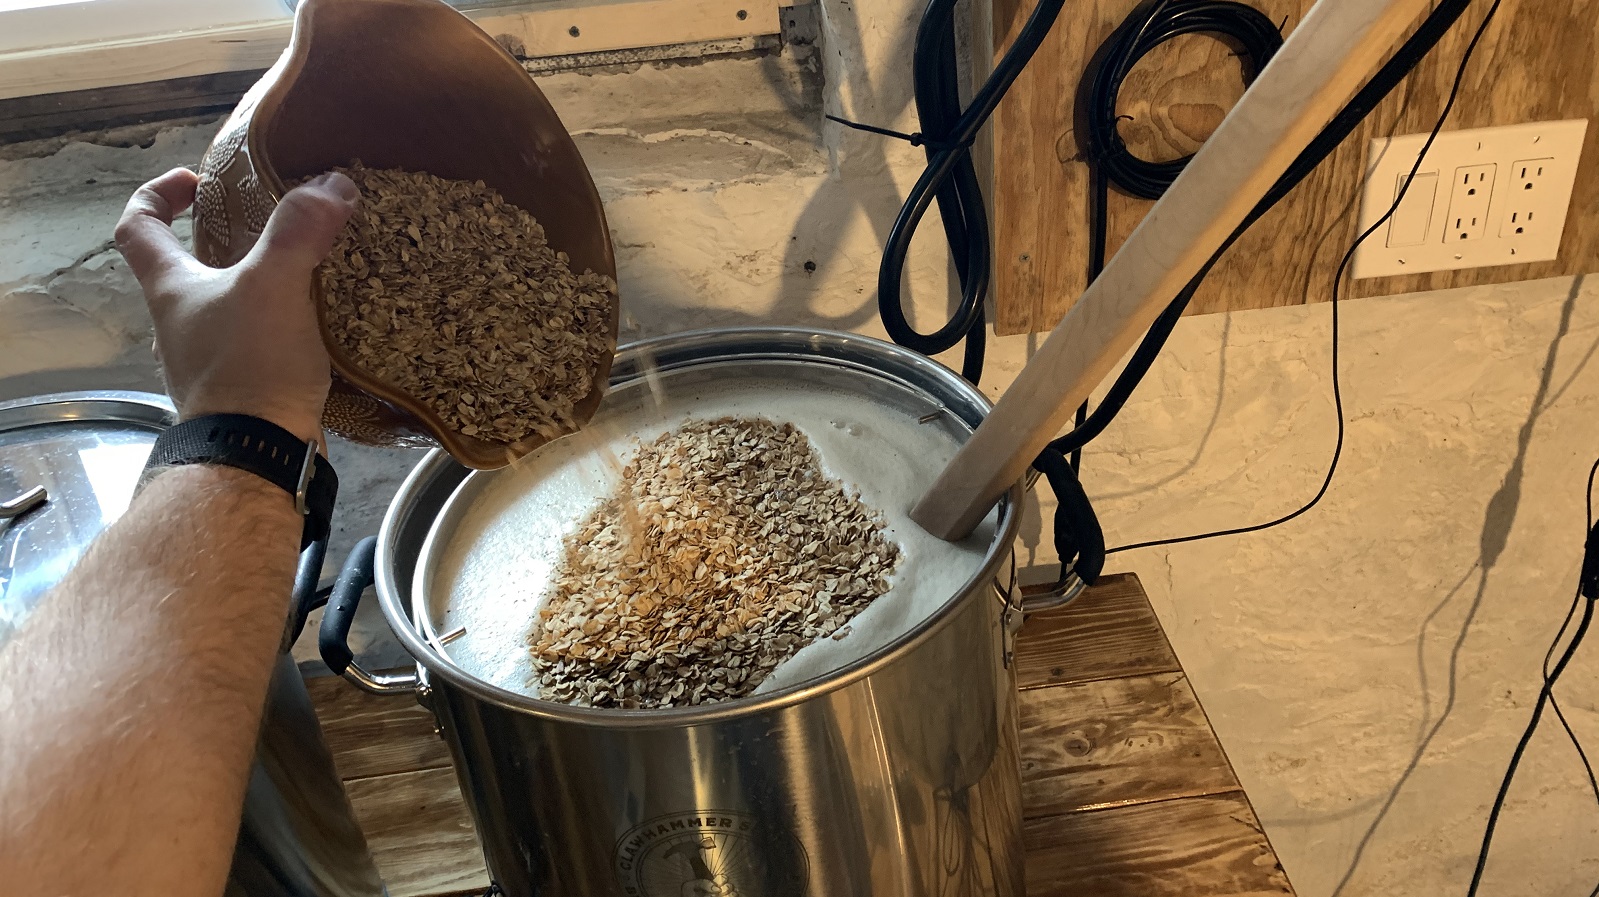
After collecting the strike water and adjusting it to my desired profile on brew day, I weighed out and milled the grain.
With the water appropriately heated, I stirred in the milled barley malt before adding the toasted flaked oats.
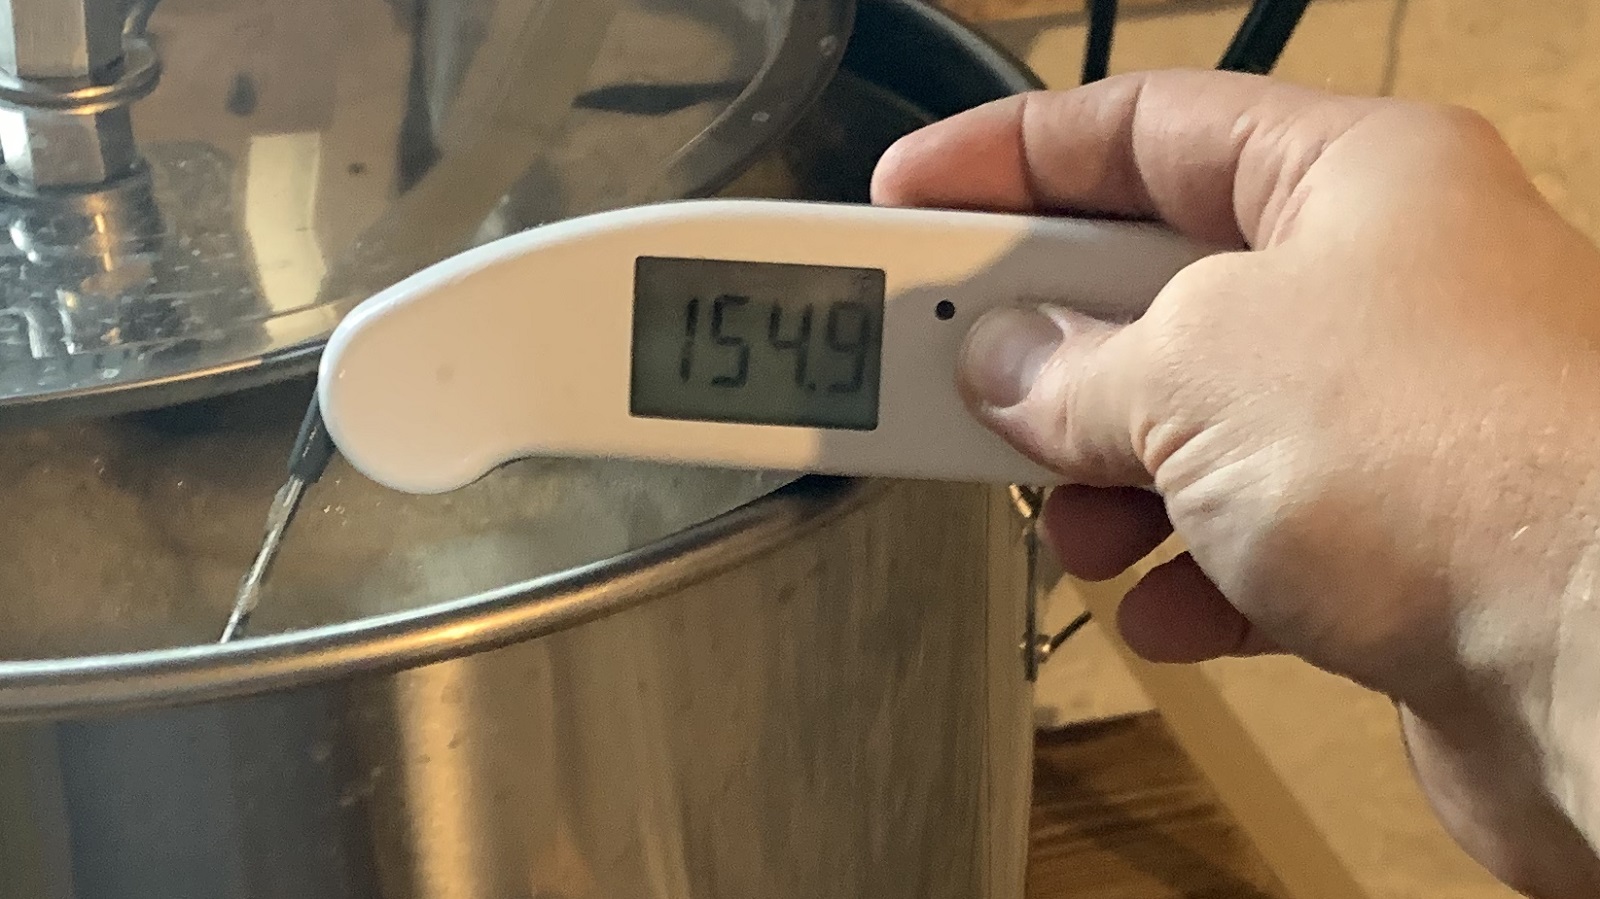
With the mash fully incorporated, I checked to make sure it was at my target temperature.
During the mash rest, I weighed out the single first wort hop addition.
When the 60 minute mash was complete, I removed the grain basket, added the hops, then brought the wort to a boil.
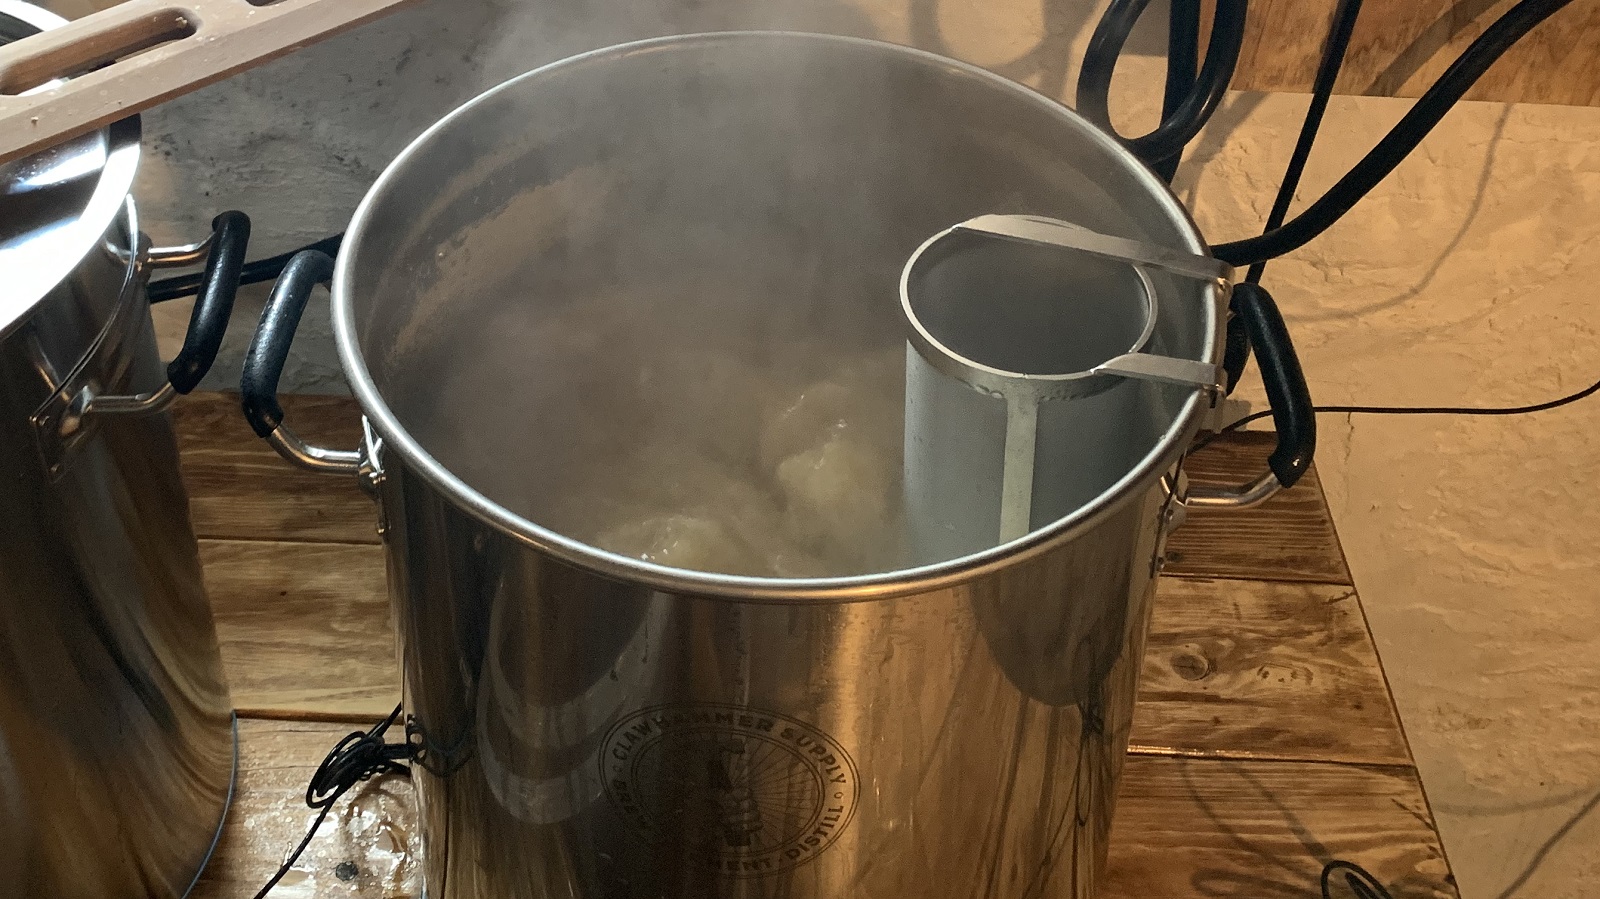
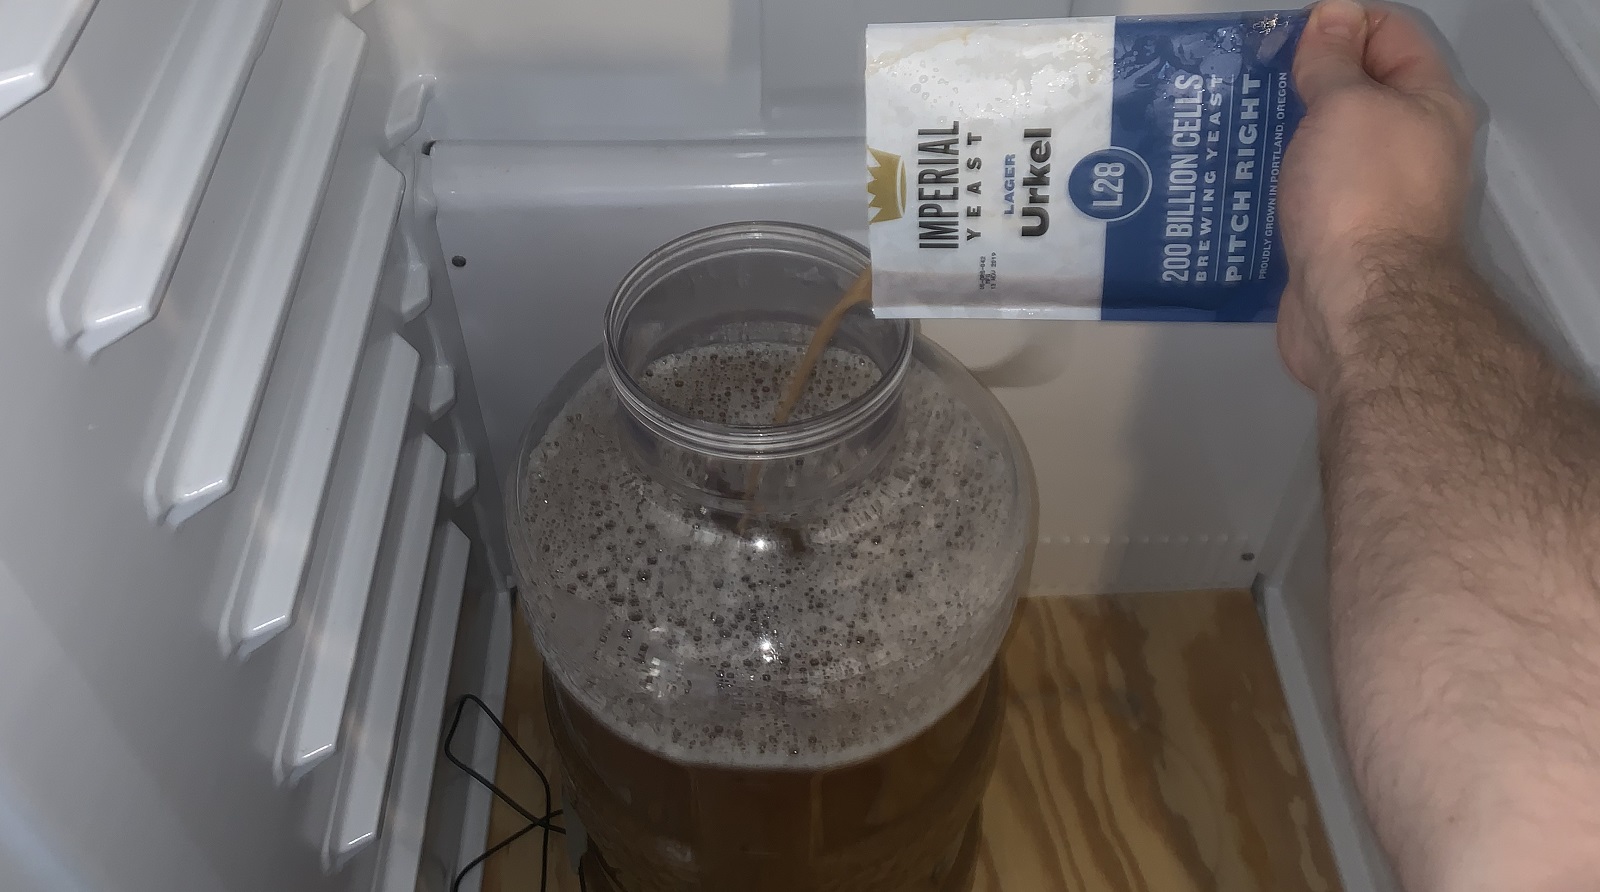
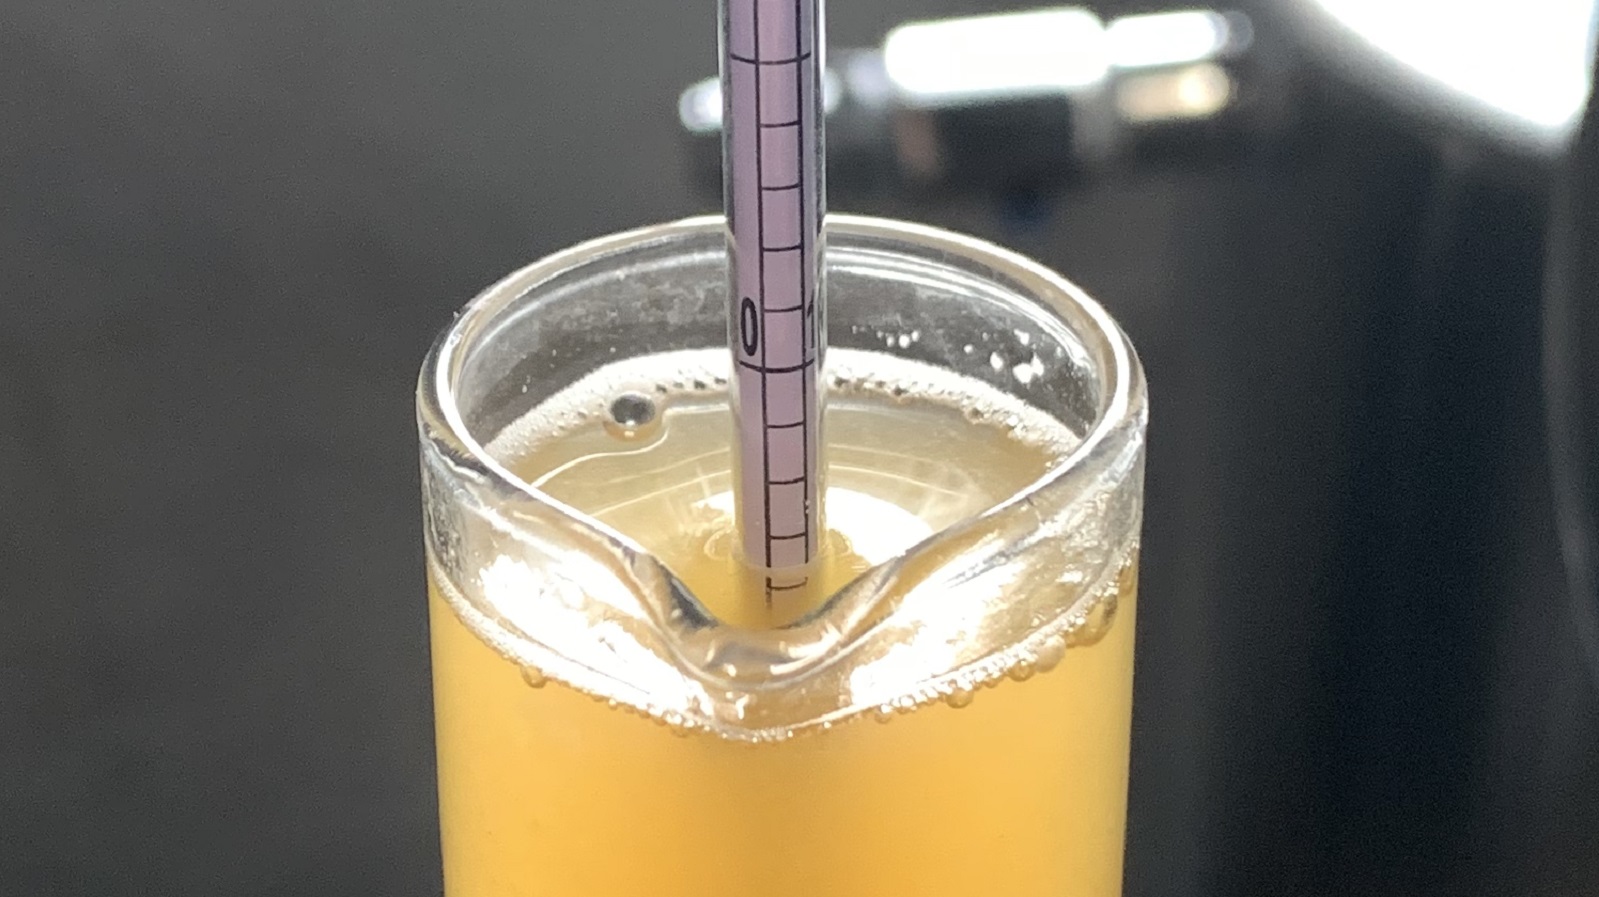
Following the 60 minute boil, I chilled the wort to my desired fermentation temperature of 65°F/18°C, took a hydrometer measurement showing it was at 1.063 OG, then racked it to a sanitized vessel before pitching a pouch of Imperial Yeast L28 Urkel.
With fermentation activity slowing down 4 days later, I prepared the adjuncts intended to impart the Stout-like flavors. First, I toasted the raw cacao nibs in my oven at 175°F/79°C for 5 minutes then raised the temperature to 250°F/121°C for an additional 10 minutes.
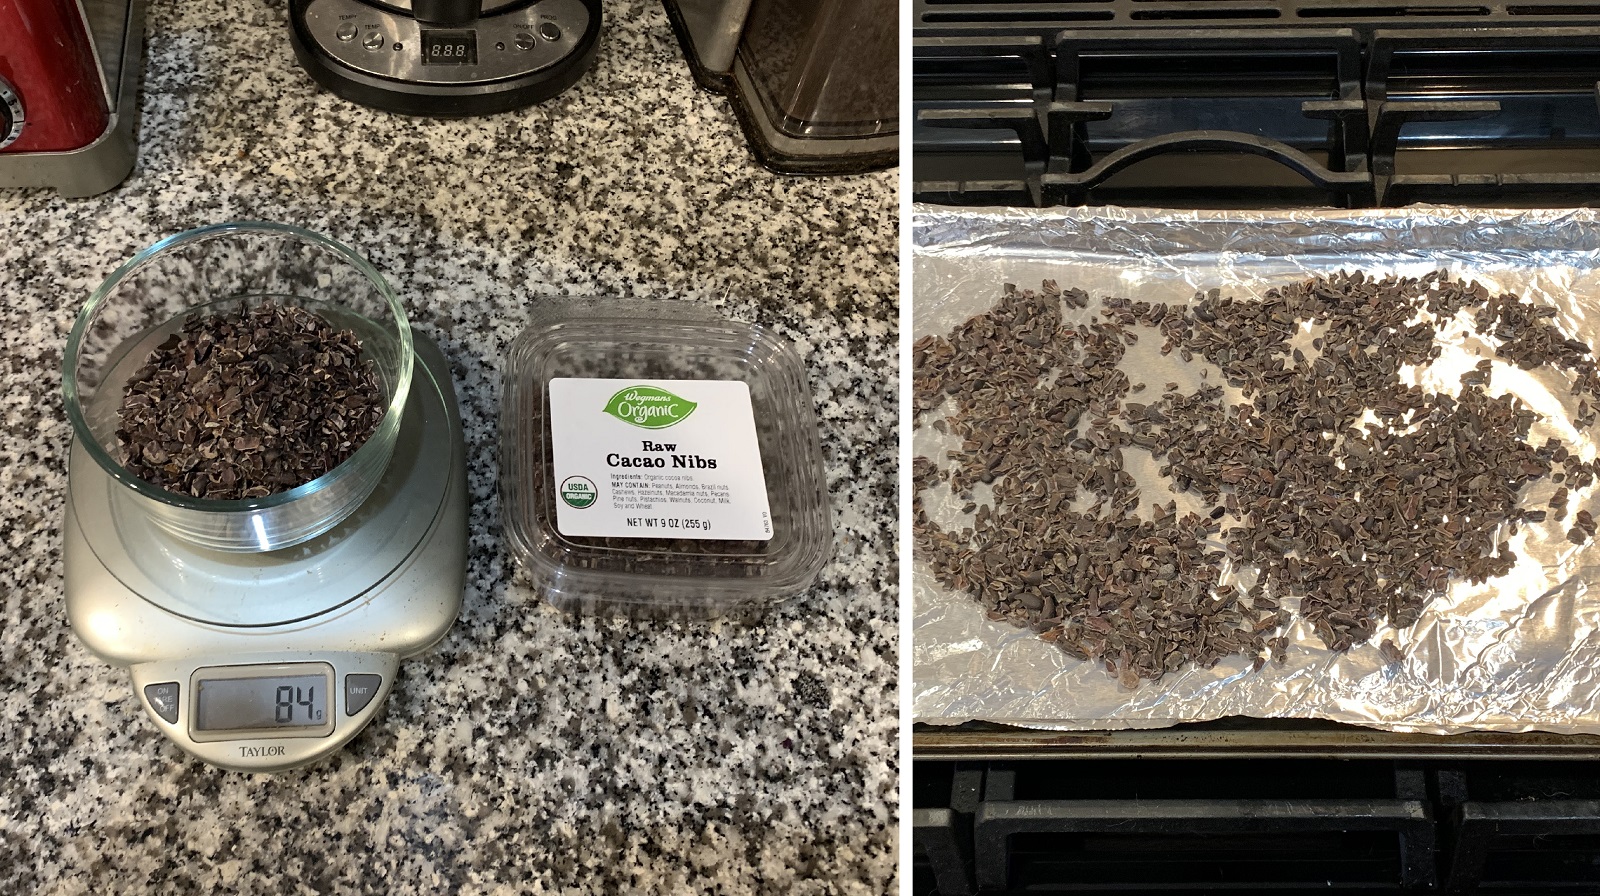
Next, I added the toasted nibs and whole coffee beans to a stainless mesh filter that was then gently placed in the beer.
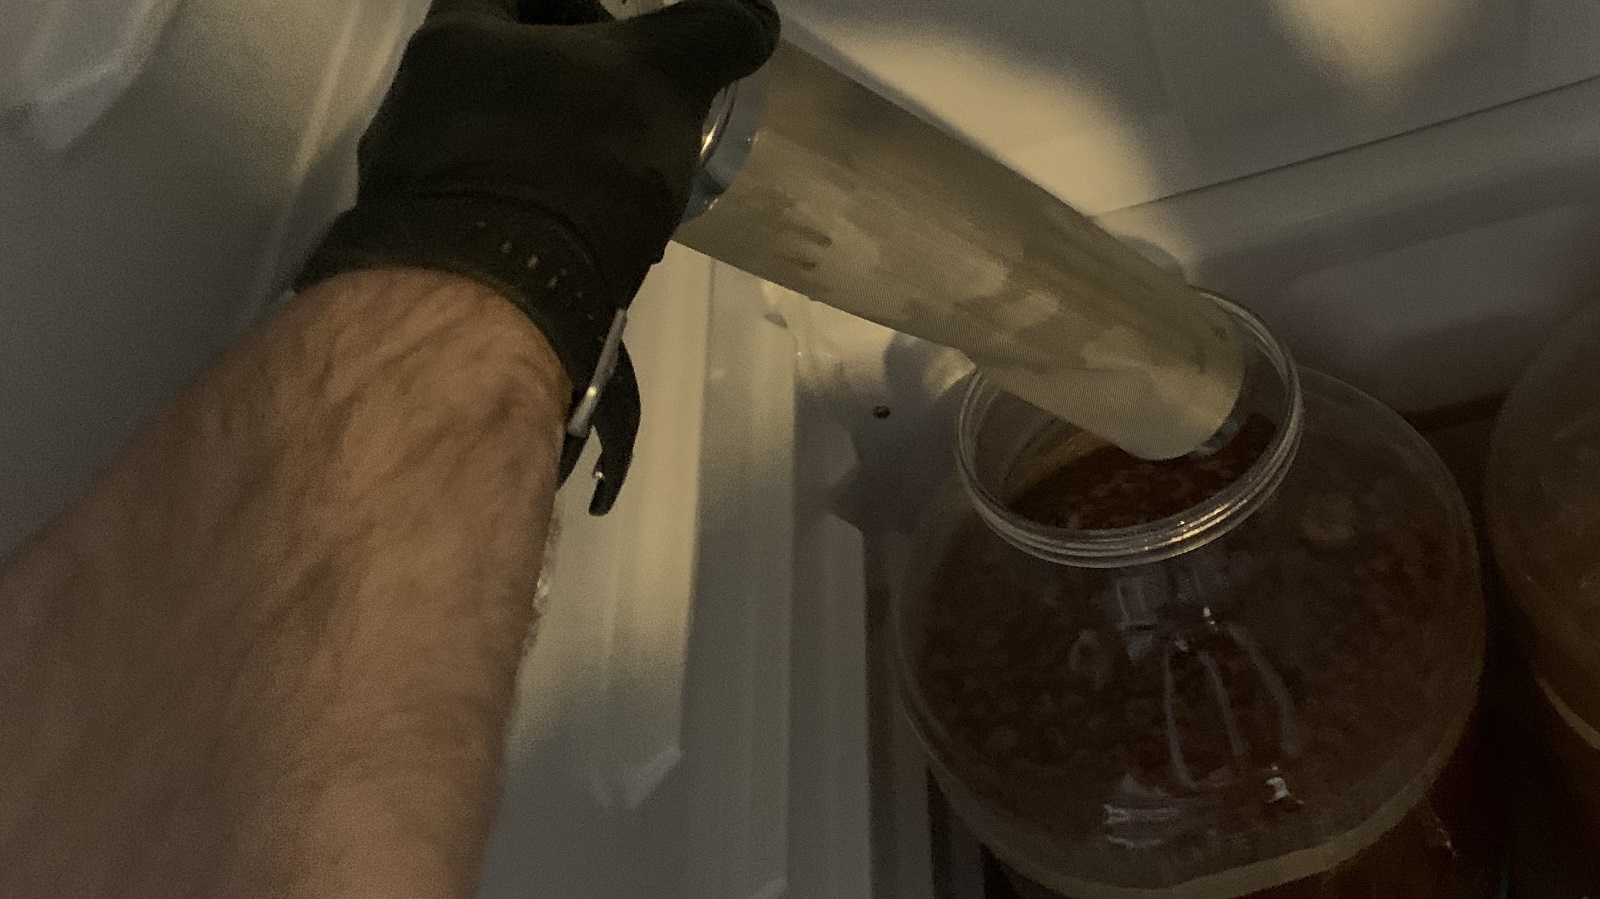
I let the cacao nibs and coffee marinate in the beer for 6 days, at which point I took a hydrometer measurement indicating FG had been reached.
At this point, I racked the beer to a sanitized kegged that was placed in my keezer and burst carbonated at 50 PSI overnight before I reduced the gas to serving pressure. After a few days of conditioning, the beer was ready to serve.


| IMPRESSIONS |
Over the last few years, I’ve tried a handful of commercial Golden Stout examples, the good ones being characterized primarily by balanced flavors of chocolate and coffee such that it gave the impression of a regular Stout. As a first attempt, I was pretty pleased with how Great Deceiver Golden Stout turned out, though I felt the coffee was a tad too pronounced. However, this faded a bit as the beer warmed in the glass, balancing out the dark chocolate and toasty malt notes, which was all held up by an exceptionally fluffy mouthfeel.
While it’s hard for me to say with any degree of certainty that I would have mistaken this for a Stout, when I served samples of Great Deceiver to tasters in opaque cups and asked them to guess the style, nearly all felt it was a Coffee Stout. To me, this suggests that pulling back a bit on the amount of coffee used might result in a more balanced Golden Stout.
On the whole, I am pleased with how this Golden Stout came out and enjoyed sipping on it, though for future batches, I’ll likely reduce the amount of coffee used and toss a small charge of Amber or Brown Malt into the grist to enhance the toasty flavors. Regardless, Great Deceiver Golden Stout did seem to deceive some tasters, and for that, I consider this batch a success.
If you have thoughts about this recipe or experience making something similar, please feel free to share in the comments section below!
Support Brülosophy In Style!

All designs are available in various colors and sizes on Amazon!
Follow Brülosophy on:
FACEBOOK | TWITTER | INSTAGRAM

If you enjoy this stuff and feel compelled to support Brulosophy.com, please check out the Support page for details on how you can very easily do so. Thanks!


40 thoughts on “Brü It Yourself | Great Deceiver Golden Stout”
Very interesting. The grain/hops/flavourings bill seem to be missing however.
Roger that! Plugin issues /eyeroll
The grain bill and hop addition details are missing. Very interesting article and attempt!
fxd
Thanks! Looking forward to trying this out – will be fun to experiment with…
Totally. Report your results back!
Damn. It’s 7 a.m. and now I’m thirsty for this beer. Challenge accepted.
Ha! Samesies. If it’s any consolation, this is definitely a good breakfast beer.
I’ve made a couple now, even one on a commercial scale and they’ve turned out great. Try adding some smoked malt to the bill and some lactose at the end for mouthfeel. I’ve also used very small amounts of your traditional “Stout” grain without too much increase to color.
Yeah I’ve seen people report good results with lactose and smoked malt too. I was more interested in limiting the amount of ingredients because I’m a simple man. Plus, this beer had mouthfeel for days without the lactose!
Thanks Phil! Definitely want to brew this. Would you drop the coffee beans to 1oz?
I’d definitely consider it! This was a very coffee-forward beer. I think what I’d do next time around is a bit less coffee, maybe 1-1.5 oz, and a bit more cacao.
Excellent write up, I do have some questions in regards to fermentation and when adding the adjuncts. You had mentioned when fermentation slowed you added adjuncts for 6 days, was this during fermentation or was this added when you reached your FG? How long did fermentation take place for? I want to try this and want to gauge the start to finish timeframe (I know results vary) but a ballpark estimate would be great!
I’m always looking for ways to minimize oxygen exposure, so to that end I waited until I could see limited airlock activity to add the adjuncts. In this case, it was 4 days after pitching yeast that I added the coffee/cacao. I did this because I knew that terminal gravity had not yet been reached (as evidenced by airlock movement) so there was still at least some yeast that could potentially scrub some of the oxygen while working on those last few points of fermentables.
I’d like to stress that your mileage may vary here. Don’t take this timeline as *the* timeline to follow. If you want to follow this method I’d suggest that you monitor fermentation and when it seems like things are slowing down, that’s when you want to make your additions.
A brewery here in Brazil brewed one with cold extracted coffee (cold brew) and lots of maltodextrins to give a full mouthfeel, the result was very good.
Sounds excellent.
What roast were the coffee beans?
Dark roast Sumatran. Dee fucking licious.
Copper Horse Coffee Roasters! So good.
http://www.copperhorsecoffee.com
Thanks!
But why a lager yeast and not a British ale yeast?
I’ve used Urkel at both cool and warm fermentation temperatures and it is always super clean. Because I wanted to malt flavors to shine and ensure a clean fermentation profile, I went with it.
I was wondering the same thing
What made you want to toast the oats? I’ve heard of people doing that but never knew why…
Toasting the oats can add depth to the flavor profile and can be likened to eating bread that’s been toasted vs not toasted. Here my purpose was to enhance all of the toasted qualities of grain that I possibly could, so I decided to toast the oats!
does toasting the oats also reduce the chance of a stuck mash caused by the oats themselves?
That’s an interesting point. I’d say it might be possible but I’d also wager that any difference on this scale would likely be small unless using really big proportions of oats or other grain without husks. It’s also moot if utilizing BIAB like I am.
I wonder if a very chocolatey/aromatic Vietnamese arabica coffee would work especially well with this as opposed to western style sumatra (I’m thinking something like Trung Nguyen Creative 3 for example not the Cafe Du Monde with chicory that used a lot of Vietnamese restaurants in N. America). Just an idea if you make this again and want to experiment.
Interesting idea. It’s been a while since I’ve looked into these varieties. I’m not sure if the potentially increased bitterness that tends to come with arabica coffee is worth it, but I like where your head is at!
Maybe with the coffee beans just leave in for 2 days, I find any longer and you can get a bit of a harsh bitterness coming through, nibs should be fine for 6 though.
Did you use roasted coffee beans or green ones?
I have dabbled i roasting my own beans but these came from a local craft roaster. I buy all my coffee from them these days because they’re amazing. The beans for this beer came from Sumatra.
http://www.copperhorsecoffee.com
I made this golden stout with slight modifications. I added dextrose in the last 5 mins of the boil (1lb I think – will have to check my notes). Also dialed the coffee back to 1.5 oz and the cacao up to 4oz (because I can be lazy, and that’s what the amount in the bag from theLHBS). The main difference is that I put it on nitro. It has been a total hit. I am probably going to brew more asap because I enjoy it that much and so did my friends who tried it. Thank you for this recipe!
That sounds amazing! And now that I’ve made it once, I agree; I would have done similar adjustments with the adjuncts the second time around. Strong work! Makes me want to make another one and make use of my dust collecting nitro faucet.
Hi Phil an Beard, quick question for you both based on the comments above..
I’ve followed your recipie (and thanks for posting!) but had a question about the coffee bean addition.
Lot’s of the posts I’ve read on different forums suggest that 4oz at 2 days in 5 GL works well.
I was plannign to use 1.5oz as above for 6 days.
If you were to take a guess, is 6 days right for that quantity of beans?
I’m worried that leaving them in their for 6 days might extract green pepper flavors?
I would assume that neither of you had that issue but wanted to check 🙂
@The Beerd Beard, did you think that upping the nibs and dropping the coffee bean addition worked for you?
Thanks!
In my experience with coffee beers, longer exposure time tends to lead to harsher/bitter coffee flavors, though 1.5 oz may not be too long. I’d recommend adding the amount of coffee you want to use and sampling after a few days; if you like then you’re done! If you want more coffee flavor let it sit a bit longer.
Thank you for this, I’ve always wanted to make one for wife who is afraid of stouts cause they are black. Question, how much did the nibs and beans darken the beer?
It’s hard to say for sure about the coffee but I imagine not a whole lot. I haven’t noticed any color differences from using nibs like this either. It’s probably negligible, or at least very small, for both.
As I said at the end of the article, I’d recommend using a bit less coffee and something like Amber or Brown Malt to get some more stout-like flavors.
Drinking this today, it’s great! I brewed a 3 gallon batch and only added .7# of coffee beans. Totally reminds me of a beer from South Carolina called World Court by Legal Remedy. 👍
Did you add the nibs and coffee beans prior to cold crashing? Like around 68°? I may have goofed and put the nibs and vanilla beans in after crashing. I’m getting zero flavor from them after 6 days in. I was going to add the coffee beans later. Thinking of letting the beer warm up to 68° for a few days to see what happens. I’ll either ruin this somewhat flavorless beer or fix it.