
When a homebrewer hits the web in search of ways to make better beer, it’s basically guaranteed they’ll discover numerous recommendations to control fermentation temperatures and make yeast starters. Despite a few xBmt results failing to support the seemingly obvious importance of these variables, all of us contributors still ferment our beer in temp controlled chambers and usually propagate yeast in a starter prior to pitching, both of which involve certain brewery “upgrades,” likely the most popular homebrewers make as they progress in the hobby. I’ll be honest, reading about chamber and stir plate builds, as convenient as it may be for the newer brewer, has gotten boring to me, a little played out. Rather, I’m curious what upgrades brewers have made, large or small, that have significantly impacted their brewing in a positive way, not necessarily the quality of the beer they make, but the quality of their experience.
For this edition of Brü’s Views, I asked the guys to share what their favorite brewing upgrade has been, whether a piece of gear or the integration of a new idea. I also posed the question to a homebrewer known for experimenting with odd ingredients, author and recent podcast host, Drew Beechum!
On Favorite Brewing Upgrades
| DREW BEECHUM |
Marshall asked me this question while I was stuck commuting in LA traffic. I had plenty of time to debate over my favorite brew upgrade. My first boil kettle, the one I drove about 100 miles to a homebrew store to buy because they made better gear than my local? That pot survived twelve years of brewing until I finally upgraded after my first book was published.
How about my first chest freezer that freed me from the tyranny of bottling? If not for that frozen coffin parked in the back of my bachelor pad dining room (must be a bachelor if a chest freezer is a dining room fixture), I’d have given up on homebrewing ages ago because ain’t nobody got time to bottle.
The heat stick that speedily brought wort to a boil? The wort chiller that quickly undid the heat stick’s work? The pump that meant less huffing and puffing and strained muscles? The giant pool of kegs (just under 30)? The stir plate, the pressure cooker, the mill, the vacuum sealer, the oxygen rig, on and on and on. I just walked out into my garage and again realized… I might just have a problem. Odds are good you might too.
What, then, is my favorite brewing upgrade?
Magnets.
Not fancy rare earth magnets scavenged from defunct hard drives to create stir plates. Just plain old refrigerator magnets.
Come again? How is a set of simple refrigerator magnets my favorite upgrade? It’s less about the magnets and more about, well, you’ll see. First, let us lay our scene, then the players, and finally the moral.
Like many brew obsessives, I quickly went from Extract with Steeping Grains to brewing the Everlasting Holy All-Grain. This was in the pre-small batch revolution days, so I was juggling the gear and materials of a 5.5 gallon brew day in my tiny apartment kitchen (again, total bachelor). I was also flipping out, losing it. I was not in my happy Zen place as a brewer.
It was the magnets that rescued me. I manually fly sparged at the time– filled up a quart pitcher then poured the pitcher into the mash tun to replace the liquor draining into the boil kettle. In my scattered mess of a mind, I kept losing tracking of how much sparge water I’d already added. I kept forgetting to bring a notebook and I wasn’t about to risk an insanely expensive laptop in a sopping wet kitchen.
Needing a solution, I spied a collection of magnets on my fridge door, easily at hand. I turned to my “day job” training as a certified computer nerd to count pitchers. That’s right, I turned my fridge magnets into a set of bit flags. Each magnet represented a power of 2 when slid up and a 0 when slid down. I could quickly count each pitcher going into the mash tun. My original setup included four magnets, so I could count fifteen additions, more than enough for my purposes.

Now you know the players and the scene– a frantic newbie brewer turning to a quartet of lowly magnets to restore my brewing calm. Those magnets taught me the lesson I needed most, to use what I had on hand and mind to tackle the situation. My other majorly beloved toys– that whole litany above or the yeasts or my processes may fail me, but my skull marble can always figure a way back to great beer. Many of my greatest beers come from adjusting to mishaps and mistakes, so thank you magnets!
| MALCOLM |
Next to kegging, one of my favorite and oft used doodads the wonderful hunk of plastic known as the The Carbonater, a small and inexpensive plastic cap that allows for quick burst carbing of beer in a standard 2 liter bottle. I first came across the carbonator cap back in early 2000’s while stationed in Hawaii, thinking at first it was a novelty. At the 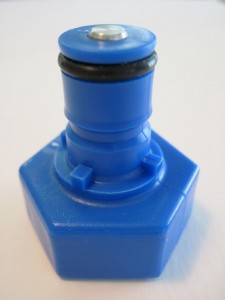 time, most of my beers were quickly kegged and ready to drink within a few hours, so I didn’t see the need for such a tool. Fast forward a few years and my beer “cellar” was filling up with higher gravity beers – many of which benefited from long term bulk storage and aging – barleywines, old ales, imperial stouts, and of course various sour and brettanomyces beers. Being a member of a few local homebrewing clubs, I am lucky enough to have access to some very talented and accomplished brewers, some of which specialize in the aforementioned styles. The carb caps allow for me to quickly transfer a relatively small sample of aging beer to a seltzer bottle (for example), chill if desired, carbonate it in minutes, and to have ready for evaluation
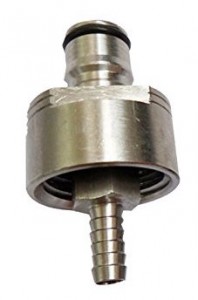 by myself and others. I love this little thing. Certainly I could evaluate a beer warm and flat but this allows for a more accurate assessment.
But wait, there’s more!
If you keg most of your beer but want to bring some to a bottle share, party, or tailgate, BLAMO, the carbonator cap is the perfect solution! Rather than use a growler, which we all know leads to the inevitable loss of CO2 and flat beer, the carbonator cap allows you to reapply the desired level of CO2 so that your beer as fizzy as you’d like. I might bring 4 or 5 different beers to an event, some of which have a good number of people also sharing beers, meaning occasionally one of mine will go untouched for awhile. No biggie! Since it’s sitting at the proper pressure and protected by a blanket of CO2, I can trust it’ll be good when ready to be served. What if an event is an all day affair, like a family picnic or homebrew conference? All you have to do is bring along a cheap mini CO2 keg charger to top it after serving.
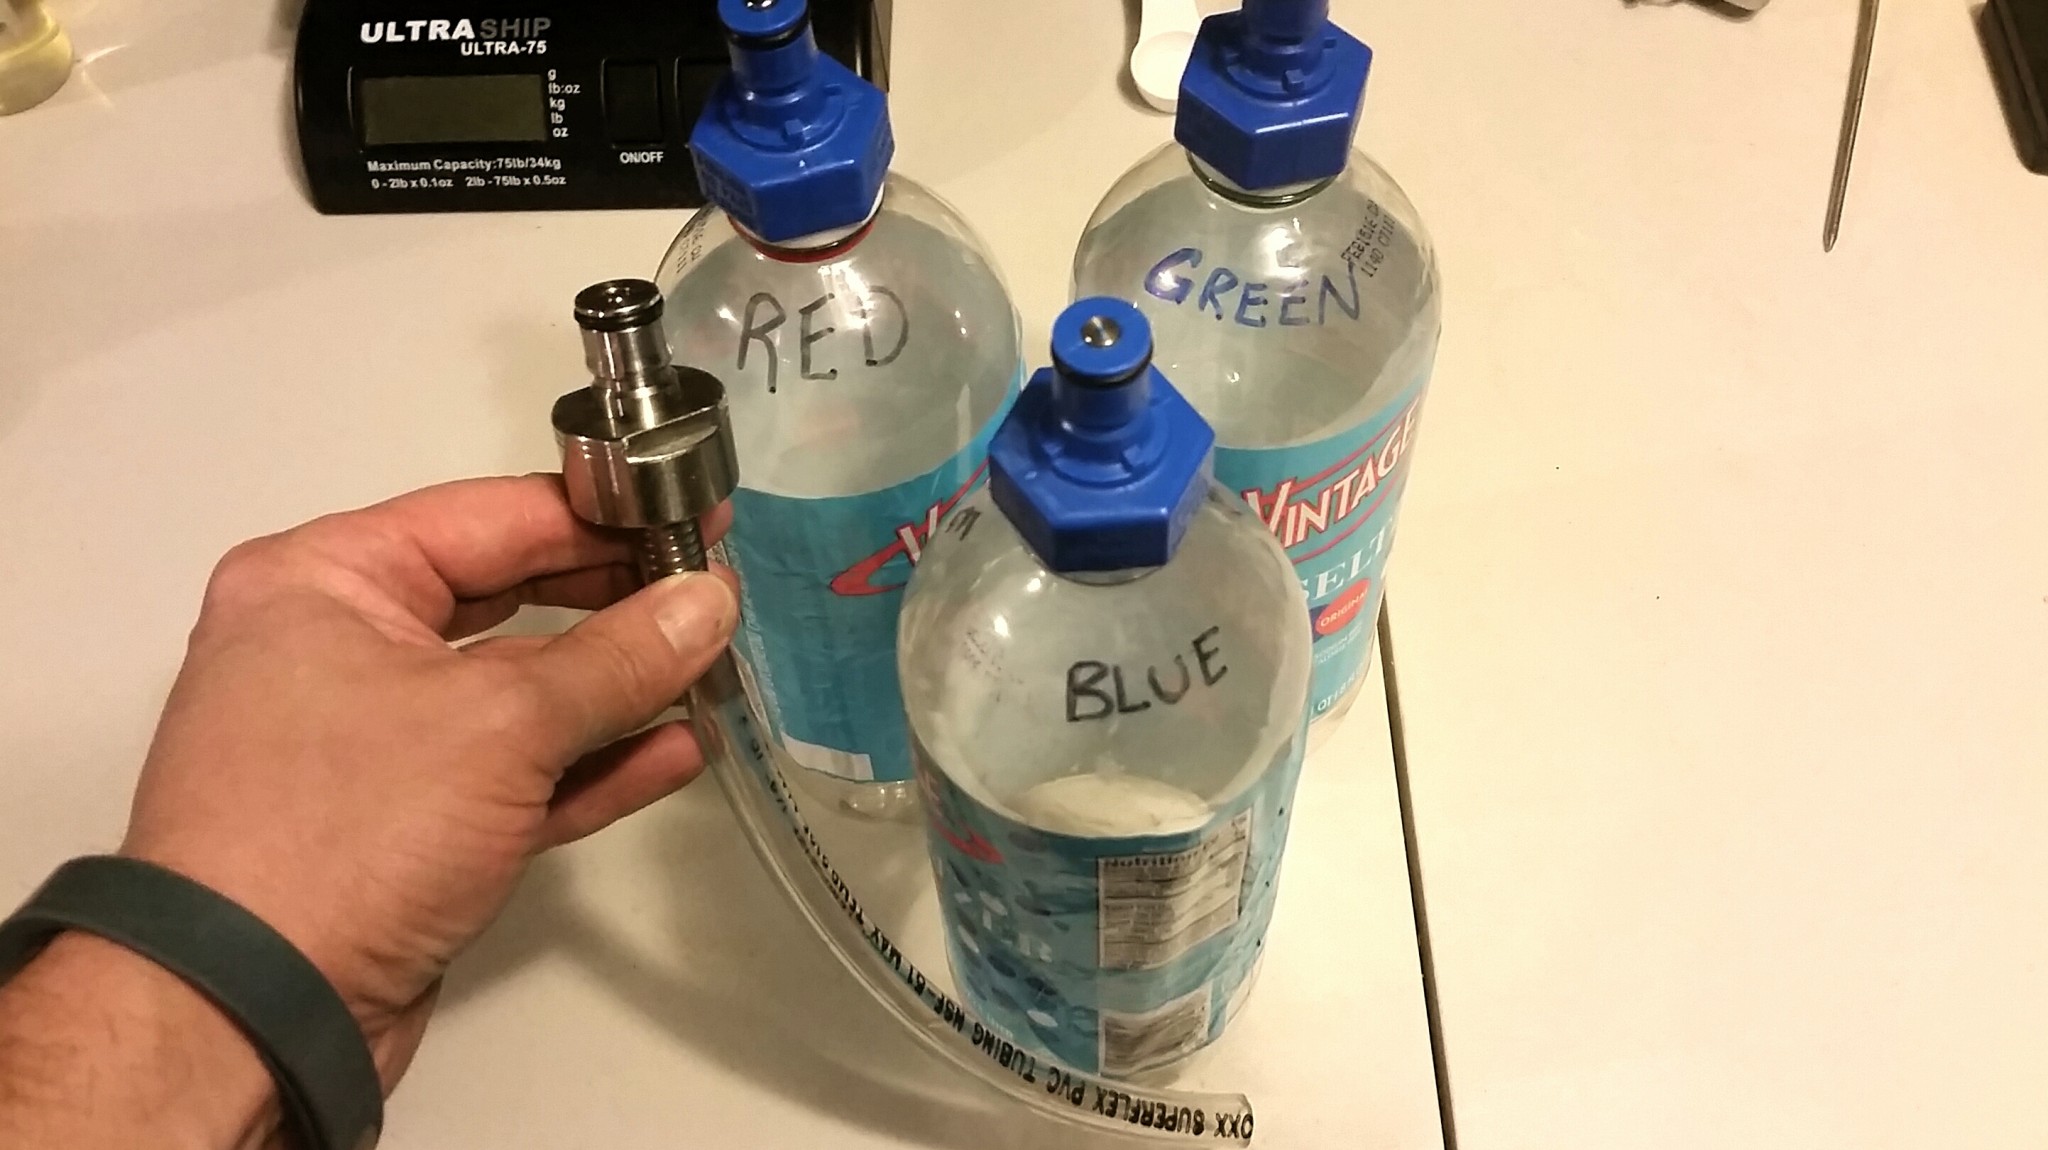
Lastly, this handy little tool is utilized almost everytime I host a tasting for an xBmt. I mark the bottles Red, Blue, Green, fill them up and away I go. It allows me to keep the pressure fairly contant from the first panelists to the last.
For me, this relatively inexpensive gadget is the shite. It makes for easy sampling and tracking of aging beers, as well as for worry free sharing of beers on tap that are ready to serve.
| MATT |
As a homebrewer in Florida, nothing opened up my brewing potential like being able to control my fermentation temperature. Since I was interested in brewing more than just ester bombs and phenol-filled hefeweizens and funky saisons, and I really didn’t love the idea of going broke by keeping my air conditioning set to 72˚F/22˚C, I realized I needed to find a way to control the environmental temperature in my yeast-only day spa.
So, my favorite brewing upgrade has always been my temperature controller. I started off trying to keep beers in a cool corner of my house, occasionally surrounding them with a few frozen 2 liter bottles of water, but that left me with wildly fluctuating temperatures and a wet floor. I moved on to an insulated cooler bag, which helped those frozen water bottles last a couple days longer, but it wasn’t as consistent or controlled as I desired. While I eventually ditched fermenting in “swamp bag,” I found it makes a great keg holder at festivals, picnics, and impromptu gatherings around house fires, as it is light, folds up easy, and cleans out quick.
After trying various DIY devices and half measures, I finally hit the right sale, bit the bullet and bought a 10 cubic foot deep freeze and a Johnson controller. I could now not only dial in yeast and style specific temps, but it could be adjusted to aid fermentation stages, lager beers and even serve as a picnic-tap powered keezer. Then I bought a second, larger keezer and outfitted that one too… I think most of you know where this ends up.
| RAY |
Many things have improved my brew day– my Monster Mill MM3 puts my old 2-roller mill to shame, my JaDeD Brewing Hydra immersion chiller was a massive improvement over my 25 ft. copper coil, and moving to banjo burners in the garage got me out of the kitchen. But nothing had nearly the impact as when I finally caved and invested in a kegging setup.
It’s not that I hate bottling… wait… I do hate bottling! And despite my deference to the bottling audience on this, I just can’t do it. I understand some don’t seem to have a problem with bottling, claiming they enjoy the ritualistic process, the portability factor, and the way bottles more easily allow for long term storage of beer. Whatever benefits bottling may have, they don’t really apply to the beer I make and drink most often.
Ultimately, kegging accelerated my brewing and, in turn, my development as a brewer. Rather than fermentation time plus an extra week to be absolutely-super-duper sure the yeast was done and I wasn’t going to make bottle bombs, plus 2-3 weeks in the closet to carbonate, plus a few days in the fridge to settle and clear, kegging allows me to brew, ferment, package, and drink in as little as 2 to 3 weeks, even delicious lagers. Plus, it makes drinking so much easier!
Speed and ease– those are the features, but what’s the benefit?
Kegging made me a better brewer
I can iterate faster (e.g., 9 batches of slightly tweaked MACC IPA in a year) and see the results much more quickly. I can also carbonate my beer with much better precision and in far less time.
Kegging made me a more frequent brewer
Because kegging is so fast compared to bottling, I brew a lot more often, and beer doesn’t sit in the fermenter while I procrastinate. This comes into play even more when packaging larger volumes, as bottling 10 gallons takes nearly double the time compared to a 5 gallon batch, while kegging a full 20 gallons, which I often do, adds maybe 20 minutes to the 5 gallon baseline process.
Kegging made me a better sharer of beer
I find growlers to be considerably easier to transport to events for a couple reasons– their larger size means fewer total containers to take to the event and remember to bring home, and a growler full of perfectly clear beer requires no lessons on slurry settling or proper pouring technique. Simply open, pour, and enjoy!
Kegging made me a better exBEERimenter
Switching to kegging really improved my ability to control certain variables and, in my opinion, made triangle tests much more feasible. As most bottlers can likely relate with, multiple pours from a single bottle usually results in samples with varying amounts of yeast in suspension, while this isn’t an issue with beer served from a keg. I can serve a 20 oz pint to my neighbor or a 2 oz taster to a participant and trust the beer will be consistent.
However, what really puts kegging over the top for me is three simple letters: I – P – A. While I’ve come to the belief most beer styles are best served fresh, none embody this opinion more than IPA. I’ve never experienced a truly terrific IPA that was bottle conditioned, and I can only assume the long duration spent at warmer temperatures required for natural carbonation leads to a dramatic fade of hop flavor and aroma, which I’ve experienced to be significantly reduced when force carbonating and keeping the beer stored cold at all times. It’s for all of these reasons that kegging is my favorite brewing upgrade.
| GREG |
It was roughly two years ago when my apartment manager suddenly became quite concerned about my outdoor propane brewing. She had somehow convinced herself that brewing was extremely dangerous and the children who lived in the complex were going to get injured. To set her mind at ease (and not get evicted) I very quickly transitioned to indoor electric brewing. I didn’t mind abandoning propane, to be honest, I’d always been intrigued by the precision of electric heat and was eager to overcome the technical challenges.
One of the first electric contraptions I built was a simple heat stick, which is just an electric water heater element attached to a rod of some sort that can safely be lowered into liquid. Instructions for building a heat stick can easily be found online, so I chose a build where all the parts could be purchased at my local home depot. Behold, my DIY heat stick!
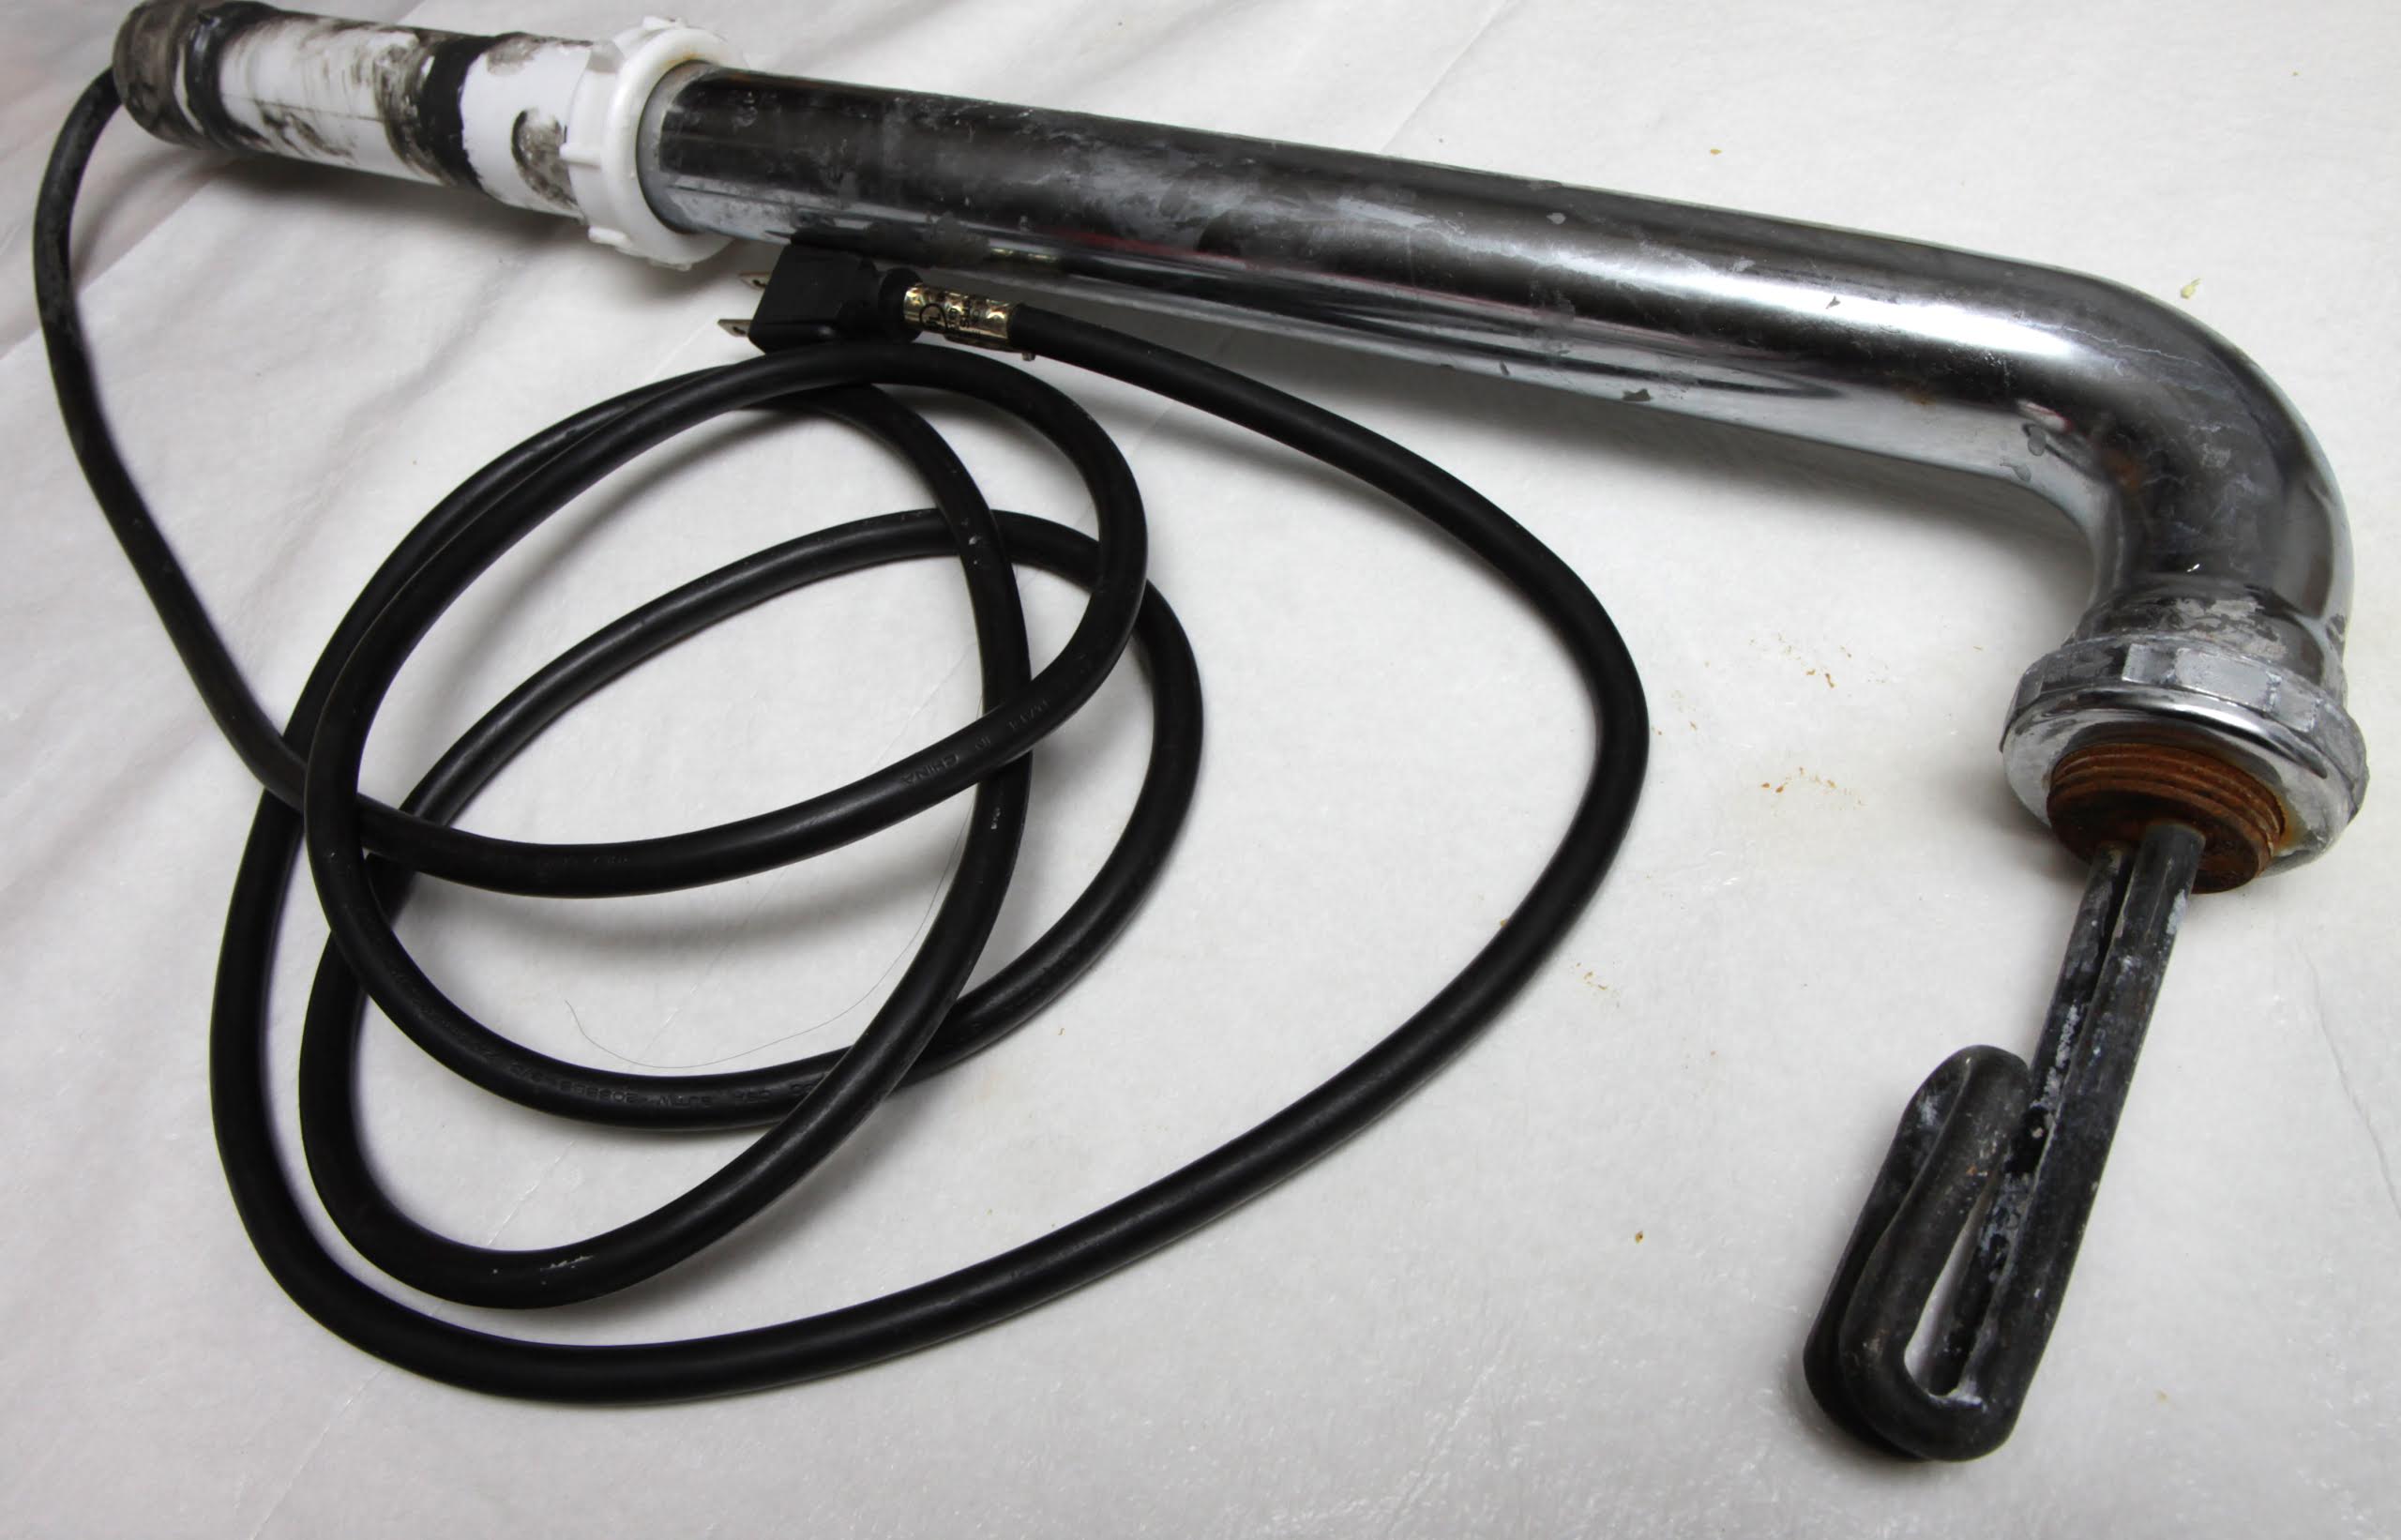
It kinda sucked. The water element base rusted to hell, JB-Weld filling made it completely unserviceable, and really, it doesn’t look particularly safe. Plus, it ended up costing quite a bit more than I expected. Sure, it worked, but it didn’t exactly inspire a lot of confidence. For years, this type of heat stick was the go-to electric brewing assist device, but thankfully Bobby from Brew Hardware began tinkering with a better solution. Holy hell, did he succeed!
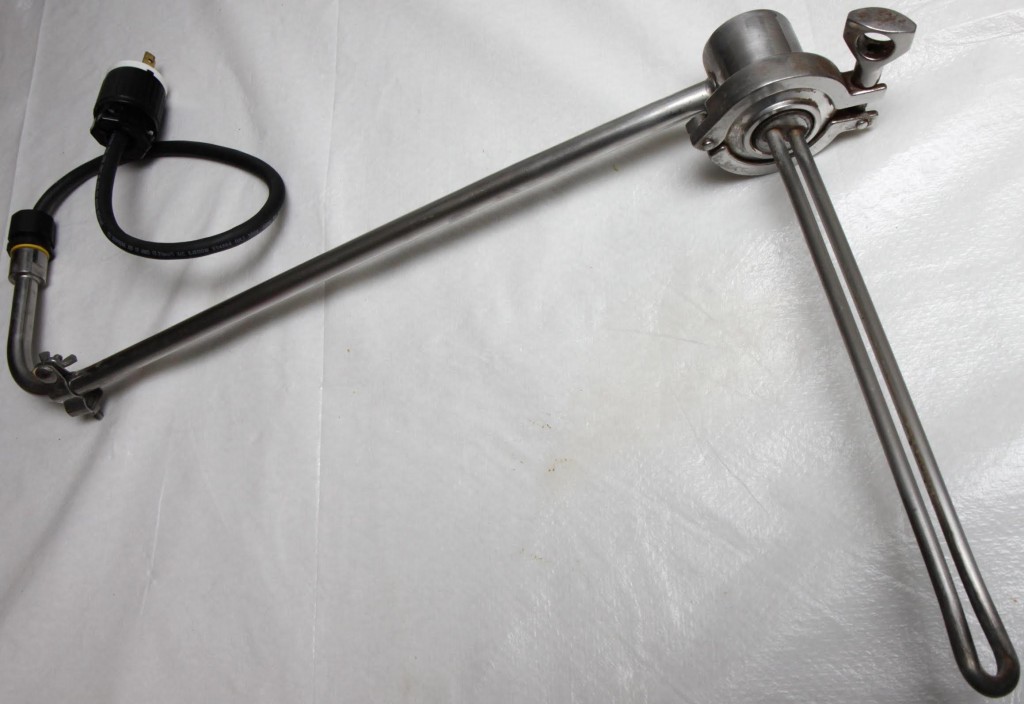
The HotRod is simply the perfect heat stick, in my opinion. It fixed every problem with my DIY attempt and then some. It’s pure stainless steel and therefore entirely food grade. The element can be removed via tri-clover clamp, making installation and inspection a breeze. The housing is also very well grounded, much improving the safety factor. And the price is pretty reasonable, especially considering how much my inferior homemade heat stick cost.
Even cooler, Bobby made an entire line of water heater elements with stainless bases to use with the HotRod or any other electric brewing application. In other words, no more rusted heating elements!!! Rust was a serious problem with all of my store bought heating elements, so I was thrilled when the HotRod became available. The wide variety means I can run a 220V element at 120V and have a super ultra low watt density element. Adios scorched wort. I’ve even dry fired my HotRod multiple times and the element has yet to show any signs of damage.
Suffice to say, I really like my HotRod, so much that I currently own three, which I’ve used to heat my HLT, boil wort, heat PBW solution in buckets, maintain the temperature in a HERMS rig, and even sous vide a steak. This isn’t a product for everyone, but if a heat stick has been on your mind, I can’t recommend Brew Hardware’s HotRod more, as it will likely save you time, trouble, and maybe even a little money.
| MARSHALL |
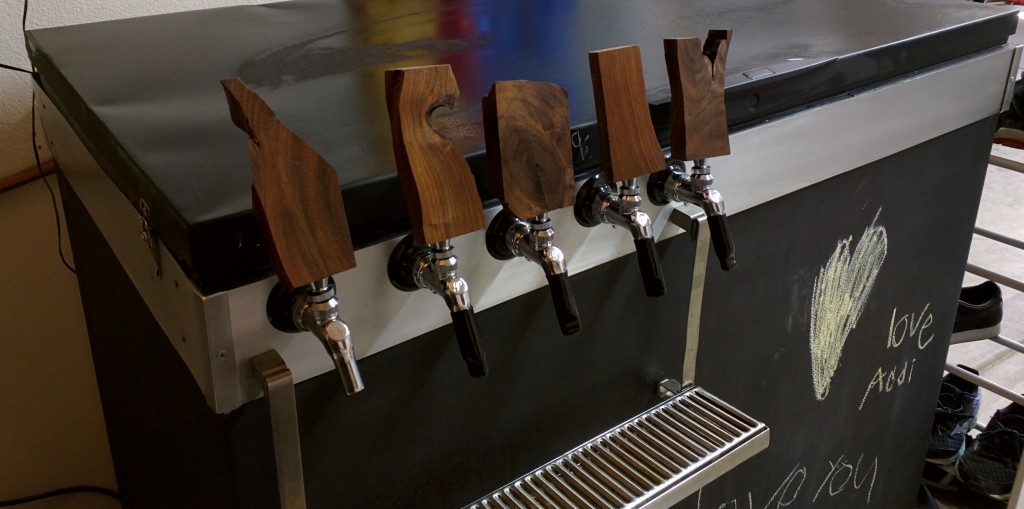
There was little pondering for me when it came to this issue, I’m 100% certain my absolute favorite brewing upgrade was switching from propane to natural gas, no question. When I moved my operation from the kitchen to the garage, I’d borrow the propane tank from my grill and hope there was enough gas left to get me through a brew day. After a  few jolts to the gas station mid-boil for refills, I picked up 2 more tanks, it helped a little, though I still found myself often hastily swapping tanks before a finished boil, and I really hated handing over my credit card on refill day, a task that had become a monthly occurrence when I transitioned to 10 gallon batches. After briefly considering going electric, my electrician/plumber friend talked me into natural gas, and I couldn’t be happier! For $120 in parts, including a couple propane to natural gas conversion valves, and maybe 1 hour of time, I bought myself the luxury of never having to worry about empty (or freezing) tanks again. What’s more is natural gas costs quite a bit less than propane– I was spending approximately $35-40 per month on propane whereas I currently spend $12 max per month on natural gas. I’ll take it!
There are a couple common concerns I hear from folks who are interested in switching to natural gas, which I’ll briefly address:
It’s too costly and/or complicated
Well, not really. By my conservative calculations, I made back the investment in a mere 6 months, so one might argue the switch is now making me money! I hate that argument, but you catch my drift. And as for being complicated, I’m telling you, plumbers can do this shit in their sleep, my buddy was in and out of my garage in less than an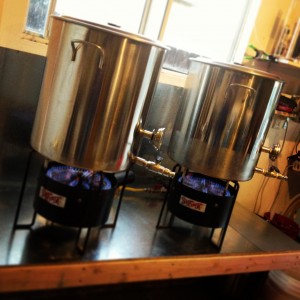 hour. Sure, you do have to have natural gas coming to your house for this work, and it makes things easier if your brewery is located somewhere near your gas meter, but I know of plenty of people with situations different than mine who are happily brewing with natural gas today.
The risk of carbon monoxide poisoning is too high
One’s life is certainly something to be concerned about. Unfortunately, some take this to such an extreme as to avoid doing things that are arguably quite safe. While I highly recommend anyone switching to natural gas ensure adequate ventilation, if not for safety’s sake to avoid the barrage of critical comments received when sharing pictures of your brewery, natural gas isn’t all that dangerous when it’s being burned, hence its common use for stoves, heaters, and other indoor appliances. Leaky valves and poor burns are certainly something to take seriously, I don’t want to steer anyone the wrong direction, but with a good installation, natural gas is certainly no more dangerous than propane, perhaps even a touch safer.
Considering the price of electricity where I live and how often I brew, switching to natural gas has been wonderful, definitely my favorite brewing upgrade!
Support Brülosophy In Style!

All designs are available in various colors and sizes on Amazon!
Follow Brülosophy on:
FACEBOOK | TWITTER | INSTAGRAM

| Read More |
18 Ideas to Help Simplify Your Brew Day
7 Considerations for Making Better Homebrew
List of completed exBEERiments
How-to: Harvest yeast from starters
How-to: Make a lager in less than a month
| Good Deals |
Brand New 5 gallon ball lock kegs discounted to $75 at Adventures in Homebrewing
ThermoWorks Super-Fast Pocket Thermometer On Sale for $19 – $10 discount
Sale and Clearance Items at MoreBeer.com
If you enjoy this stuff and feel compelled to support Brulosophy.com, please check out the Support Us page for details on how you can very easily do so. Thanks!


17 thoughts on “Brü’s Views w/ Drew Beechum | On Favorite Brewing Upgrades”
Marshall is a paid shill for “Big Gas”!
And Drew is on the hook for “Big Mag” – the magnet magnates.
In all seriousness, if you use propane or NG inside I hope you will consider the purchase and use of a carbon monoxide detector.
At least now here in CA, you’re required to have a CO detector before you sell your house – so that’s a good thing. (Shill for Big CO Monitor co)
great article but my favorite part had to be from Matt’s section: “..and impromptu gatherings around house fires..”
Regarding brewing indoors – I would like to point out that if the unfortunate happens, Matt seems to have the bright side taken care of with his swamp bag. I just want to know how he reached the conclusion it’s good for keeping kegs cool at house fires. Was there a triangle test?
I loved my life when I converted from propane to NG.
Thanks for the recommendation for Brew Hardware! I’ve been looking for a distributor that sells stainless steel heating elements sufficient for electric brewing, as mine are getting a little worn out, after using them for several years.
Chris
I think probably my corona mill. It means I could go bulk grains and keep stuff around. My LHBS is awesome, but it is also roughly 35 minutes across town for me. With 3 young kids and a not very understanding wife, that means 70 minutes minimum for even a short trip. Figure milling there, etc. if I am lucky, it is half a brew day (2 hours) just to get the ingredients to brew.
Now I just buy sacks of grain from them and 5lb bags of specialty malts online and I can have the supplies for almost any number of beers I might want to brew. That plus making oversized starters and keeping 4-6 types of yeast on hand (my San Diego Super just bit the dust. Starter never krausened and had a lactic smell to it :(, so I finally need to go to my LHBS as I don’t have any US ale yeasts on hand now. I think I went through at least 5 or 6 brews with that yeast line over about 14-16 months).
Saves me time, it saves me money. I can brew even more because it is cheaper and I am less afraid of trying off the wall things. Like when I first started brewing ~3 years ago, one of my earlier AG beers was a Rogenbier with S-33 and too much C20. It wasn’t terrible, but it wasn’t pleasant. I took the chance on making one with White Labs Hefe IV yeast I had on hand and the thing is friggen sublime! Never would have tried it (well, probably) if I thought I was taking a long shot with $50 of ingredients instead of $20 of ingredients.
Also, I still am on propane, but I have a farm store near me that is only about $12-13 for a full 19lb propane tank on a fill-up. I go through only about 2, maybe 2.5 tanks a year. I just swap in my grill tank if my brew tank empties during a session.
I would have to say the one upgrade that has made the most difference to my beers more then any other upgrade is having a PID control my mash temp recirc on my Herms. My beers are more balanced and consistent ever since I went to PID control.
It seems that the link for the stainless carbonating cap from Malcom’s post links to a “liquid” disconnect, and the picture with the plastic tubing attached (and some of the Amazon comments) seem to indicate that you can use this setup as a counter-pressure filler for PET bottles. Is that correct? So you just use a jumper from your keg liquid out to that thing? How do you relieve the pressure in the PET bottle as it fills?
Hey Doug, I will share a link to a video that shows a few techniques later tonight. Cannot get to it until later because I’m at work. You may be able to find it if you net search “bottle fill stainless carbonator cap with barb”- or something of the like. Try out your Google-lization skillz and YouTube’n! Lol.
Here Doug,
Hope this helps. If not please reply or contact me directly.
https://www.youtube.com/watch?v=CCrfp8ha9Dw
https://www.youtube.com/watch?v=KQg8Qb3OS7U
Thanks, Malcom, very informative videos. Pretty slick little item, especially for filling PET bottles to take beer to go.
Glad it helped Doug. Didn’t mean to pass the explanation off (to a video), but he showed quickly what would take paragraphs to write!
Ray
I trust your personal experience, but would you be willing to do an exbeeriment: MACC IPA bottled vs kegged. Could people tell the difference? Of course you would have to brew the bottled IPA a week or two (or three) earlier. I promise I will buy a brulosophy shirt if you do that! I also love IPAs.
It’s planned, and to control for time, they’ll be brewed simultaneously, so we’ll be comparing “old” kegged beer to bottle conditioned.