Author: Marshall Schott
When healthy yeast is is pitched into sugary wort, fermentation is going to happen regardless of what container it’s in. For homebrewers just starting, this is often a plastic bucket or glass carboy that, while cheap, lack many conveniences that simplify the process of racking out of said vessel. Still, they work.
As the hobby of brewing at home has grown, so too have the options for fermentation vessels, as well as our understanding of how certain variables affect the beer we’re making. Let’s face it, homebrewed beer doesn’t have the greatest reputation, and it’s likely certain issues that occur during the fermentation process or packaging, such as oxygen exposure, have contributed to this perspective. Because of this, manufacturers have developed unique vessels that allow homebrewers to employ many of the same processes used by commercial brewers, which is exactly what Spike Brewing intends with their new FLEX+ fermenter.
When the folks from Spike Brewing reached out asking if I’d like to review a new fermentation vessel, I was admittedly a bit hesitant, as I couldn’t really imagine how it would improve upon what I was already using. It was only when they shared a list of features with me that I realized the FLEX+ could be a game-changer, so I agreed to put it through the paces and share my thoughts.
The product reviewed for this article was provided by the manufacturer in exchange for an honest review; no other compensation was provided. The opinions expressed in the article are solely those of the author and a concerted effort was made to approach the review from an unbiased perspective.
Assembly
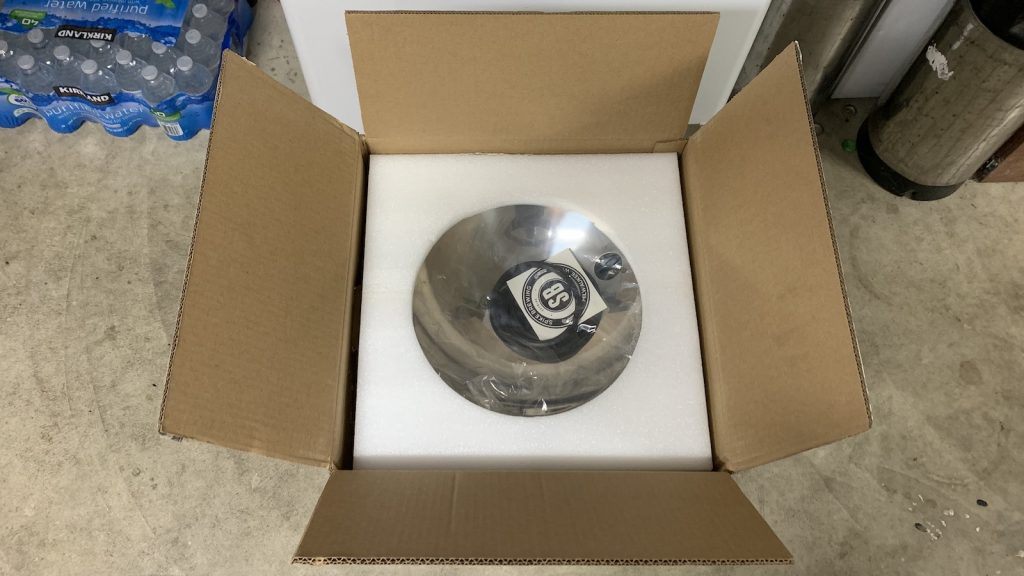
I received a FLEX+ prior to Spike publicly announcing it, as I wanted to have time to use it for a few batches before penning a review. It arrived nicely packaged a few days later.
My first thought when unboxing the unit– what the hell have I gotten myself in to? So many parts for such a relatively small fermenter.
With some prior tri-clamp (TC) experience, I soon realized it really wasn’t as bad it looked and began assembling the unit.
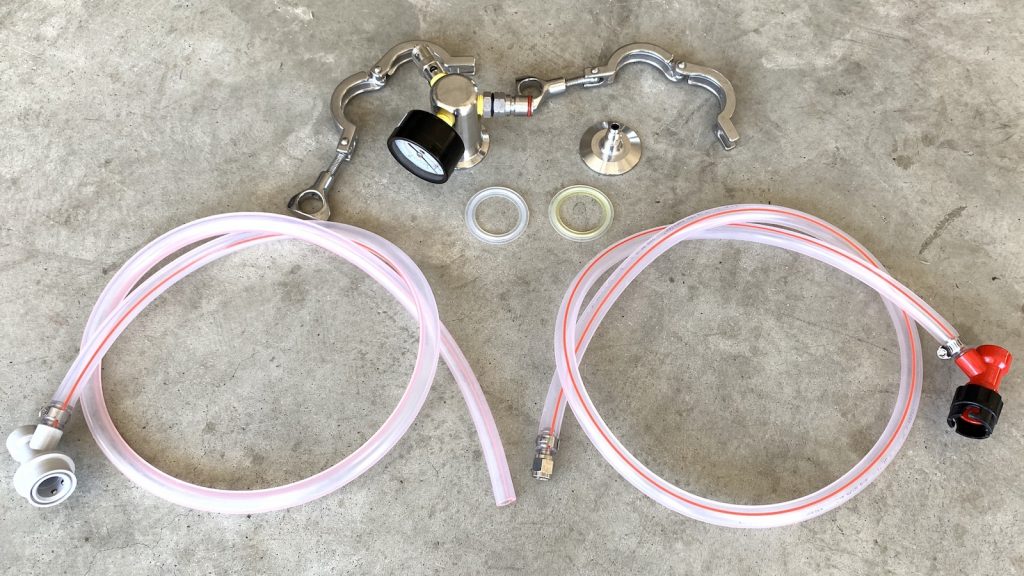
In earlier conversations with Spike, I’d mentioned to them what I found most appealing about the FLEX+ is the ability to ferment and cold-crash under pressure, as well as perform oxygen-free transfers, so they included a few accessories to make this possible.
With everything put together, I ran a couple tests with water and external CO2 to ensure no leaks before proceeding with cleaning and passivating the FLEX+. As this point, it was ready to use.
Detailed Feature Overview
Spike Brewing has developed a reputation for providing brewers with stainless gear with high quality sanitary welds, and the FLEX+ certainly was no exception. The steel had no visible imperfections and the welds were all seamless.
Tri-Clamp Fittings
Every fitting that connects to the FLEX+ does so via tri-clamp, which is awesome because they’re incredibly easy to remove and clean, which means reduced risk of contamination.
Some may view this as overkill on the homebrew scale, but having used most types of fittings in my brewery, I’m a believer. There’s a reason professionals rely on tri-clamp fittings.
High Pressure Lid
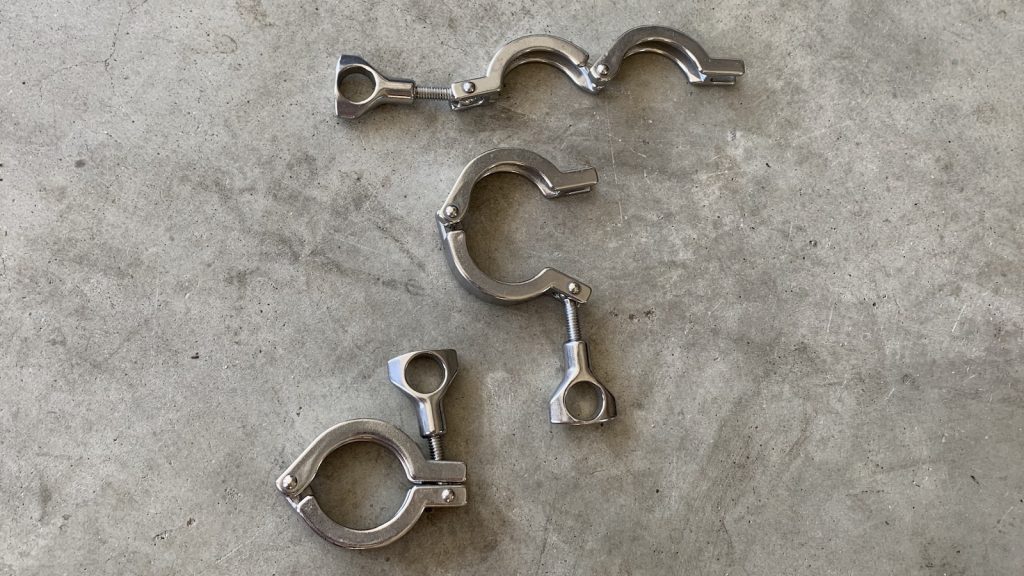
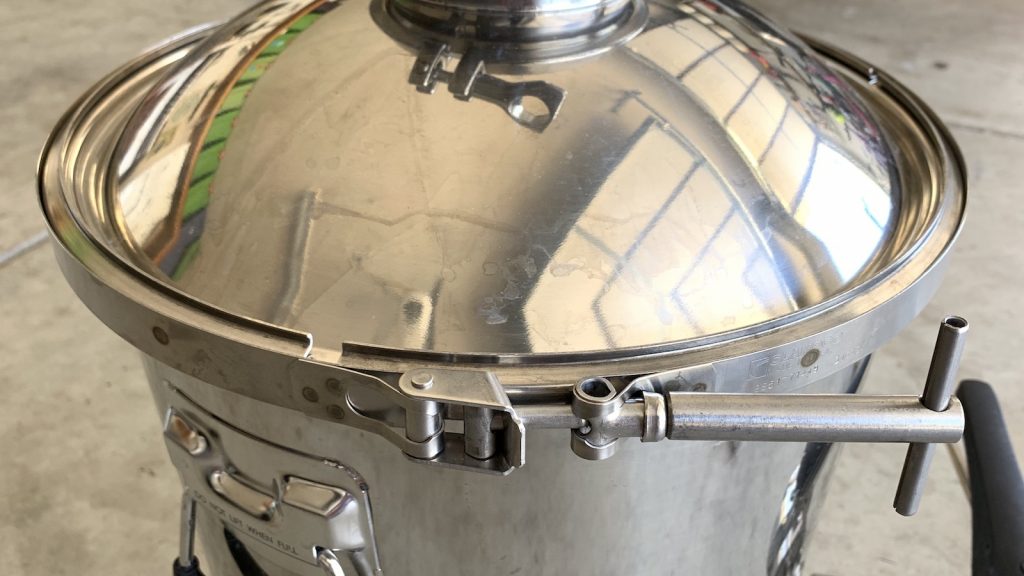
The high pressure lid gets attached to the vessel body with a large v-band clamp, which when tightly secured, allows the FLEX+ to hold up to 15 psi of pressure.
For the most part, fermenter lids aren’t really anything special, usually containing a hole for the airlock stopper and a simple way to secure it to the vessel. This is not the case for the FLEX+, which comes with a domed lid with various rad features.
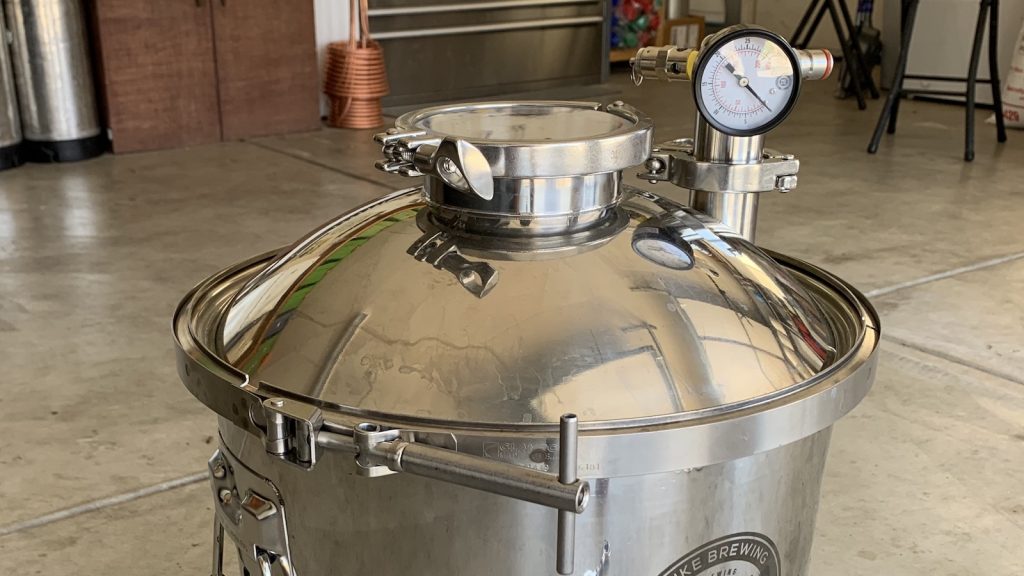
Modular Viewing Port
One of the more unique features of the FLEX+ is the 4″ modular TC port at the top that, with the included clear plastic cap in place, allows one to observe the beer during fermentation. This port also comes in handy when making dry hop, gelatin, or any other additions.
I’ve found the beer can be slightly difficult to see through this port, especially since I ferment in an enclosed chamber, an issue easily resolved with my phone’s flashlight.
Blowoff Port
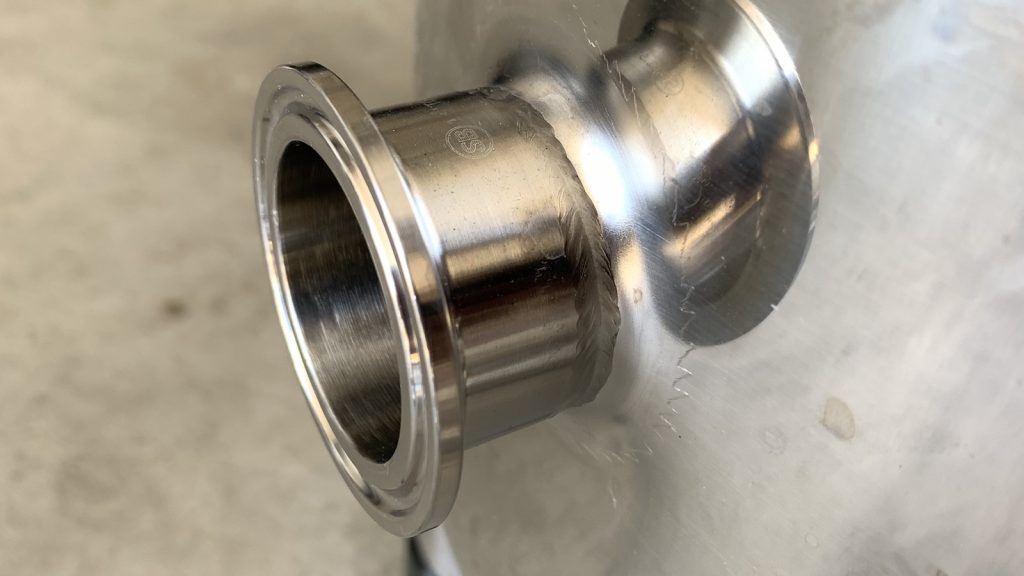
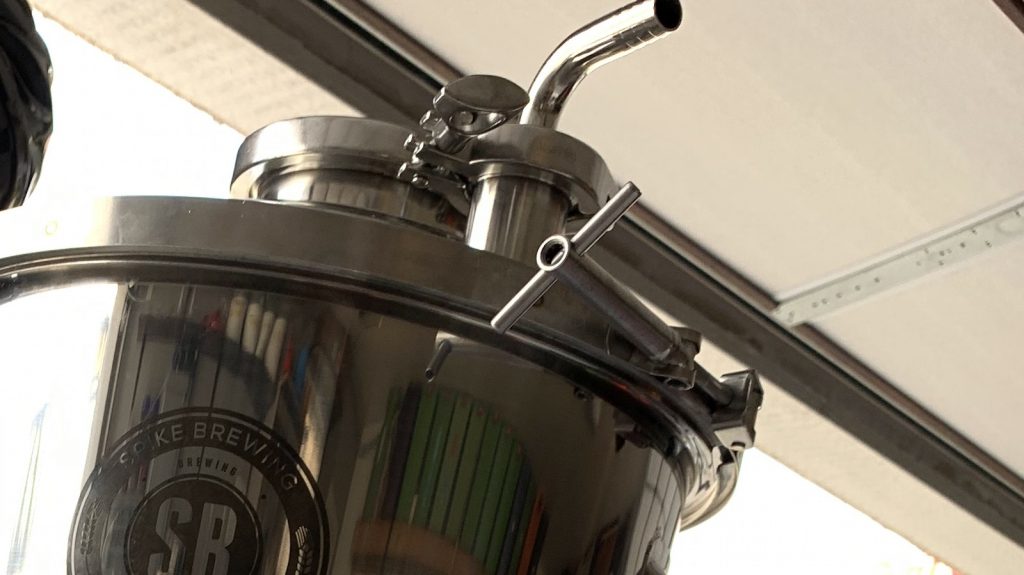
Next to the viewing port is a 1.5″ welded ferrule where an included TC barb fitting gets placed. Attache a piece of blowoff tubing, throw the other end in some water, and bam, there’s your airlock.
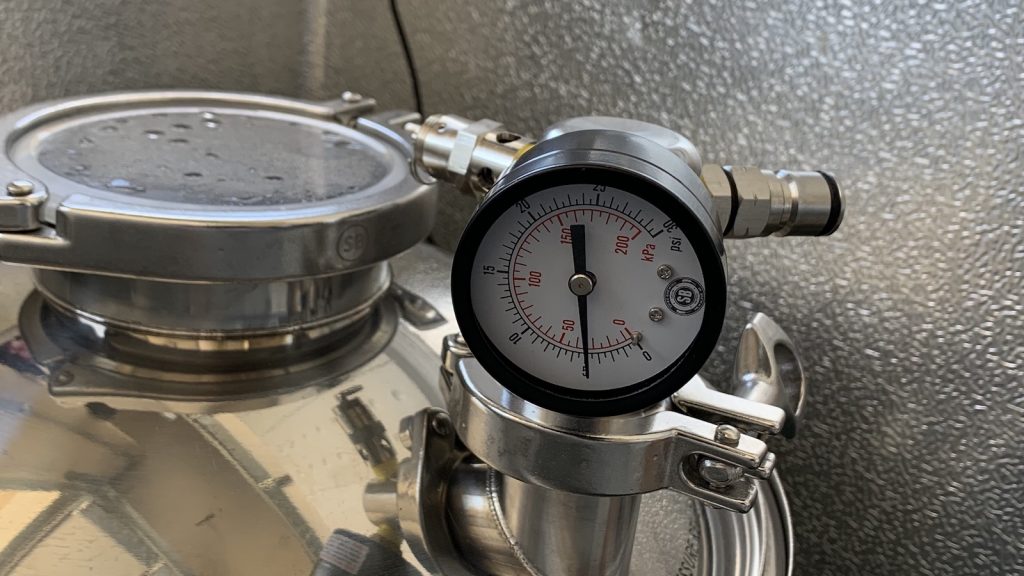
This port is also where an add-on gas manifold can be attached that makes fermenting and transferring under pressure possible. The manifold comes with a pressure gauge, 15 psi PRV, and ball lock gas post.
More on this in a bit…
Internal Volume Markings
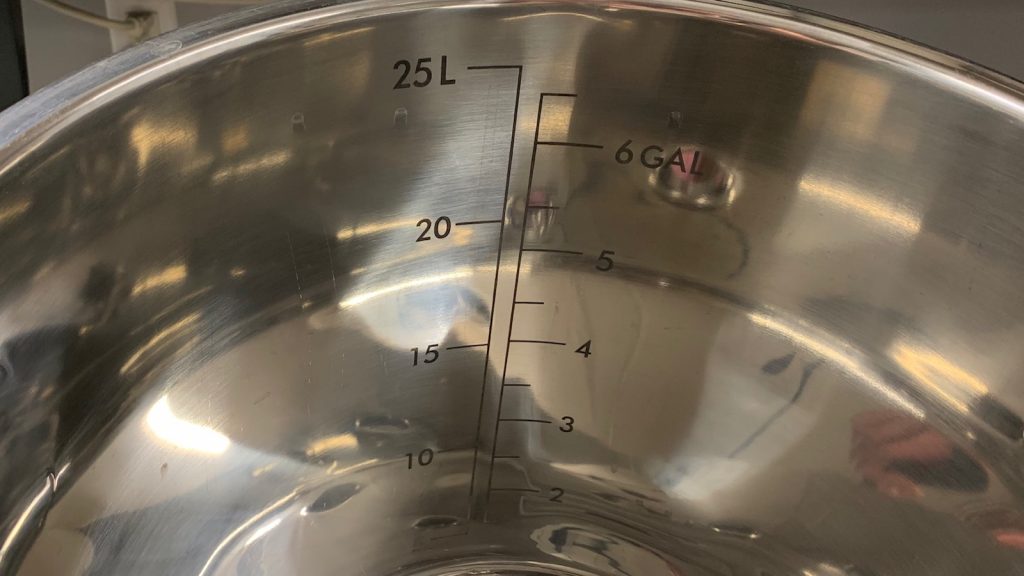
Etched onto the inside wall of the FLEX+ are volume markings that make racking accurate amounts of wort, juice, or must a breeze.
Stainless Handles with Soft Cover
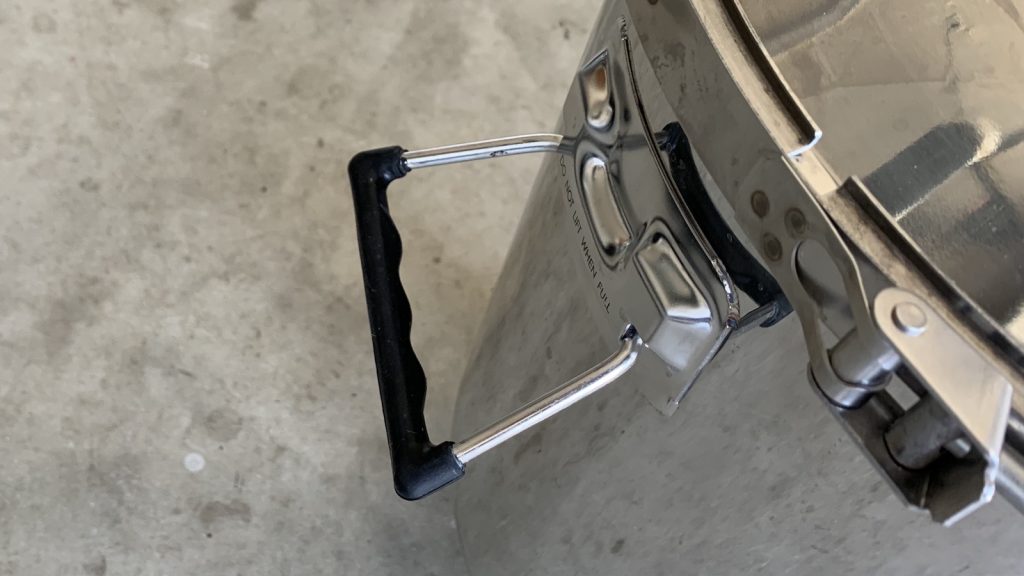
The handles on the FLEX+ are nice in that the area one grabs is covered with a fairly soft plastic material that makes picking the unit up much more comfortable.
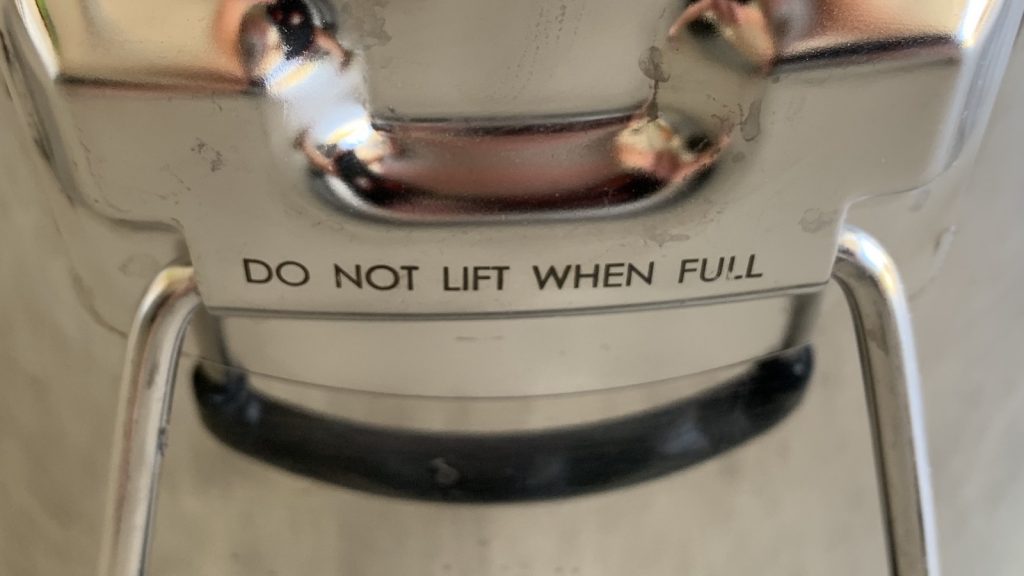
What’s really weird, though, is the warning etched near the handles.
Do not lift when full? Isn’t that what handles are for? Lifting? How else am I get my wort-filled vessel into my chamber? I like to live life on the edge and have relied on these handles to lift my filled FLEX+ every time I’ve used it, no tragedy has struck… yet. Proceed at your own risk, I guess.
Mid-Level Multipurpose Port
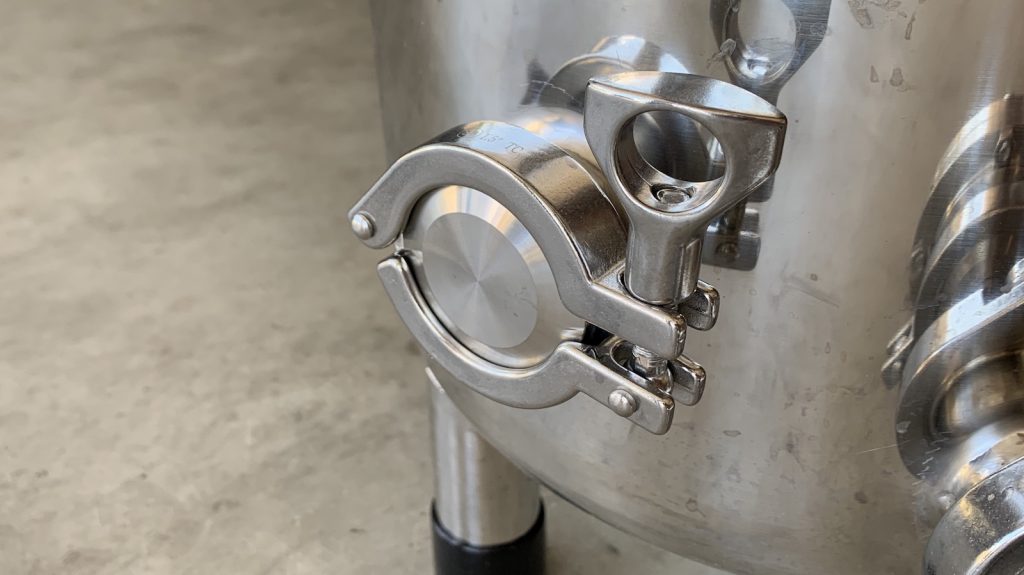
A little over halfway down the FLEX+ is a 1.5″ TC port that comes with a stainless cap.
There are various accessories that can be used with this port such as sanitary sampling valve or a thermowell for precise fermentation temperature control.
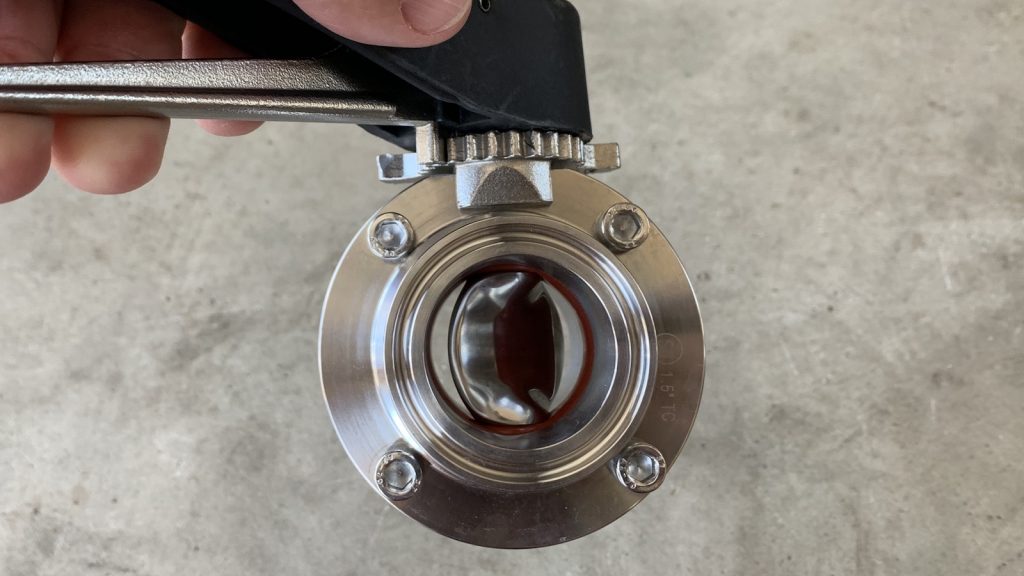
Bottom Racking Port with Butterfly Valve
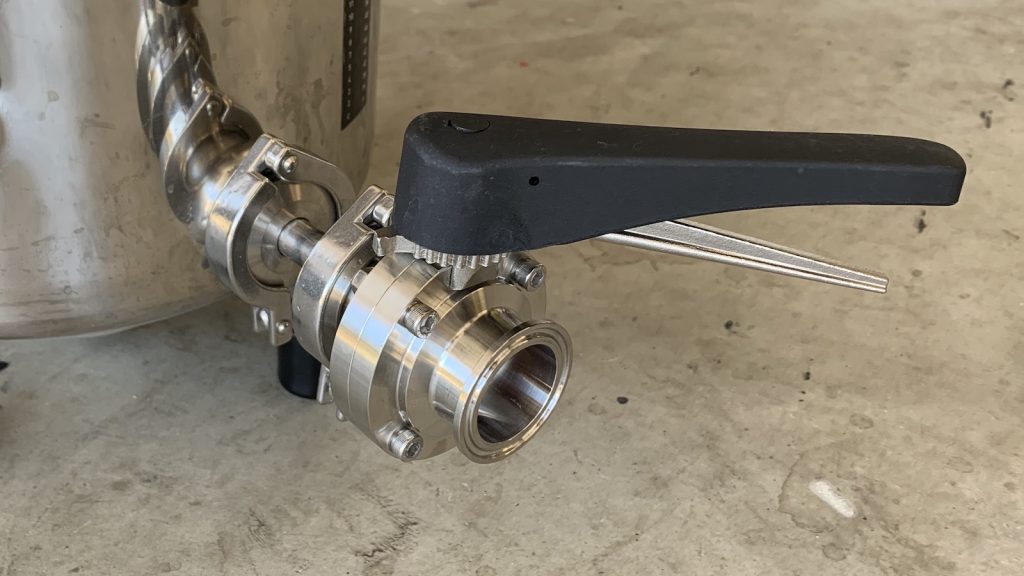
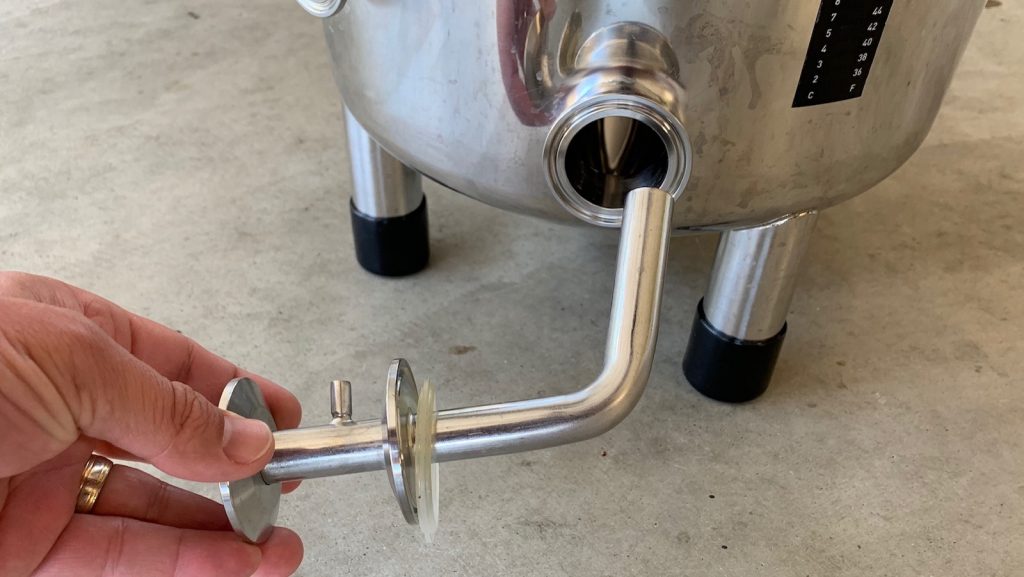
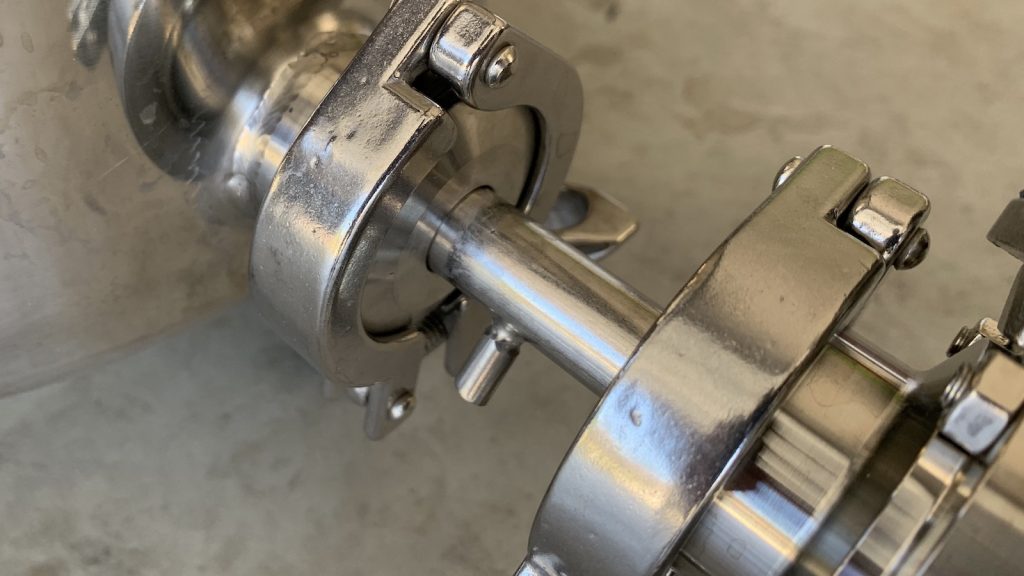
Toward the bottom of the FLEX+ is another 1.5″ port where the racking arm and butterfly valve get attached.
I’d never used a butterfly valve before and initially thought it was cumbersome feature likely intended make the homebrewer feel more like a pro. But after using it multiple times, I’ve had a change of heart. Not only does it make transfers really simple, but it’s completely sanitary and super easy to clean.
Between the valve and the fermenter is a racking arm with an OD that’s quite a bit larger than most others I’ve used, which means less risk of clogging.
Once installed, a small position indicator lets you know exactly where the racking is. Sounds like a non-issue, but it is incredibly convenient, particularly for those who dry hop loose.
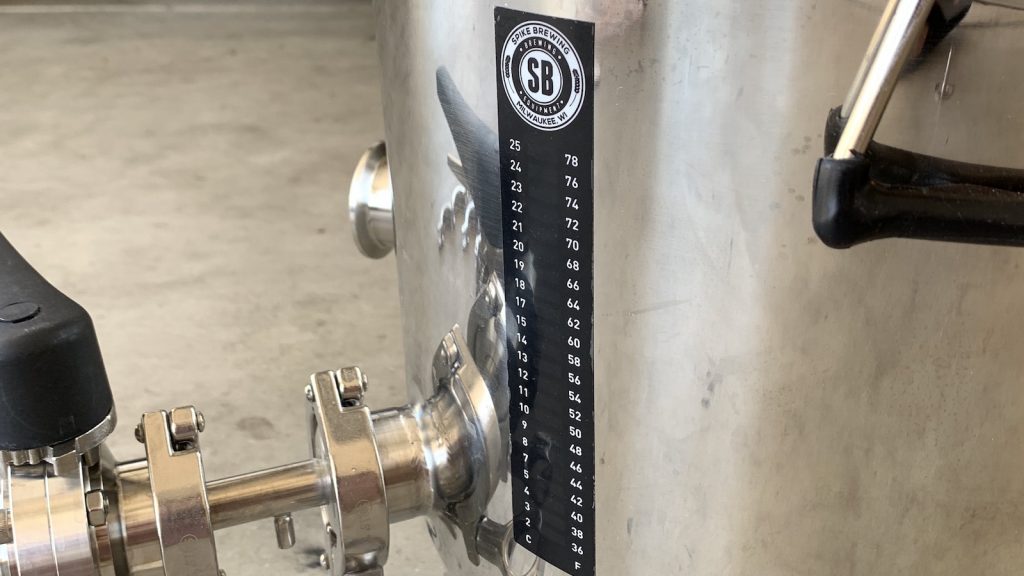
Stick-On LCD Thermometer
Cheap but surprisingly effective, Spike includes a stick-on thermometer with each FLEX+, making it easy to read the fermentation temperature.
I keep the probe from my temperature controller secured to the side of the FLEX+ and it has reliably read within 1°F/0.5°C of the LCD thermometer.
Legs
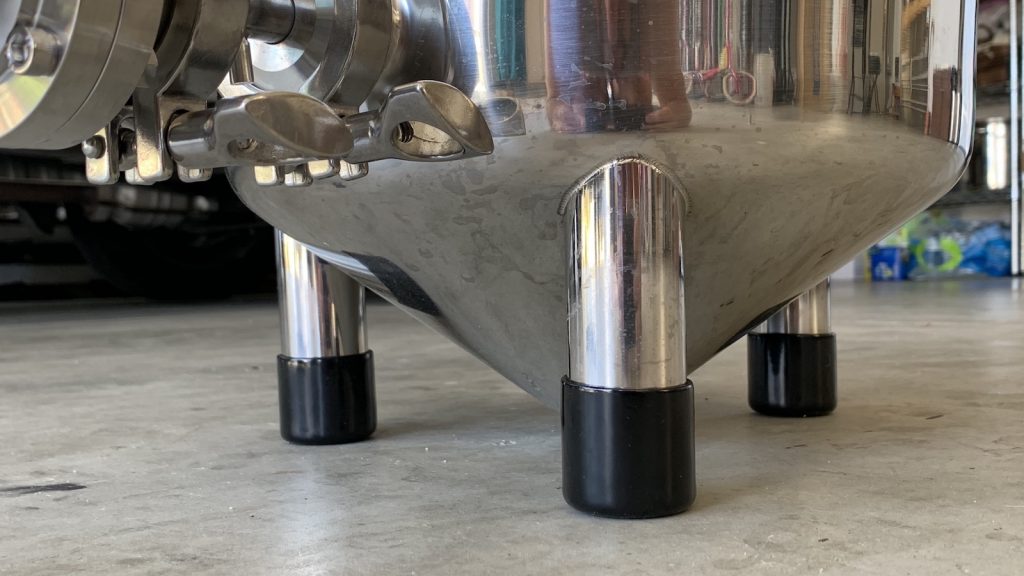
The FLEX+ rests on 3 legs that are welded onto the unit with the same quality as all of the other ports.
Nothing too special here, just wanted to point out they can be adapted to fit add-on extensions that raise the fermenter up either 9″ or 18″.
How I Use The FLEX+ Fermenter
Using the FLEX+ is mostly self-explanatory, though its 15 psi rating means some seriously cool stuff can be done. While some of the methods I use can likely work with the included blowoff barb, the gas manifold makes it really easy.
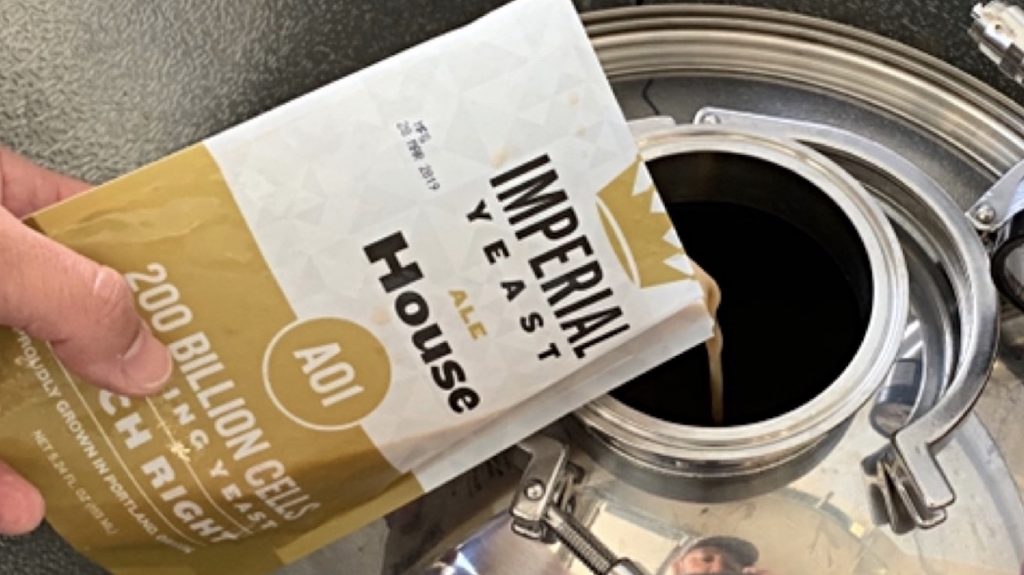
After cleaning and sanitizing the vessel, I rack wort into it from my kettle then place it in my temperature controlled fermentation chamber. While the mid-level TC port could be used for a thermowell, I do what I’ve always done and tape the probe of my controller to the side of the FLEX+. Seeing as my groundwater tends to be fairly warm, I usually end up leaving the wort alone for a couple hours before returning to pitch the yeast, which I do through the 4″ top viewing port.
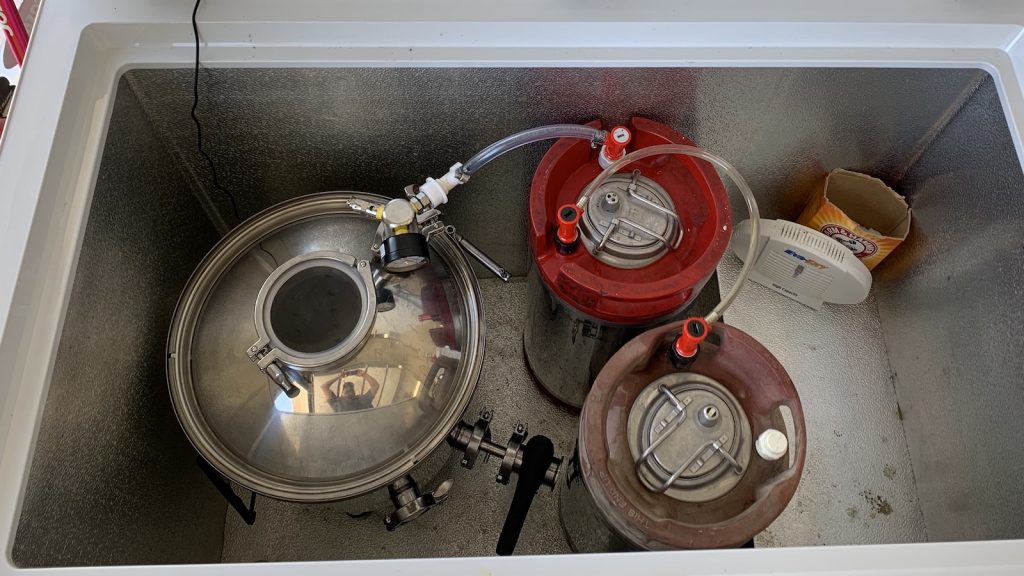
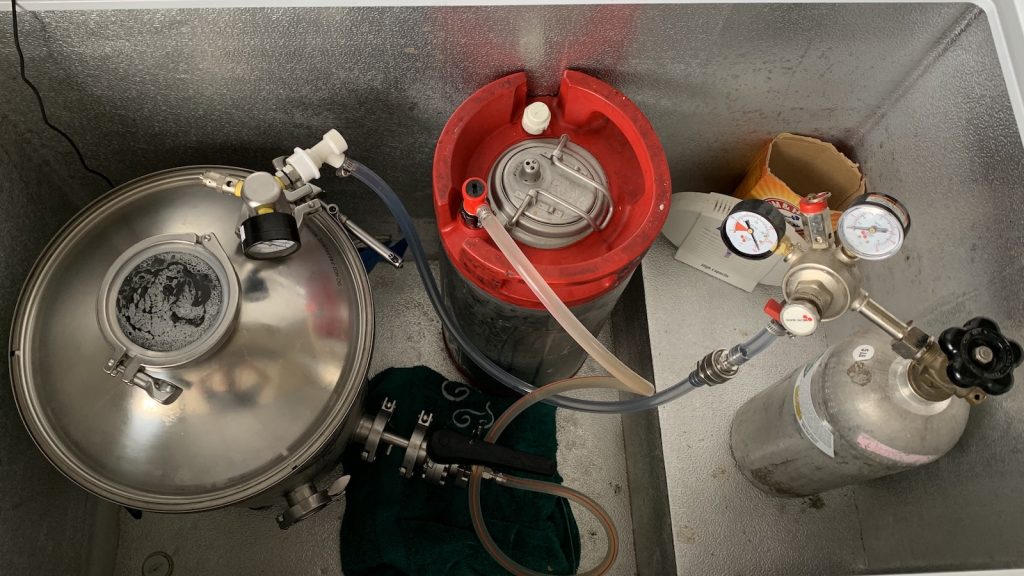
After reattaching the cover and making sure all other connections are tight, I connect a blowoff tube to the post on the gas manifold, the other end of which gets attached to the gas post on a keg I previously cleaned and fill with sanitizing solution. Next, I run a line from the liquid post of the sanitizer filled keg to the liquid post of a clean empty keg, thereby creating a simple CO2 capture device.
As the beer starts to ferment and the pressure created in the sealed FLEX+ rises, the sanitizing solution is pushed out of the first keg and into the empty keg, effectively purging the first keg of oxygen. This all happens pretty quickly, within the first 8 hours in my experience, after which the second keg acts like a typical blowoff vessel.
My love of this method is ineffable.
Once fermentation activity begins to wind down, I disconnect all of the lines and allow the beer to finish attenuating under a little pressure, knowing the PRV won’t allow it to build up any higher than 15 psi. I then use this pressure to collect oxygen-free hydrometer samples using a sanitized TC barb fitting attached to the sanitized butterfly valve. I’ve found 5 to 8 psi will clear the diptube of any debris and result in a hard enough pour to knock most carbonation out of solution. When FG is reached, I proceed with cold crashing by reducing the temperature of the chamber to 33°F/0.5°C. If the gauge is still indicating 5 psi or higher, as is often the case, I’ll leave it alone, otherwise I’ll connect external gas at 1-3 psi.
Of the batches I’ve fermented in the FLEX+, I’ve only fined one with gelatin, which is an obvious vector for oxygen exposure. To combat this, added the gelatin as quickly as possible through a small crack in viewing port with the gas from my tank still flowing; then I purged the vessel 3 times once sealed. Imperfect, but better than doing nothing at all.
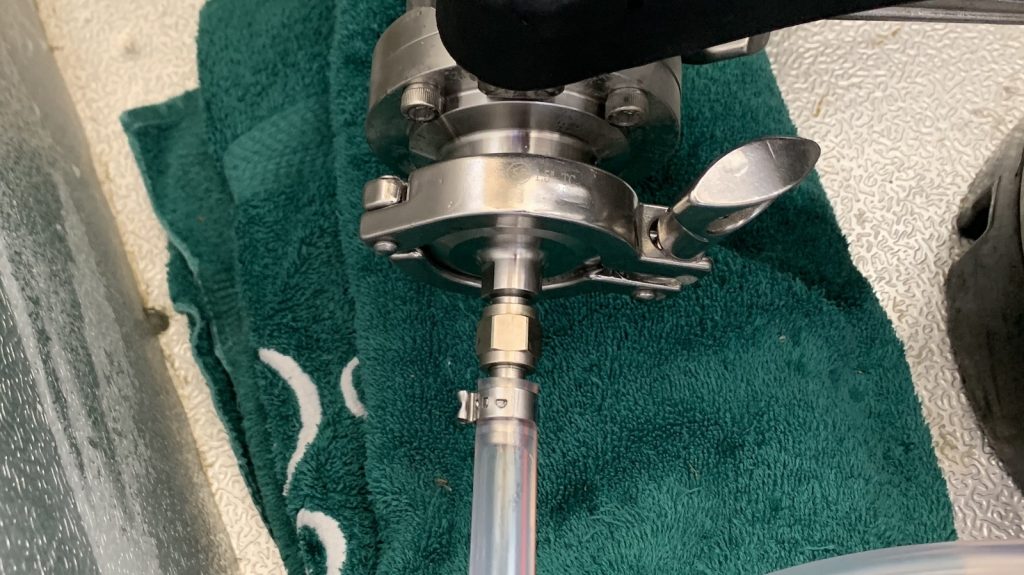
After a day or 2 of cold crashing, I move on to packaging, which is another area the FLEX+ shines, as it allows me to rack the beer to a keg without moving the vessel out of my chamber. After sanitizing everything that will be in contact with the beer, I attached the TC to flare fitting included with Spike’s closed pressure transfer kit to the butterfly valve then connect the transfer tubing to the flare.
At the other end of the transfer tubing is a liquid disconnect, which gets attached to the liquid post of the keg that was previously purged with homemade CO2. With approximately 3 psi of gas on the FLEX+ and a gas post depressor in place, I open the butterfly valve and let the beer flow.
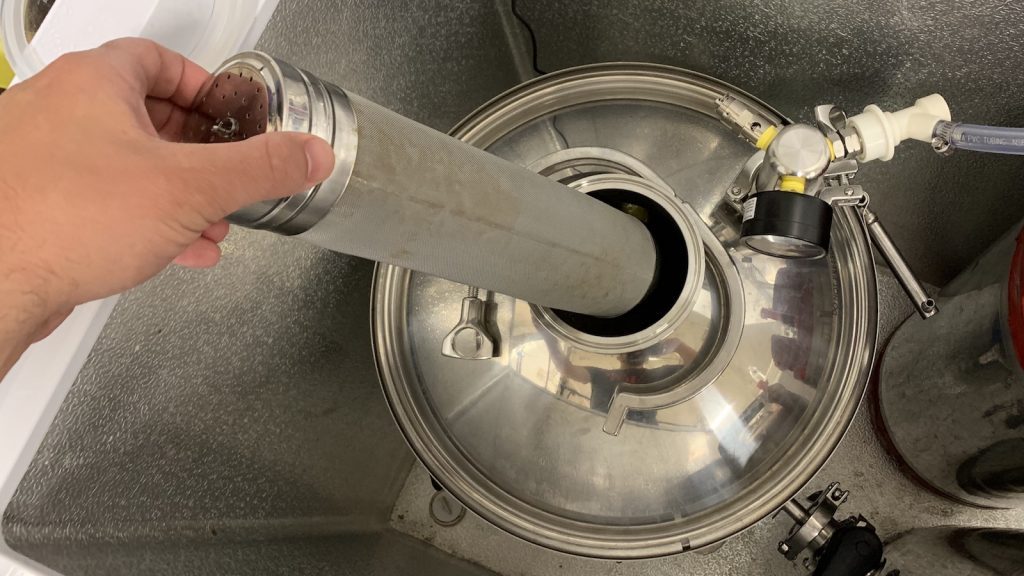
I don’t make too many highly hopped beers, and even when I do dry hop, I use stainless mesh filters and drop them into the viewing port. I’ve not had any issues with clogs or trub transfer. If I did, a simple loosening of the butterfly valve TC allows the diptube to be easily repositioned above the trub line. Bubbles in the line indicate transfer is complete, at which point I disconnect it from the keg, turn the gas from the tank off, place the filled keg in my keezer, and get on with cleaning as usual.
| The Verdict |
Through both personal experience and the results of exBEERiments, I’ve come to view cold-side oxidation as being one of the main culprits of shitty beer, which has led to me employing numerous methods to reduce this risk, from skipping the cold crashing step to kegging with a CO2 filled balloon attached to my fermentation vessel. What I appreciate most about Spike’s FLEX+ is that it was clearly designed with this in mind, allowing one to use pretty much any standard cold-side method in an essentially oxygen-free way including cold crashing, hydrometer sample collection, and packaging.
With its ability to hold up to 15 psi of pressure, there are numerous other badass things the FLEX+ can be used for, such as purging a keg with naturally produced CO2, which has become a normal part of my process. The FLEX+ also makes pressurized fermentation a breeze, a killer feature for those who feel this is required for fermenting lagers warm, as well as carbonating directly in the fermenter.
In thinking of downsides of the FLEX+, other than the obvious it-cost-more-than-a-bucket, a few things do come to mind, the first of which is its size. Immediately upon assembling the FLEX+, I realized it had a noticeably larger footprint than other fermenters I’ve used, and sure enough, I could only fit one in my chamber. Not a huge deal for the majority of people who brew single 5 gallon/19 liter batches at a time, but a slight bummer for those of us who ferment two batches simultaneously. Another lacking feature that could be viewed as a con by some is that the FLEX+ has no trub dump, which would not only make collecting and reusing yeast easier, but it’d be a neat feature for those interested in carbonating and potentially serving from the same vessel.
There’s no denying Spike’s FLEX+ is a luxury piece of homebrewing gear at $375 with standard accessories, though it does offer many of the same conveniences as more expensive options. I care a lot about reducing cold-side oxidation in my beer, and seeing as I’m not getting any younger, lifting full fermenters in and out of my chamber is becoming a chore. I absolutely love that with the FLEX+ I can ferment, pull samples, cold crash, and package without risking oxygen exposure or moving the vessel. And the ability to purge kegs of oxygen using naturally produced CO2 further improves the packaging process while saving me money on gas refills. I’m a huge fan!
The Spike FLEX+ is currently available at Great Fermentations or direct from Spike Brewing. If you have any questions about this product, please don’t hesitate to leave them in the comments section below!
Support Brülosophy In Style!
All designs are available in various colors and sizes on Amazon!
Follow Brülosophy on:
FACEBOOK | TWITTER | INSTAGRAM
If you enjoy this stuff and feel compelled to support Brulosophy.com, please check out the Support page for details on how you can very easily do so. Thanks!








32 thoughts on “Product Review | Spike Brewing FLEX+ Fermenter”
The delta in price between a flex, and the CF5+ is getting close enough, that If I’m stepping up to a bit of luxury for fermentation, just a bit more up gets me into the conical.
Is it possible to insert an electric element and just brew, chill and ferment without transferring from a brew kettle?
It’s only 7 gal, but I don’t see why it wouldn’t work for smaller batches seeing as it’s all stainless.
What do you estimate the total cost would be including the accessories they provided?
$470 with the gas manifold and if you pay for their closed transfer kit, the latter of which you might be able to build yourself with parts lying around, saving $55.
When you compare the regular Flex to the price of the Brewbucket there is a massive difference. For $50 more you get way more features and higher quality component (specifically the racking valve). I am sold on the Flex over the Brewbucket.
Does this fit in a standard 7cb ft chest freezer?
I’ve had two 7 cf freezers and they were slightly different in size. Either way, I think you’d be able to fit one FLEX without the kegs and such.
Hey Marshall,
Quick question, the second keg (empty) do you have to remove the gas post. I cant tell from the picture, but seems that you have a plastic cap or something, is this to let CO2 out?
I use pin lock and that white thing is a cheap gas post depressor to let the gas out while filling. You could just as easily use an extra gas disconnect.
Can you upload a picture of how you take a hydrometer sample?
I don’t have a picture, but it’s really simple. I just put a TC barb on the butterfly valve the slowly open it so the beer flow gently.
I’m curious of your thoughts about the pros and cons of the Flex+ vs the CF5 Spike Conical. Aside from the price difference (which the CF5 is about twice the price, so no small difference), the CF5 appears to have all the advantages of the Flex+ and then some.
CF5 won’t fit in my ferm chamber and I don’t have glycol (yet).
a flex+ (presure lid) is $375
a cf5+ is $525
$150 different
IMO the conical adds some nice pluses for that $150 extra. Plus the conical is the end of the upgrade path for home brewers. So if you think you are going to get into a conical some day, then you might want to save a bit longer and just go conical. Assuming it will fit your temp control device.
I have a spike 20 gallon boil kettle and their 1/2 bbls. Conical. The quality on both is top notch and I couldn’t recommend the company more.
Thank you for the thorough review. One thing that was mentioned as a disadvantage which the CF 5 has is the trub dump. However if one were to rotate the racking cane to the bottom of the flex and keep the flow restrained I would expect trub removal is not an issue. Just go slow. Also personally as a CF chiller I only think removing the cold break in a lager may be worth it but for ales not so much. One gets cleaner yeast harvesting with purging trub but for ales a simple water wash yields enough yeast to repitch. And if it is a second pitch no worries. As an owner of a CF – 5 I love it for lagers but am planning to do a couple IPA’s under pressure. It is a very well made and flexible fermenter. Also I own a Spike 20 gal boil kettle and to be clear I have no affiliation with Spike and present my comments as a homebrewer. Great products.
Cheers!
How can you carb with yeast still in the cone? Did you dump the yeast with the rotating valve? Or was the yeast just a non issue?
I’ll say up front that I didn’t even read the review. I’m sure it’s great and I’ll bet you gave it a positive review.
Someone with your background is very familiar with bias. There is simply no way that you can be unbiased if someone gives you a product for review, I’m not for a second saying that you and other well known beer brewing experts are in any way dishonest but there is a reason Consumer Reports doesn’t accept products for review from manufacturers without paying for them.
I understand that you are providing a service by educating people about new products and it’s not possible to buy all the equipment that you review. I just find the inherent bias when reviewing products that are given to reviewers free of charge hard to accept.
Again I’m not saying there is any dishonesty involved. It’s just human nature.
It might be more plausible for a commercial entity that was charging the recipients of the review, however at the free blog scale, its hard to do this level of equipment reviewing without getting some items at low/no cost to the reviewers.
Would it change your opinion if these items were loaned and the bruplosphy team returned the items after review?
There’s no way one can be unbiased if they spent their money on a product either.
I think the appropriate phrase would be conflict of interest. I’m sure that you get my point.
I’m sorry if seems like I’m criticizing you personally because that’s not what I mean to do. I’ve been been on the other side of this with musical instruments and related equipment given to me by manufacturers. I think that it’s very to give negative, public feedback in this situation.
No offense taken at all. Cheers!
Great review Marshall. I actually just purchased one of these myself, and although I do agree that it’s a great product I’m finding myself unfortunately regretting buying it. Everyone’s needs vary obviously, and I can see why this would be particularly appealing for anyone that wants a fermenter capable of fitting in to a ferm chamber. For that specific use case, it probably is the best option available. My mistake was that I was very attracted to the small form factor, the modular nature of the unit with the accessories available and a few key features…but I didn’t take in to account that I don’t need my fermenter to fit into a chest freezer. For anyone in a similar situation as myself you should just buy a conical, and I’ll tell you why.
While I appreciate the wide variety of accessories they make available for the Flex line, that became a slippery slope for me and I surpassed the cost of one of their conicals pretty quickly. Some of the same accessories that are available for an additional $55 cost with the Flex fermenter are included with a conical (thermometer, sample valve), plus you have the dump valve at the bottom. So essentially, with equivalent accessories what you end up with is a $95 savings and no dump valve. Again, probably perfect for some folks. But for me, I should have given it a tad more thought because I’d rather have the dump valve.
Also, I’ve noticed one rather annoying flaw that will only apply to anyone that adds the extension legs to their Flex. I bought and installed the extensions and casters and immediately discovered that when you stand it up while the thermometer, butterfly valve and sample port are attached it’s too front heavy and will tip over. It will stop tipping over if you remove the sample port but it still isn’t very stable at all. I contacted Spike about this and they recommended getting the bracing shelf they have available. I did, and while it has stopped tipping over on it’s own you can literally tap the butterfly valve with your fingertip and it still tips over. I’m guessing the CF5 conical might have the same problem because the dimensions are very similar, although the geometry is slightly different so maybe that helps. Anyway…I wouldn’t call it a fatal flaw but needless to say this has had a pretty heavy impact on my opinion of the Flex.
I really do think it’s a great product and will be perfect for the use case you outlined. But for my circumstances….if I could return this thing today and get a conical instead, would I? Fuck yes, you bet your ass I would.
Marshall,
Thanks for the great detailed review. I am about to ferment my first batch this weekend and am intrigued with your CO2 collection setup. Just to be certain, the first keg is full of sanitizer and the amount of gas produced is enough to empty into the second, open keg?
Thanks!
More than enough. If you ensure everything is airtight, you’ll likely empty the first keg in the first 12-20 hours of fermentation.
I brewed with my new FLEX + for the first time two weekends ago. After ten years fermenting in glass carboys, this was a great switch and I only had to lift it one time to get it into the form chamber. I tried to jump right into the two keg thing and I wasn’t successful at getting the whole first keg of sanitizer transferred over — I wanted to ask some questions here as maybe they can help everyone.
I was doing an IPA, which I dry hopped at two days in. At that point, it felt like about half of the sanitizer had made its way to the second keg. When it was time for dry hops, I pulled the PRV, opened the 4” TC port, and quickly closed it back up. The remaining fermentation did not generate sufficient pressure to transfer any more sanitizer after that point. Do other’s have this issue? If not, see the next paragraph.
Are folks doing anything to “prepressurize” and then release pressure from the sanitizer kegs to seat the main lid o-ring? I did not do this and I heard a lot of low hissing during fermentation, which eventually stopped. I didn’t do anything to diagnose where it was coming from since I thought it was the gas relief from the second keg, but after reading how quickly it should have transferred, I’m wondering if I had a small amount of CO2 escaping the whole time?
Thanks for the thoughts, hope everyone is finding solace brewing while at home these days.
spike recently sent out a product notice that the gas manifold/prv should not be used for fermentation under pressure. This review should probably be updated to reflect that this product as offered from spike should not be used for pressure fermentation.
from spikes email:
Using the Spike gas manifold to pressure ferment during primary fermentation can lead to unsafe conditions. When we refer to pressure fermentation we mean adding wort to your conical, pitching yeast, and then sealing off the fermenter with the Spike gas manifold instead of a pressure blow-off (e.g., an airlock, a blow-off tube, etc.). During primary fermentation, the krausen can slowly rise filling the lid head space. If the Spike gas manifold is used instead of a pressure blow-off, the krausen can fill the gas manifold and clog the safety pressure release valve. With the safety pressure release valve clogged and the fermentation reaction creating additional pressure with nowhere to go, eventually a failure can occur that can result in a substantial mess, and potentially an injury.
For these reasons, we do not recommend that you use the Spike gas manifold to ferment under pressure (i.e. during primary fermentation). We at Spike are continuing to investigate reliable and safe options for pressure fermentation. When we identify such an option, we will let you know.
I’ve not used it to ferment under pressure, but I’ll make the edit.
I’ve now used this piece of equipment (including all the bells and whistles listed here) for three fermentations and really, really love it. Incredibly well-made, easy to clean, and likely the absolute best way to reduce cold-side oxidation in your beers. I’ve already come to look at this as my “IPA fermenter”. For those “do my dry hops inject oxygen into the beer when I add them” people, two days ago I added 2oz of dry hops in a SS mesh cylinder through the 4″ port on top. The port was open for maybe 5 seconds, then sealed up, and CO2 was bubbling through the blow off tube (inserted in StarSan) under 10 seconds after everything was put back together.
I connect the blow-off tube first, then switch to the manifold after the first 2-3 days of fermentation. Using a 1L yeast starter, high kraeusen has lasted about 2 days and if I seal up the manifold when the kraeusen starts to recede I’ll have between 5-10psi in the FLEX+ by the end of fermentation a few days later. The whole thing goes in my kegerator for a day to cold crash. With the gas manifold attached there’s no suck back possible.
Using the same threaded TC adaptor in the last picture I can transfer to a purged keg and drink pretty much right away.
My only complaint is to reinforce what someone else said–the dip tube and butterfly valve fittings are really heavy and the FLEX+ is a little unbalanced as you empty it and can easily tip forward. Solution is to have it on the ground and rack using 1-2psi CO2 (or sometimes I put a thick paperback under the butterfly valve housing). Spike would do well to place the port DIRECTLY over one of the feet which likely solves the issue.
Great product that actually helped me make better beer.
Hi all, I did find this FAQ article from Spike about the handles saying “Do Not Lift When Full”:
https://spikebrewing.freshdesk.com/support/solutions/articles/35000176708-the-flex-handles-say-do-not-lift-when-full-is-this-accurate-
It says:
“A full Flex weighs upwards of 70lbs. Although the handles are designed and tested to support that weight we do not recommend lifting when full. The liquid inside can slosh around and throw off your balance causing a potential safety issue. 70lbs dropped from only a couple feet can really injure yourself, others and/or pets. We have a caster kit and leg extensions available (https://spikebrewing.com/collections/flex-accessories) which hopefully will eliminate the need to lift your full Flex. If you have to lift your Flex into a chest freeze, for example, please use caution!”