Author: Marshall Schott
From heating strike water to boiling wort, the brewing process demands quite a bit of energy and there are myriad options available to brewers these days. My introduction to brewing began with a humble setup that involved boiling wort made from extract in a pot on my apartment stove. A few years and numerous batches later, I decided to ditch extract for all grain, which led to the acquisition of a propane burner for full volume boils.
I brewed with propane for a few years before getting fed up with constantly paying $20 to refill my tank and eventually made the move to natural gas. That was over 4 years ago and I’ve since brewed hundreds of batches on what I zealously referred to then as “the best investment I’ve made.” Compared to propane, brewing with natural gas was definitely an upgrade, not only because it’s a cheaper form of energy, but it’s available 24/7. So certain this was my forever system, I built a brewing bench into the wall of my garage, sacrificing the space usually reserved for my car.
I’ve been aware of folks using electricity as their brewing energy source for awhile, but my interest remained low for a few reasons, perhaps the most obvious being I’d invested so much in my natural gas setup. Additionally, I was worried making the move to electric might somehow complicate my process. It wasn’t until some people I really trust who had recently converted to electric wouldn’t shut up about how amazing it is that I began to reconsider my position, and it didn’t take much for me (my wife) to be enticed by the idea of having my garage back.
I communicate regularly with the folks from Ss Brewtech and my interest was piqued when they mentioned to me last year that they were working on an electric system. When they finally announced their new eBrewing line, I was excited to see it hit every mark on my list of requirements and finally decided to slide into electric brewing.
Prior to agreeing to review Ss Brewtech’s new systems, I let them know I planned on doing full volume BIAB batches and asked how they suggest avoiding scorching the fabric filter on the element. Their response: We designed the system so that it won’t scorch the bag, you have nothing to worry about. Who was I to question the experts?
The product reviewed for this article was provided by the manufacturer in exchange for an honest review; no other compensation was provided. The opinions expressed in the article are solely those of the author and a concerted effort was made to approach the review from an unbiased perspective.
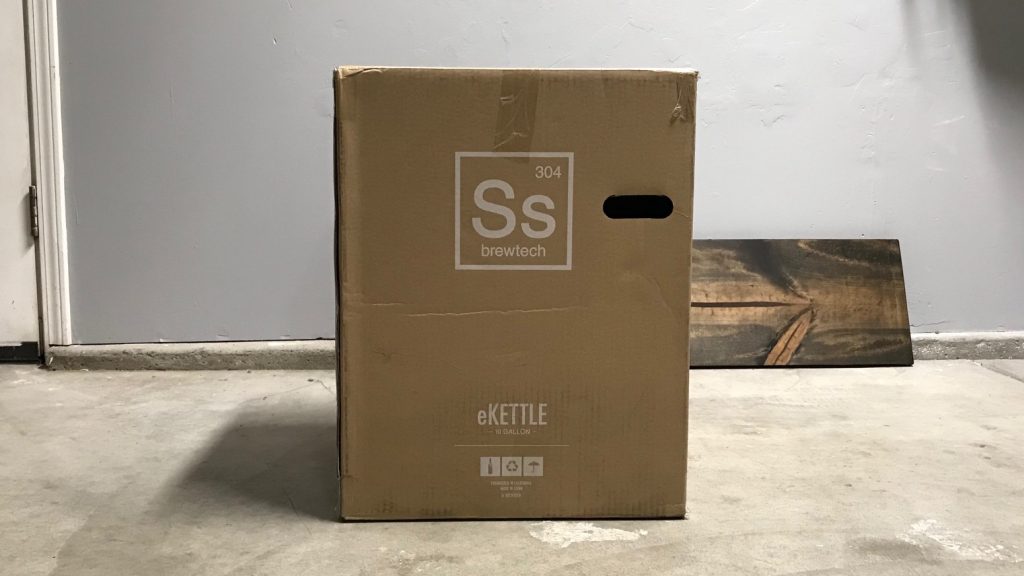
The time had come to demo the natural gas and outfit my brewing area for electric, which given the exBEERimental nature of what we do, meant running dual 240v 30 amp GFCI dedicated circuits. While I handled ripping out my brewing table and workbench then repairing the wall, I outsourced all of the electrical stuff because I’m not an electrician and like living. The Ss Brewtech 1V eBrewing controller arrived first and the nicely packaged kettle showed up a couple weeks later, hot off the line.
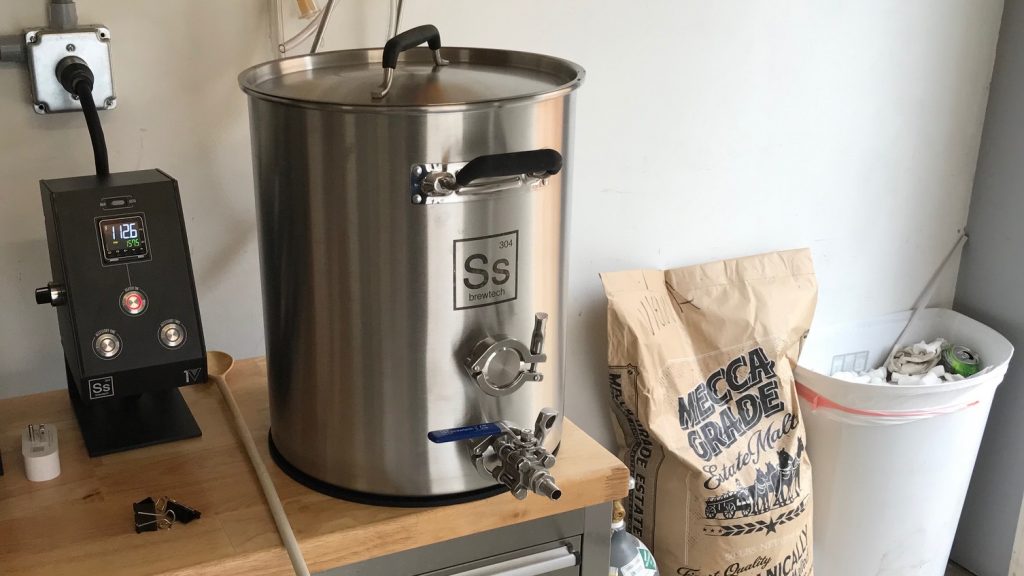
While the controller required no assembly, the kettle had a few parts that I immediately set to piecing together, a task that took all of 10 minutes.
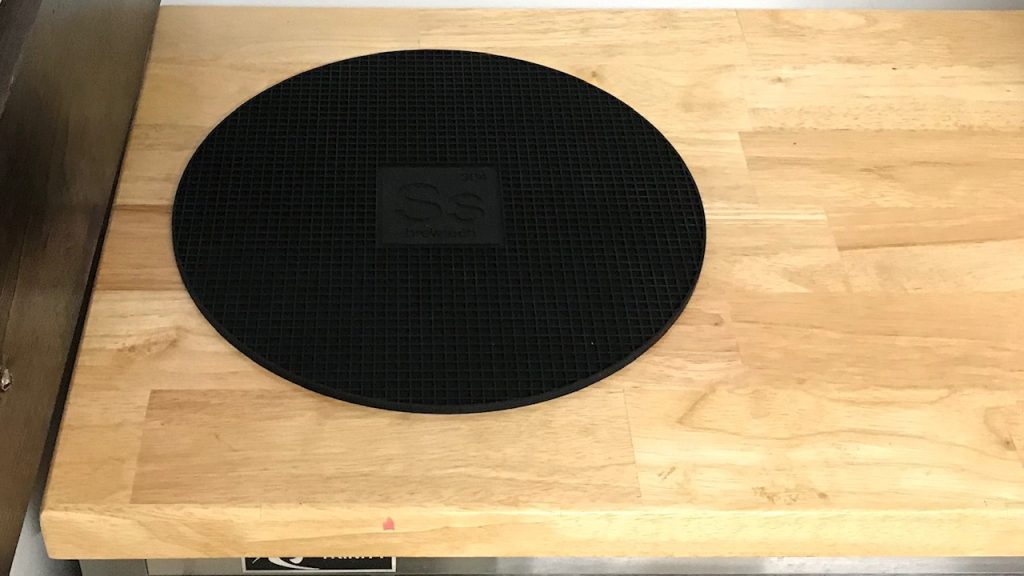
Ss included a rubber trivet for the kettle to sit on that not only protects the brewing table surface, but reduces the chances of the kettle moving around (note: this is an add-on item and is not included with the 1V system).
Once together and in place, I cleaned and passivated the kettle per the provided instructions, after which it was ready for use.
In the 3 weeks after receiving this system, I brewed 3 batches and ran numerous other tests with water to get a good feel for how it works. What follows are my thoughts on specific aspects of the Ss Brewtech 1V eBrewing Kit.
1V Electric Controller
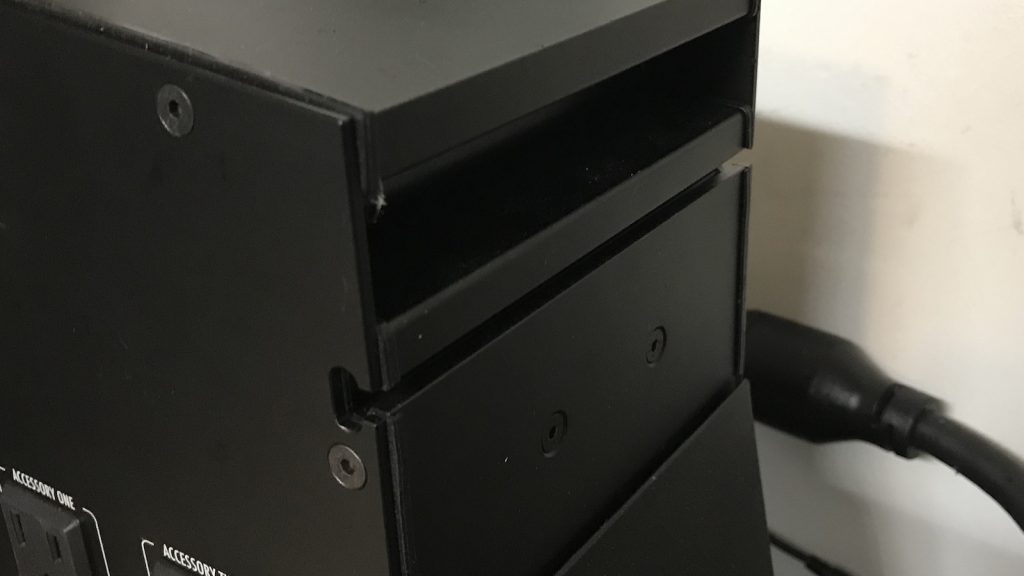
Possessing numerous components that work together to control the brewing process, the attractive 1V controller is the brains of this outfit. While the relatively small footprint means it can be easily placed next to the kettle, Ss will soon be offering a t-rail bracket so that the unit can be secured to the wall.
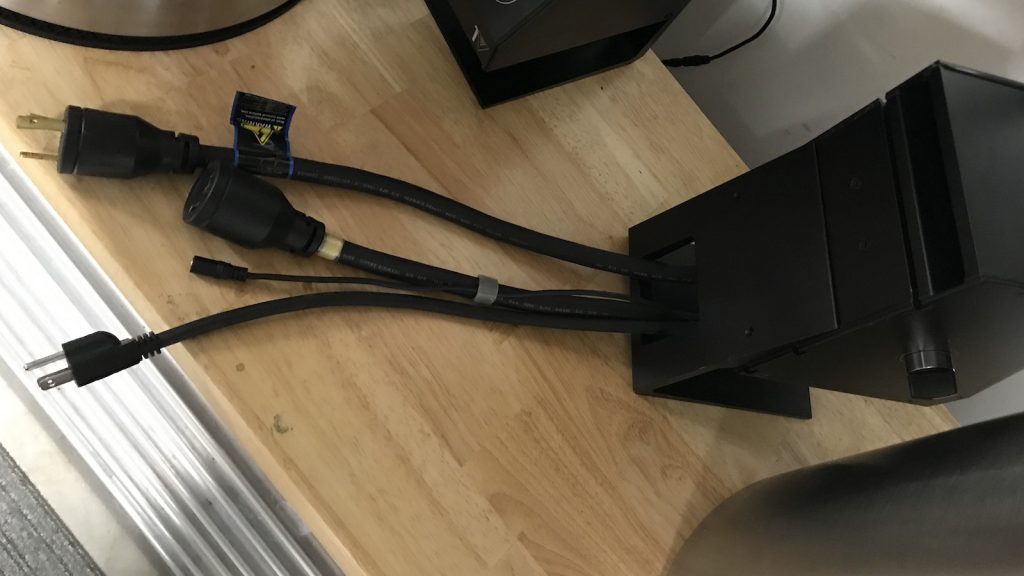
Extending from the bottom of the controller unit are a male L6-30 power cord that gets plugged into the 240v socket, a female L6-30 cord that receives the plug from the kettle, a standard 110v grounded plug, and a female 3.5 mm jack that connects to the temperature probe in the kettle.
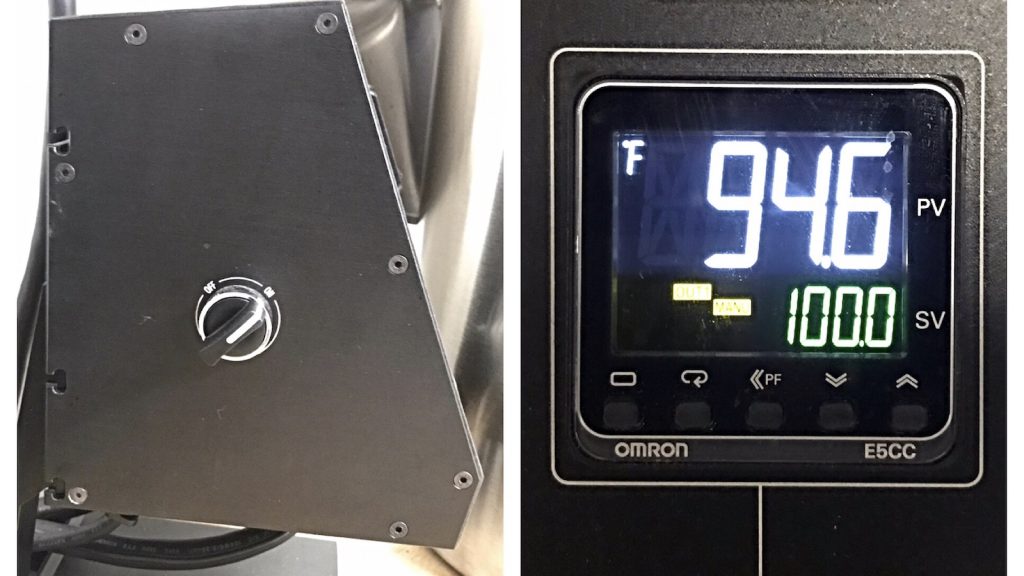
With everything properly connected, the side-mounted power switch gets turned to the “ON” position to fire the unit up, which results in the PID display lighting up nice and bright.
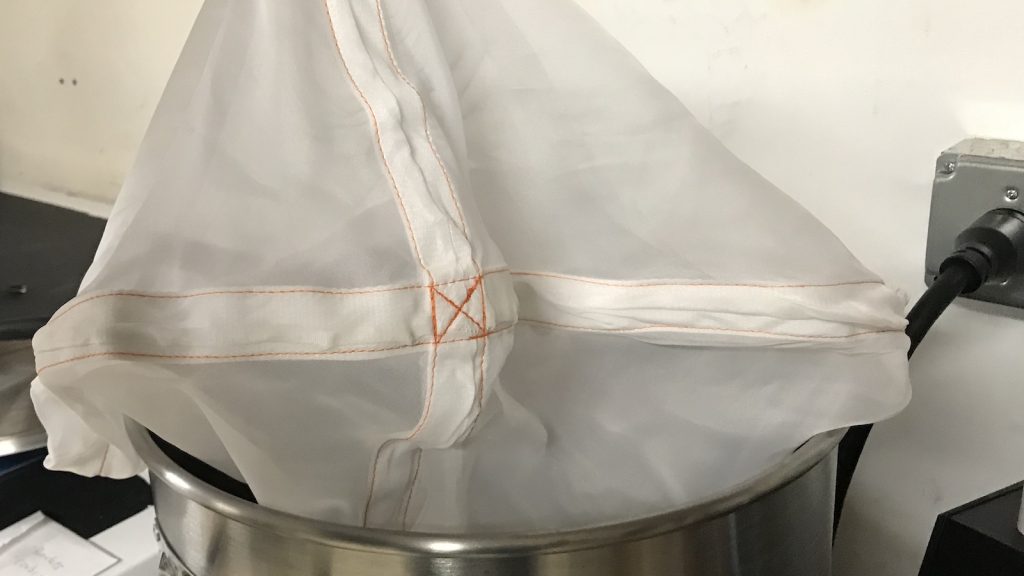
One of the unique things about this particular PID controller is that it doesn’t rely on high speed switching to modulate heat, but rather an internal solid state voltage regulator (SSVR), which means wattage to the element is proportional. Simply put– this feature is what allows a fabric grain bag to be placed directly on the element without risk of scorching, a claim my experiences with this unit wholly confirm.
At the top of the controller is a small toggle switch used to set the controller in either manual or automatic mode. When set to manual mode, the user is able to set the percentage of power going to the element. Crank it to 100% for quick heating of strike water and set it to 75% to maintain a perfect rolling boil. Automatic mode is used to dial in precise temperatures, which is ideal for step mashing, maintaining a single infusion rest temperature, or holding kettle sours at a particular temperature for extended amounts of time.
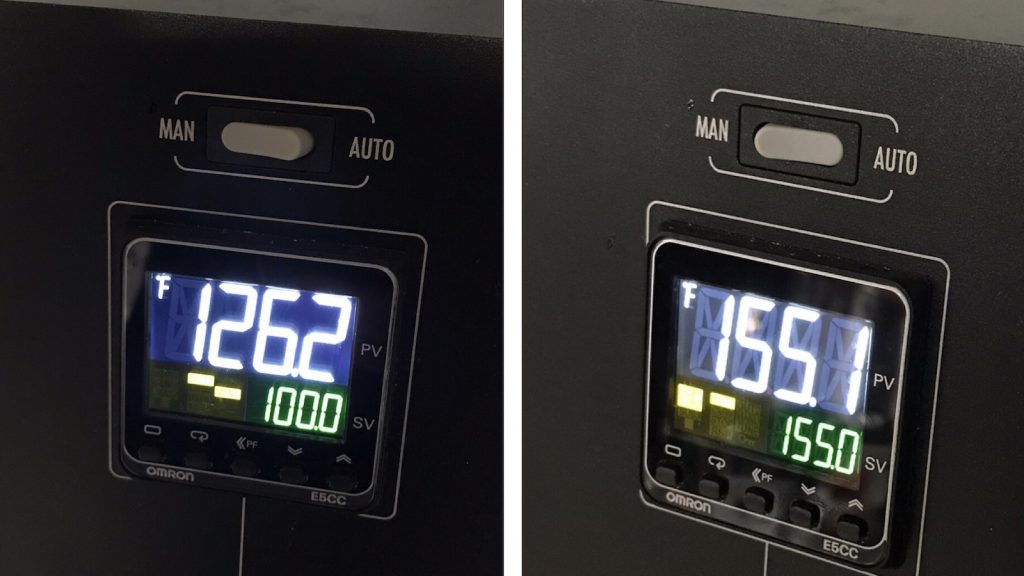
Another convenient feature of the PID controller is the ability to change the decimal position to make getting to specific set points quicker. The default is tenths, and while holding the up or down arrows down for a bit leads to more rapid changes, moving the decimal makes it even faster.
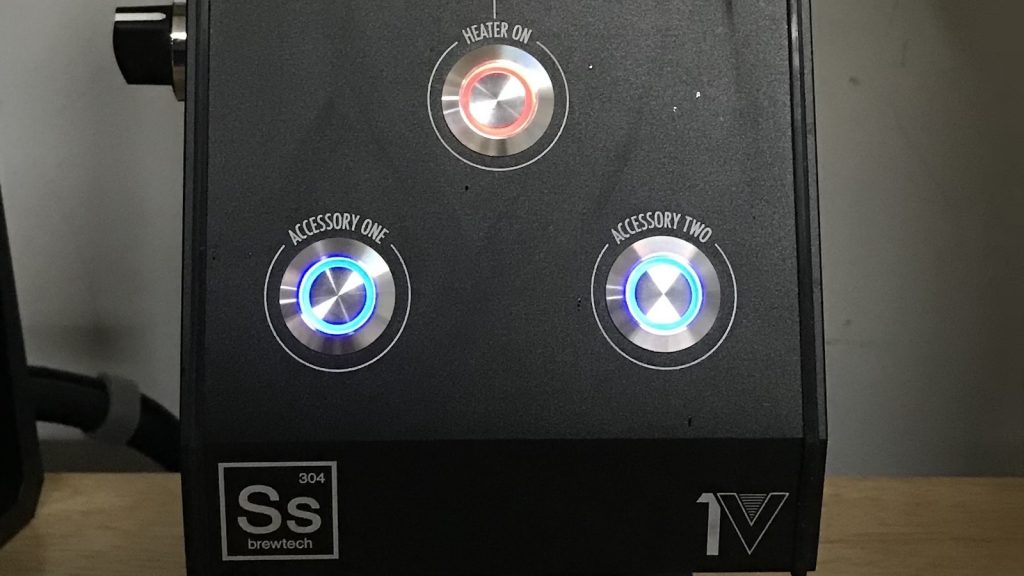
Directly beneath the LCD display is an activation button used to turn the element on, and beneath that are 2 accessory activation buttons.
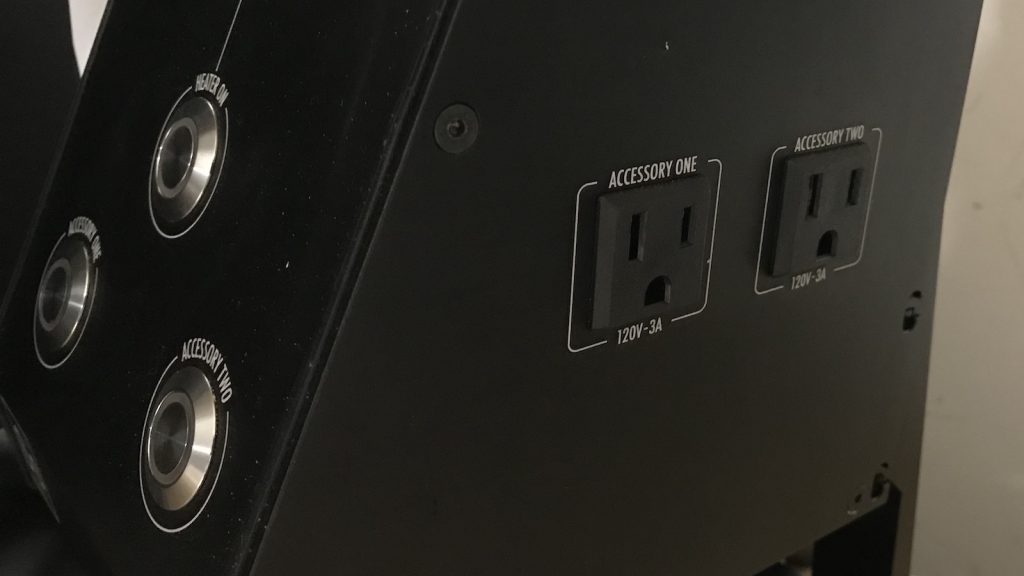
When turned on, the accessory buttons send power to the 110v receptacles located on the side of the control unit. These can be used for pumps, bucket heaters, mobile phones, vacuum cleaners, hand blenders, TV and xBox for playing COD4 Blackout while brewing, or anything else with a 110v plug.
That about covers the 1V controller, quite a bit packed into such a quaint unit.
eBrewing Kettle
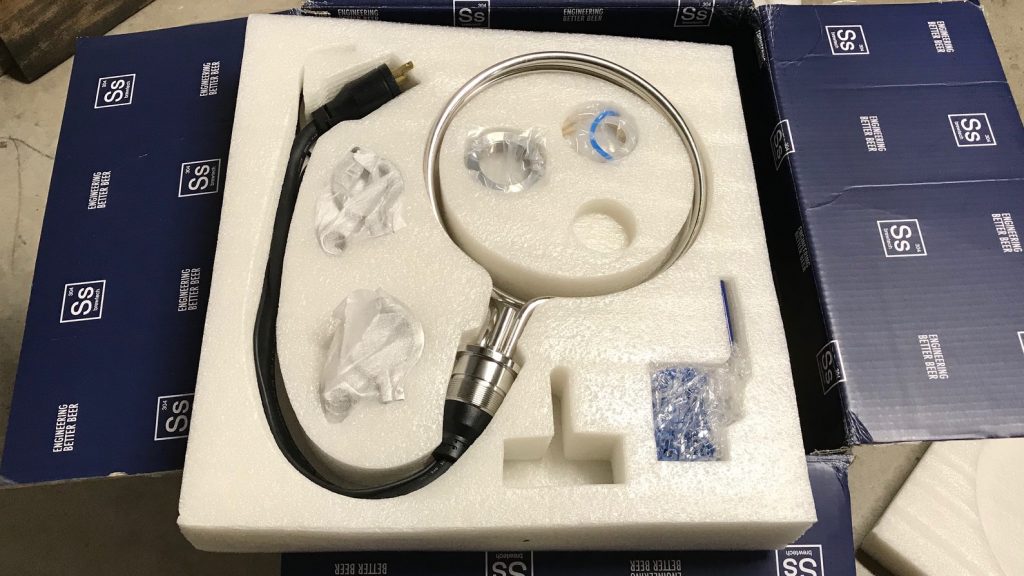
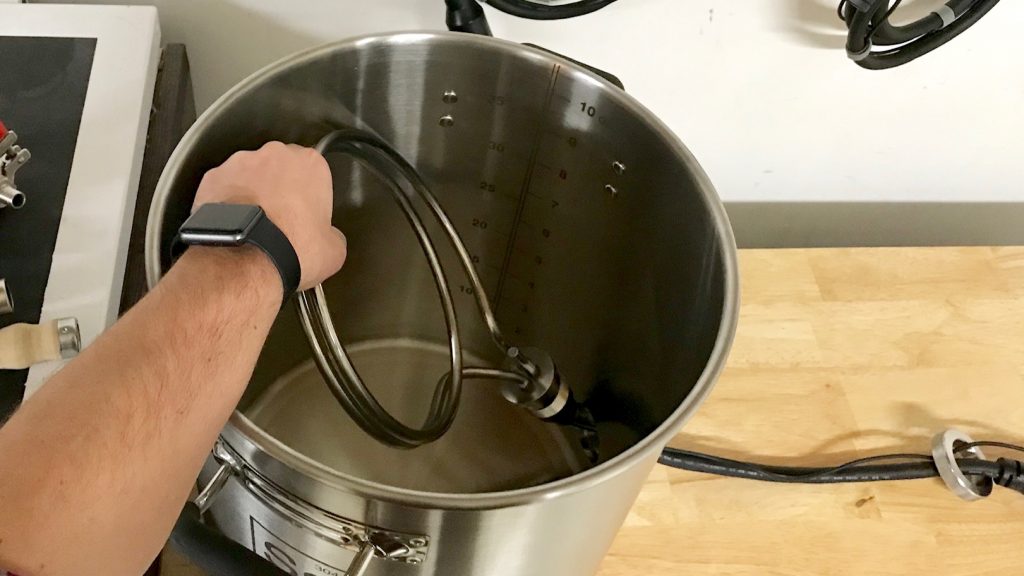
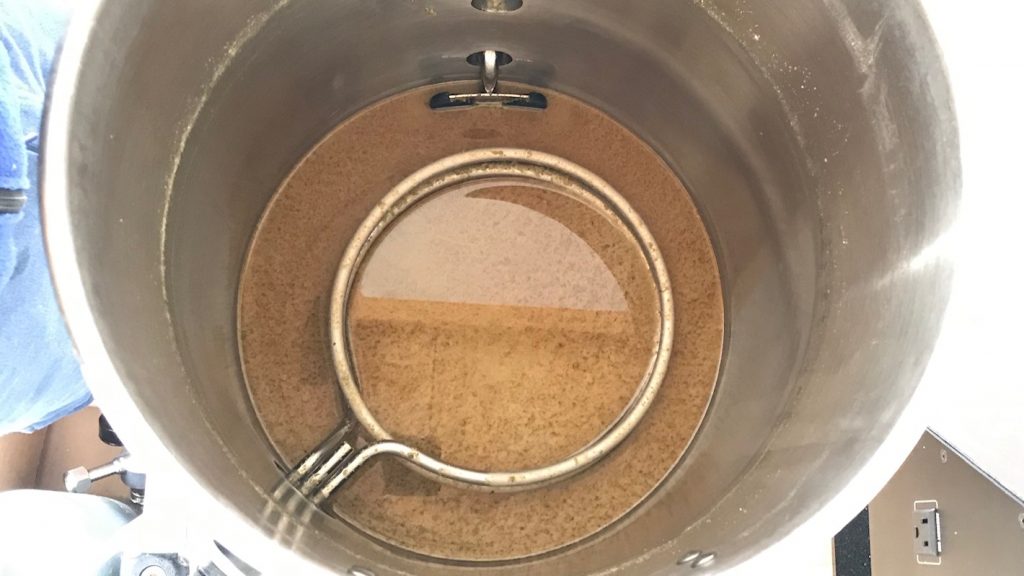
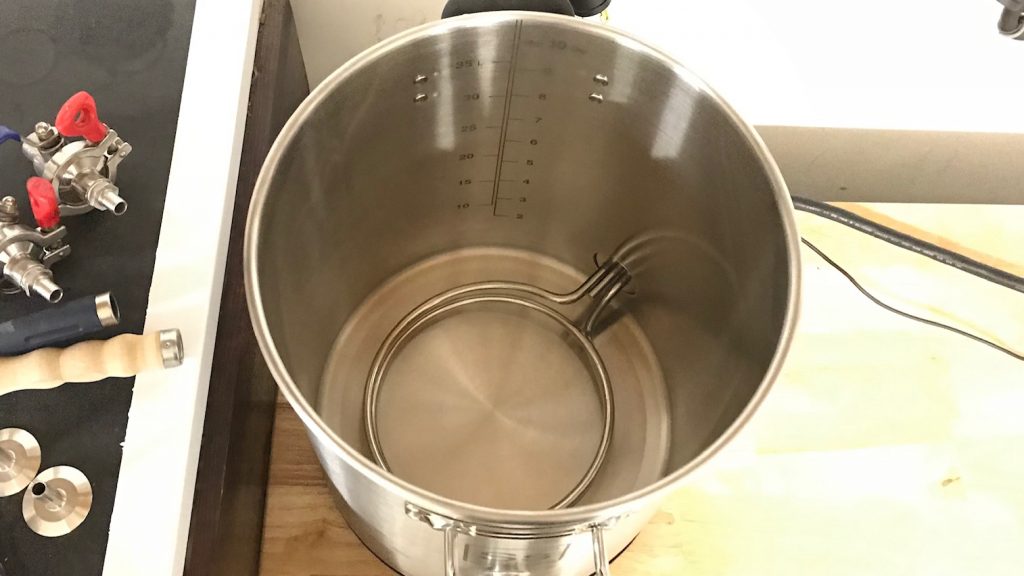
Rather than using a standard ripple water heater element, Ss Brewtech designed what they refer to as a halo element made of an alloy that’s more resistant to heat and corrosion than stainless. Packing 5500 watts, the halo design is purported to more effectively distribute heat throughout the kettle compared to other types of elements.
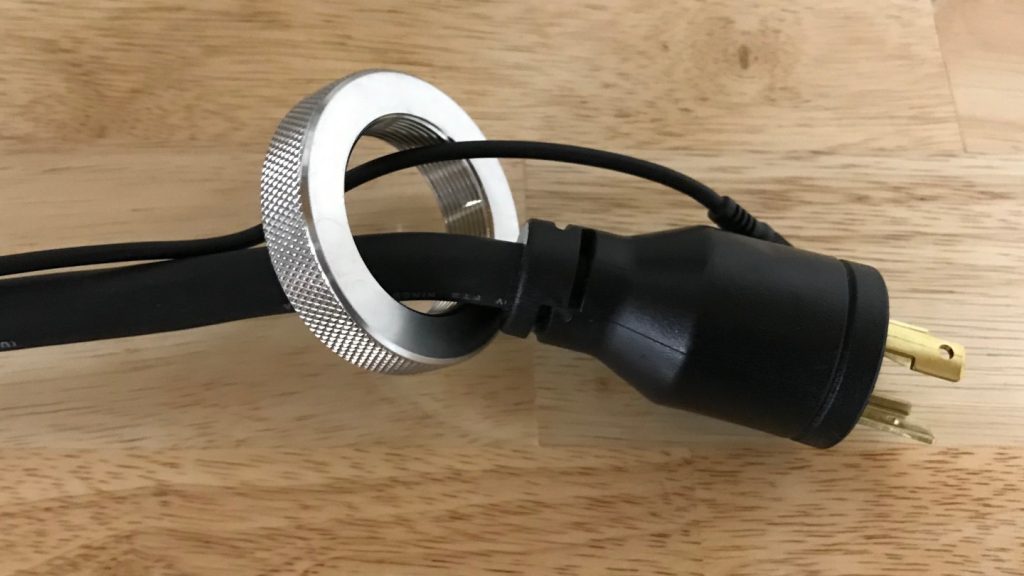
Permanently attached to the element are a male L6-30 power cord and a male 3.5 mm thermoprobe cable that get run through a triclamp port on the bottom of the kettle and secured in place with a stainless retaining nut.
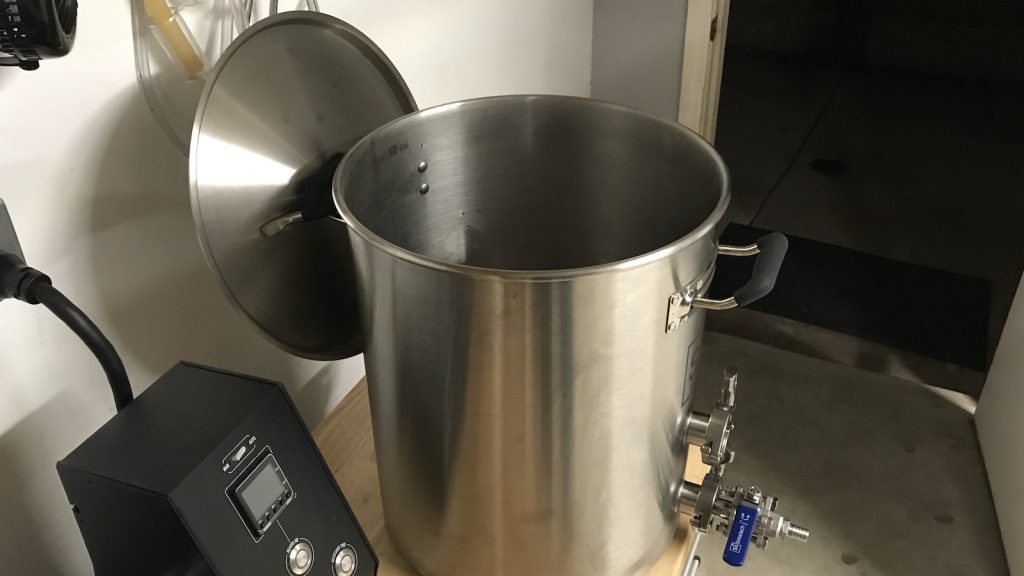
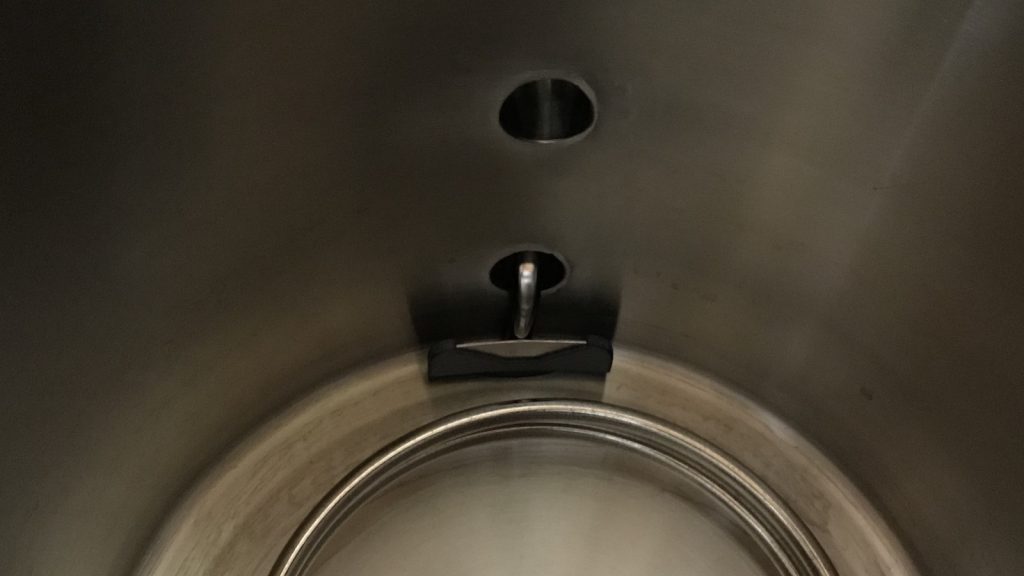
On the front of the kettle are 2 vertically aligned triclamp ports, the bottom of which an included 1/2″ 3-piece ball valve gets connected to. While I’d usually use the top port for a thermometer, this seemed unnecessary given the thermoprobe, so I covered it with a stainless blank included with the kit.
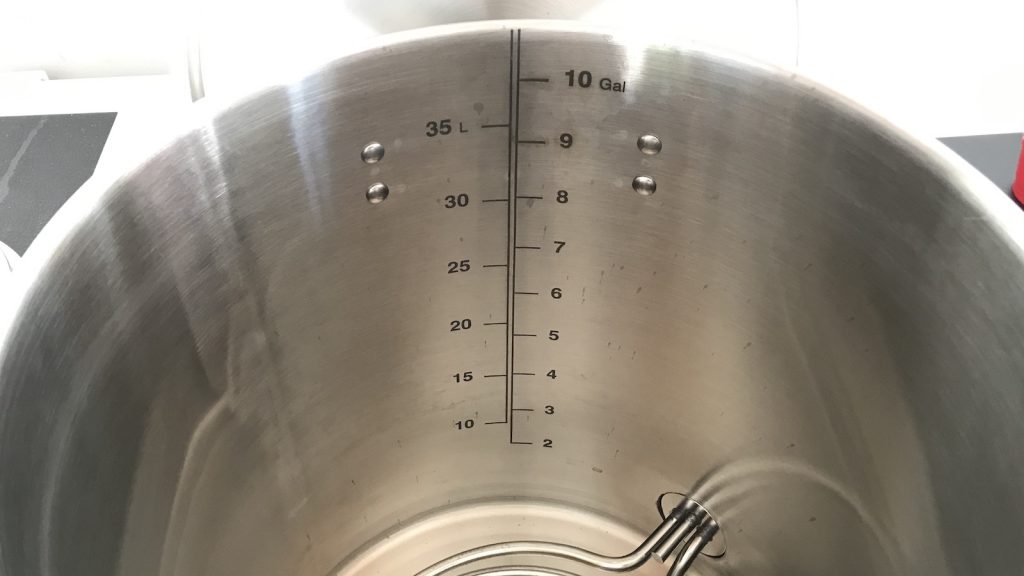
One of the simplest yet most convenient features of these kettles are the etched volume markings, which lined up perfectly with my trusty measuring bucket.
Ss opted to placed the rubber coated handles on the front and back of their eKettles as opposed to the sides, something I initially thought would have no impact, though I’ve realized actually adds some convenience by keeping things more streamlined.
Included with the kettle is the same trub dam that comes with Ss Brewtech’s other kettles, a simple little piece of gear designed to help keep trub out of the fermenation vessel.
Ss Brewtech is currently offering the 1V eBrewing kit with a 10 gallon/38 liter kettle, but they will be releasing a 20 gallon version soon. So, how does it work?
Ss Brewtech 1V eBrewing System Performance
For an initial test, I filled the kettle with 9 gallons/34 liters of 62°F/17°C tap water and timed how long it would take to bring it to a boil. However, I failed to realize the controller was set to manual and only at 90% power, but even so, it only took 39 minutes for the water to reach a boil. That’s just under 4°F/2°C per minute.
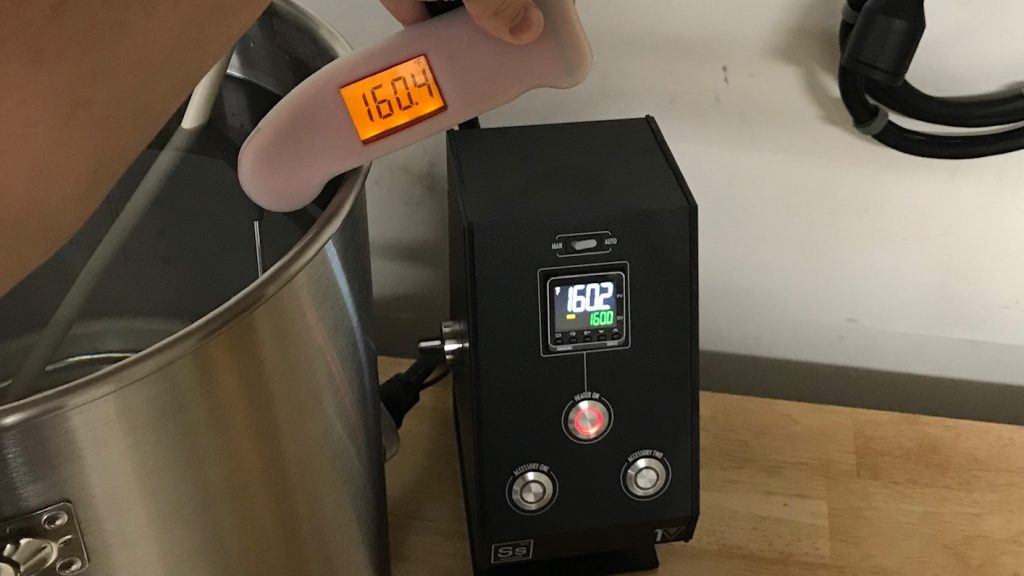
On a subsequent test with the controller set on automatic, I was able to heat 9 gallons of water from 62°F/17°C to 160°F/71°C in just under 22 minutes. And just to test the accuracy of the thermoprobe, I compared it to my Thermapen thermometer.
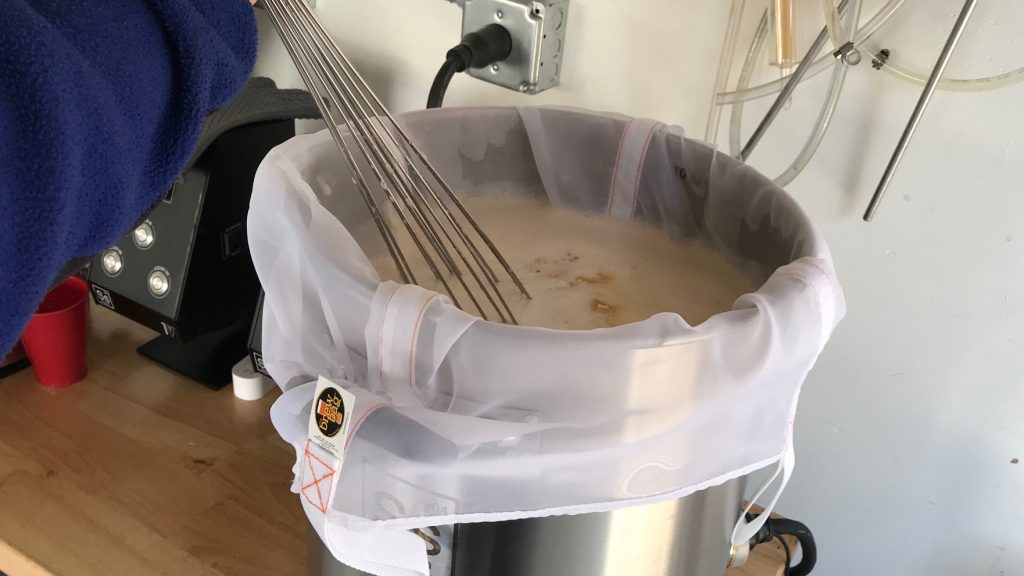
Over the following 2 weeks, I brewed 3 batches using a traditional full volume BIAB approach. With the controller set to automatic, the strike water was brought to the exact strike temperature before I mashed in by dropping the bag full of grist into the water, after which I set the controller to maintain my target mash temperature. Trusting what the Ss Brewtech guys told me, I allowed the bag to come into direct contact with the halo element during the mash.
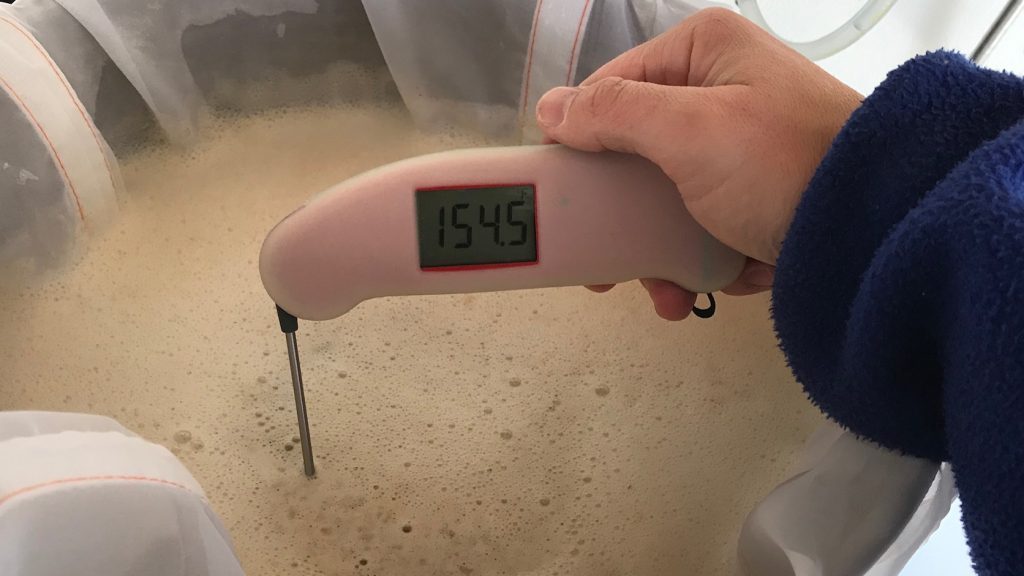
In sticking with my typical method, and as a loather of pumps, I stirred the mash every 10 to 15 minutes. I also took temperature readings periodically throughout each mash that showed the mash stayed within a 1.5°F/0.5°C range of my set mash temperature. At the end of a 60 minute mash set to 154°F/68°C, the temperature was dead on.
After removing the bag of grains, I flipped the controller back to manual mode and set it to 100% power. As soon as I saw bubbling on the surface of the wort about 16 minutes later, I reduced the power to 75%, which maintained a perfect rolling boil.
Side note: I made the mistake of not reducing the power on one batch… no amount of Fermcap-S will restrain that foam!
After each boil was complete, I turned off the element by pressing the “heater on” button before chilling the wort with my Hydra IC, conveniently relying on the thermoprobe and controller to gauge the temperature.
The chilled wort was then racked to a fermentor and I noticed the trub dam did a damn good job at keeping trub in the kettle.
It was time to clean up. I started by turning off the main power switch on the control unit then unplugging the element and thermoprobe on the kettle from the controller. Next, I dumped the remnant wort down my utility sink drain, gave the kettle a quick hot rinse, Scrub Daddy’d the kettle and element surface, then rinsed it again. Clean as a whistle in under 5 minutes.
I expect some gunk to build up over time and plan to remove the element for deeper cleanings after every 10th batch or so, but this worked good enough for me. The kettle was then placed back on it’s rubber trivet, plugged into the control unit, and was ready for another go.
| The Verdict |
If it isn’t clear by now, my overall experience with the Ss Brewtech 1V eBrewing Kit has been grossly positive, certainly more than I expected. I’ve used numerous Ss products over the years and have learned to expect awesomeness, but this unit has far surpassed anything I hoped for. It’s fast, efficient, easy to use, and surprisingly fun to brew on. Moreover, having converted my home to solar power, my brew days are now essentially free!
There are so many things I love about this unit– BIAB without concern of scorching the bag, it’s dead quiet, and it has a small footprint, to name a few. Forcing myself to take a more critical perspective, I found a few things I thought others might want to consider before picking one up for themselves.
As far as electric brewing systems go, the 1V is reasonably priced at $949, particularly for a powerful 5500w unit. However, a dedicated 240v circuit is needed to run it, which depending on where one chooses to brew, can require a costly installation. Easy access to a dryer plug? That’d work too.
The only thing about this unit that I found myself scratching my head about is the fact the cables on the element are permanently attached. I’m certainly no expert, there’s probably a valid reason for this, but in my mind, cleaning the kettle would be a tad easier without those cables dangling around. It hasn’t been an issue, though I make an effort to ensure the ends stay dry.
While I don’t use pumps in my brewery, I know quite a few folks who would prefer to recirculate during the mash. It seems simple enough to me to include a port at the top of the kettle for this purpose, though something like The Hangover would come in super handy for this as well.
Obviously, the 10 gallon/38 liters kettle, which is actually closer to about 11.25 gallons/43 liters per my measurements, limits the batch size that can be brewed with this rig to about 6 gallons for full volume BIAB and 9 gallons if using a batch or fly sparge method (with another vessel). For those who want to brew larger batches, Ss Brewtech has plans to release a 20 gallon/76 liter eBrewing system soon.
So, would I recommend the Ss Brewtech 1V eBrewing Kit to others looking to go electric?
Without hesitation! It took me making the jump to brewing electric to fully grasp just how awesome it is, and having brewed with others on various electric systems, the Ss eBrewing unit is easily up there with the best of them. To anyone who has been considering electric systems, you owe it to yourself to add Ss Brewtech to the list.
Ss Brewtech eBrewing systems are currently available at SsBrewtech.com. If you have any questions about the 1V eBrewing Kit, please leave them in the comments section below!
Support Brülosophy In Style!
All designs are available in various colors and sizes on Amazon!
Follow Brülosophy on:
FACEBOOK | TWITTER | INSTAGRAM
If you enjoy this stuff and feel compelled to support Brulosophy.com, please check out the Support page for details on how you can very easily do so. Thanks!






99 thoughts on “Product Review | Ss Brewtech 1V Electric Brewing System”
I think I would be all about that if they did a small batch version, maybe a 5 gallon kettle. Trying to cobble something together might be cheaper, but that system sounds frighteningly easy / painless to use.
Did you seriously Electric Slide me just now?
Boogie woogie woogie woogie
Shame on you. Haha. Now the rest of my co-workers must suffer.
Wonder if it’s too late for Santa to revise my list!
Where is the temp prob located? Did you reach your OG values as stated in BS?
Thermoprobe is located just above the element connection point. Yeah, nailing ~74% brewhouse efficiency.
Looks great. I opted not to wait and got a High Gravity system which I love. SSBrewtech is good stuff so you won’t go wrong.
Just can’t figure out how the bag can touch the element and not get burned. That’s cool (well,it must be cool if it doesn’t burn it) 🙂
Agreed, how does the bag not burn? And without some recirculating how does the wort not scorch on the element?
Long heating elements have less energy per surface area compared to short ones with the same effect, and as stated in the article they’re not switched on and off at full power (as with simpler controllers) but provided with variable voltage.
Looks like a great system. Any idea if they plan to incorporate some way of lifting out the grain when they release their 20 gallon version or if a separate pulley or something will be necessary? Was there any issue with resting your chiller on the element?
They’ve got plans to release an “all in one” system in the next few months that will incorporate a mashing vessel of some sort… I’m assuming it’ll be a stainless basket.
No issues with the chiller on the element yet!
How long is the included extension cord?
I’d reckon about 5-6 ft. I’m away from home right now, otherwise I’d measure it for you.
I’m using the Brewer’s Edge Mash and Boil currently. Do you have experience with that setup? If so, any thoughts on how they compare? (Other than SS having a higher build quality)
Build quality is certainly better, but the Ss 1V is also 240v compared to the Mash & Boil’s 110v. This was essential for me.
Just want to clarify. I just purchased the 1v system. The extension cord is not included. It only comes with the large 3 vessel system.
I realize that wasn’t very clear in the review and have made an edit. Thanks!
Has this new system saved you time in your brew day?
I’m not sure it’s saved me much time, maybe 15 minutes, give or take, but it certainly feels much more convenient.
Love this system! What boil-off rate did you get at the 75% power setting, and does the heating element interfere with your immersion chiller? I use a jaded Hydra chiller and I’ve been concerned that the chiller would have to sit on top of the heating element.
Boil off rate was about 1.1 gal/hr. IC on element hasn’t been an issue at all, everything still looks totally fine. That said, I’ve only brewed 3 batches on it.
Thanks Marshall… I’m already making my list for Santa for next year. Or I guess Father’s Day is sooner!
Welcome to the Electric Brewminati!! I have been a fan of Electric Brewing for a long time. So many benefits that outweigh any negatives. I checked out that system at NHC the past year. pretty slick for sure! I am with you though on the cords on the elements. I recently switched my ripple elements from having enclosures and a long cord to a twist lock at the element and man is it nice!
Cheers Marshall!!
Brian
Short Circuited Brewers
P.S. Still waiting on a response to a size and where to ship your shirt!
Email me, I’ll get you my deets!
Yaaaaaaassssssss!!!!! I feel like my prayers have been answered!!! Man oh man. Been thinking about making the switch to electric for a long time now. Tommy likey. Tommy want wingy.
Dude, it’s soooooooooo dope!
Hey Marshall, did your chiller sit on the heating element when you were chilling? I have a ripple element at the bottom of my 60l kettle and I use a false bottom to keep the BIAB bag and my DIY immersion chiller off of the element. I boil with the false bottom in place too.
Yeah, the IC went right on the element and hasn’t seemed to have any impact.
Hey Marshall
Do you have to use ball valve that came with the kettle or can you continue to use you brewer’s hardware Quick Clean Take-Apart Ball Valve? I’ve gotten addicted to mine ,and i don’t think i could you anything else.
The Quick Clean valve uses threaded NPT to connect to the kettle while the Ss kettle has a welded TC connection, so they cannot be used, at least as it’s designed, together.
Can’t you just take the easy clean valve apart and use the half with the valve end on it, utilizing the TC flange on the kettle?
Yeah, I’m sure that’d work, I just didn’t see it as being necessary… and I didn’t want to piece out the quick clean valve 🙂
Brewbag on element question here. Just to be precise, did you ever have your Brewbag in contact with the element while heating up to mash or boil temps? Or only put the bag in once target was reached? Was that how SS told you to proceed as not to burn the bag?
Really enjoyed this review as I recently switched to e-brewing on a much smaller and DIY scale with plans on possibly moving back up to 5 gallons in the future. I’m very jealous of that super ultra low density element. However, I agree with your critiques and would offer these suggested changes to make a really great system almost perfect IMO.
1) move the second TC port to the top of the kettle or add a third at the top.
2) make the element cord a twist lock, as you suggested.
3) add at least half gal hash marks, preferably every quarter gal for more accurate measurements
4) lower the price to $499.99, lol. We can all dream, right?
Great review! Looks like a fantastic system!
Like many homebrewers, I tend to drool over new, fancy, well-made stainless-steel equipment. But, for whatever reason, I find the modest roar of my gas stove(s) comforting, even reassuring. Maybe I’m old-school (although I’m not that old…), but I’m sticking with my gas setup. Still, if Ssbrewtech wants to send me this system to review, I won’t say no.
Thanks for this write up! I am about to move into a new place and can finally upgrade from my 1-gal apartment brew setup.
The new place is a rental and I’ll be brewing in the garage. It’s exciting to think about all of the space, but now I’m worried I won’t be able to have the electrical work done nor a vent installed for any of these setups I’ve seen.. are there any workarounds to pull this off?
Thanks!
For the electrical– ask your landlord, they might be cool with it.
For the ventilation– I bought a couple small battery powered fans (https://amzn.to/2GBtOlj) that I attach to the shelf above my kettles, seems to work just fine. Remember, ventilation is only for the steam since no gas is used, no risk of CO poisoning.
Out of interest what was the efficiency like? Did you hit your OG?
73-74% as planned. Nailed all my OGs.
That system looks glorious, super clean! I’ve been using my home made electric system for almost a year now. By far the best choice so far. I agree they should have made the pot cord a disconnect to avoid it dangling around, I’ve got that set up on mine =D. I’m sure its safer that way since its not another exposed connection. Cant wait for them to start selling them by parts, I could use a few upgrades.
… hm, are you mashing in in a bathrobe?
I would, if I was into bathrobes. That’s an old fleece “garage” jacket.
Marshall, thank you so much for this review. I’ve been wanting to pull the trigger as soon as I heard about this product but really wanted to see a review before I threw down the money. Quick question, did the set up come with the ball valves and TC clamps and gaskets? On the website it doesn’t look like those are included but in your picture in the review it does? Thanks.
Yes, it comes with all that stuff!
Great, thorough review! Thanks Marshall.
Looks like a great set up to brew in my basement when it’s below zero here in upstate New York (once I figure out ventilation for steam)
I currently boil in a 15 gallon kettle which has been a great size. Do you feel like the 10 gallon size may be a little restricting? I’m not sure I’d want to lug around and try to clean the 20 gallon size.
For a stepmash, can you leave the brew bag sitting on the element when raising the temp?
Not sure, actually… I’ll test it out.
Hey Marshall – did you ever test out the step mash with the brew bag sitting on the element?
Thanks!
Not an actual step mash, but I did mash in cool then raise the temp, no problems at all.
Is there a way to set a timer so that your strike water is ready to go first thing in the morning?
I own the 1V kit, just got my bag, and can’t wait to brew! i was working under the assumption that i had to turn off the element and dough in until i got a false bottom. THRILLED i read this review and have not yet ordered a false bottom!
Wohoo! I’m glad you like it!
Any word on when they will make a mesh basket as an insert for BIABasket?
I’ve heard rumors it’ll. E around Spring is pqo
Marshall- any chance you could revisit Rays post of BIAB vs non sparge in a NEIPA with these two systems? I switched to Biab a year ago from mash tun that I used as no-sparge and vorlauf, unfortunately have never felt like Beer was as good as before. Rays Exbeeriment really highlighted my personal findings, albeit from memory.
It’s on the list!
Just great… I get my next purchases all planned out for a new brew pot, accessories, propane burner, etc., and you’ve gone ahead and complicated things for me. I was toying with the idea of going electric before I decided I couldn’t afford the latest high-end stuff, but now I’ve got to revisit that decision. My wife is seriously going to hate me.
Seriously though, thanks for the great write up. I’ve got some pondering to do.
So how would this system work for those of us that do a traditional mash/ sparge/ boil?
You’d need another vessel, something like a water cooler would work, it yeah, this’ll be great.
Could you estimate what the maximum O.G. you might be able to achieve with an all-malt wort, and a 6-gallon batch size?
BeerSmith can do that really well, but unfortunately I’m not currently near my home computer with BS on it. I’d guess at my brewhouse efficiency, I could hammer out a 5.5 gal batch of 1.070 OG beer with this unit, give or take.
Hey Marshall, super random question. I am looking into adding a 240v outlet on my own and I have gotten a ton of different answers. From your picture it looks like the electrician just ran PVC conduit from your outlet box along the outside of the wall to your breaker panel. Is that correct? Thanks!!
Yep, he used Cantex conduit for everything. However, it runs to a sub-panel (inside my garage) I had him install directly behind the main panel (outside wall). I didn’t have enough slots, plus I had him do some other non-brewing related stuff as well 🙂
Awesome thanks! Seems every electrician has a wildly different opinion. “use EMT conduit, use MC Wiring, Romex wiring can go through conduit, wait no it can’t…” Haha, glad I started all this prior to buying the SS 1v 😉
Hey Marshall, I have the 2V controller and like you had a subpanel installed as didn’t have enough slots in my old box and wanted room for expansion. How did your electrician do the GFI? I asked for this but was told (and have seen numerous posts on different websites saying yes/no on this) that you can’t do a GFI on the 240v with a three prong wire, only with a 4. I think there is a way around it but that is not up to code. I ordered an in-line GFI for now but would prefer not to have the excess cord sitting around.
I’m not terribly sure what he did, but it all works beautifully. I know he tried something different on each circuit (I’ve got 2) and had to come back to “fix” the one that didn’t work, but I couldn’t tell you what that was. Full disclosure: my electrician is Tim’s brother, and while he’s a nut about safety, he’s also been doing this shit for decades and could’ve relied on some loopholes to make this work… no clue.
I have a 4 prong 220V GFI system. I would send a photo, but I don’t see an attachment button. The outlet stands along but is wired to and another box that’s a dedicated GFI for the 220V plug.
Thanks guys. I just got the following reply from SSBT for anyone else in the future:
“The L6-30 is Hot Hot EarthGround. So no Neutral involved. GFCI breakers do not require access to a neutral to work. Only if the load requires a neutral does a GFCI also need access to neutral. L6-30 is not capable of providing for 120v devices, and this means your load doesn’t use neutral. So its GFCI protector doesn’t need access to neutral either. We have included the option to add 120v devices to the controller but that runs through a separate power cord and outlet.
There are multiple options here like adding a breaker that feeds it from the main panel with one that has GFCI protection or a “GFCI Spa disconnect” or an L6-30 inline GFCI like this one https://www.stayonline.com/wiring-device/30a-portable-gfci-1769.asp “
Hey Marshall! Great review!!! I’m about to pull the trigger on one of these systems since my Robobrew took a dump today.
How long is the extension cord that SS provides?
And do you have a Beersmith profile that you’d be willing to share? And is there any kind of promo link I can use for SS to help you guys out?
Hey dude! The cord has got to be 6′, pretty long. I’d measure it for you, but it’s now all behind my brew bench.
iIf anyone can help out, how high (inches or gallons) does the heating element sit above the bottom of the pot. I want to make sure my hydra will fit fully submerged on a 5.25-5.5 post boil chill. Thank you!
It’s 2.75″ at its highest point. JaDeD makes a unit that attaches to the Hydra specifically to keep it off the element, it’s called Electric Chair, I’ve got on on the way as I type.
Have you considered just using one of the brewerhardware BIAB 13″ false bottom. It would keep the grain off the element (even though I know that is ok on this unit) and also the chiller. You can get with a 3″ or 4″ high. You can leave it in during the boil.
Thank you! Great work and ideas as usual!
The ssbrewtech guys told me I could sit my Hydra directly on the element after I saw your review. But I don’t like that idea for long term. Did you send the jaded guys the measurements, And they custom made one for you? I spoke with them before I ordered my ekettles, and they told me to wait until I got them to give them the exact measurements. I’m going to order an electric chair soon as well.
Honestly, I’m comfortable with setting the IC directly on the coils, haven’t noticed any warping after 6 batches, but I was curious about JaDeD’s solution and asked them about it. Yeah, they require measurements, but they told me they’ll keep the ones I sent them for the Ss 1V eBrewing System to use with other customers.
I just use a worm clamp and a SS hook I bought from Home Depot to keep my IC off my electric element. I just set the height of the clamp so the IC would hover just above the element when hooked on the side of the pot. Cost maybe $3, if anyone doesn’t want to invest in different chiller options.
After you get the electric chair, I would be interested in a little post as to how it works? I I am ordering mine this weekend after I have time to send them in the measurements.
You got it.
I’m surprised the temperature at the top was consistent with the temperature at the bottom. I’ve been using a 20g electric system for a few years and without a pump I’d be at least 3 degrees off.
So close to ordering one! What do you use to lift / drain the grain bag? Pulley system?
Brute strength! They’re 5 gal batches, pretty easy.
Gotcha! You don’t let it hang and drain or anything?
Nope! I pull the bag out, hold it over the wort and gently spin it a bit until pre-boil volume is reached, at which point I put the bag in a bucket. A few drops to clean up, occasionally some arm soreness, but it works for me.
Dude your approach is so easygoing. I love it!
I was re-reading this string of conversations and it seems like you may have said that ssbrewtech has a 6’ extension cord that works with the controller? I looked all over their website and can’t find one. Did they send you one?
Yeah, it’s included with the kit.
Any idea what the smallest batch is that can be made on this system?
I’m thinking about 2.5 gal
An update/feedback. Got my E kettles for the two kettle system. Also got my jaded electric chair. Gave jaded the measurements and it fits perfectly. Tested 6gal ( for hlt strike water ), and the temperature went from 60 to 170 in 20 minutes. I then tested 8 gallons and temperature went from 135 to 212 boil also in about 20 minutes. I then did a boil off rate and mine came out about 1.2 gallons per hour. I did what Marshall did and once I got it to a rolling boil put the percentage down to 75%.
update, I just did an hour boil off at 71% and got exactly 1 gallon boil off per hour. At Sea level. Makes the math easy.
Jaded electric chair? Didn’t see that on the site. Custom? What was the cost? Does enough of it stay submerged under the wort level to cool effectively?
It’s a custom option, email JaDeD.
Yes, just email them and they will make it for you. I think it was $65. My Hydra stays completely submerged. I make 5 gallon batches.
I converted to biab ebrewing two years ago doing 3 gal batches so 120 volt element works fine, uses an INKBIRD controller, and I added aTopflo pump to recirculate. Bought everything I needed from beerhardware in Jersey and built the system myself- cost $550. I’ve done 15 batches so far and the system works great and produces great tasting beer. I keep the bag off the heat element with a false bottom.
Despite what is claimed in this review, this system can absolutely scorch your grain bag. I used it a handful of times without issue, but eventually, my grain bag was destroyed.
Oh man, that sucks! Did you happen to use it on manual mode at a high setting? I’ve used mine 20+ times with the same bag, it’s still completely fine.
Hey Marshall. Great review! Any chance SS Brewtech will send you a review unit of their 3v RIMS system now that it’s available?
All,
I don’t want to try and take the place of the Brulosophy team here. But I did just purchase the 2v system with the RIMS setup, mainly because I live in NH and fighting the cold and wind 5-6 months a year wasn’t very fun at all. I did a little rigging of existing equipment (though my wallet doesn’t agree) and set up the following:
Mash Tun: Spike Brewing 15 gallon TC kettle. I loved the step down in their kettles.
Mash Tun Temp Control: SS Brewtech RIMS element
Boil Kettle: Converted my old 14 gallon boil kettle to a e-kettle using SS Brewtech’s hole saw to insert a weldless TC port and a Spike 5500W element.
Controller: SSBrewtech 2v eBrewing
I also hired an electrician to install the 240v outlet. The plug is unusual (not a standard dryer plug) so make sure you specify the exact parameters of the plug before they show up or you’ll be like me and pay the electrician to drive back and forth to the store. The installation in my basement has the GFCI right on the breaker box in a dedicated circuit, obviously. It cost about $300 to install.
I have mostly the same experiences as others. For 5gal batch volumes it went from 46F New Hampshire groundwater temps to boiling in about 22 mins. To really push it, I also installed the 5500W TC element in a 20 gallon kettle and it brought 17gal of water to a boil in about 90 mins. Not awe-inspiring but my old Robobrew takes about 45 mins to get 5 gal to boil.
The RIMS element was about the same ramp rate. Took about 15 mins to get to mashing temps (150F) and another 7-8 mins to get up to mash-out. I did a step mash on the first batch to test it out and going from a protein rest to beta-amylase rest to alpha-rest to mash out was only as difficult as pressing the temperature setting buttons. I do single-infusion mashing mostly but wanted to use all the gears to see how it worked.
The 2v also has two 120v plugs on the side for accessories. That’s super-useful. I have an old Chugger pump that has no on/off switch. Well now it does! The entire control panel is well done, sturdy, and well-built. My only nit is that the 240V cords from the unit itself are only maybe 3ft. 6ft cords would be far more useful.
In terms of brewing…well…it doesn’t really feel like I’m brewing! I set the temperature and can walk away for an hour before needing to do something else. I’ve always done batch sparges. I have stainless QD fittings on all my equipment so when the mash is finished recirculating I hook the pump hose up to the boil kettle, in which I’ve heated all the sparge water. Pump the hot water through the RIMS system on the way to the mash tun and voila! A clean RIMS heater.
With the boil element, as Marshall said, 100% power to get the boil moving and 70-75% power to keep a rolling boil. With a couple drops of Fermcap S in the kettle I can walk away having dialed in the perfect boil rate.
Clean up using TC fittings is a breeze. The way I have it setup I can remove the 5500W element easily, replace the TC port with a cap, then scrub-rinse-dry.
The system is not for the faint of wallet, but I do think it saves me quite a bit of time and hassle. I’m finishing a normal 5 gal brew-day in about 3.5 hours and add in maybe another half hour for cleaning. But no more worry about propane running out or where everything is. Can’t go back!
Looks like a sweet setup. I’d like to switch to electric sometime soon. Shame SS brewtech don’t make a trub dam that works with their quick clean ball valve though. I loathe cleaning up standard ball valves, faffing around unscrewing the bolts etc. How much distance is there from the coil to the edge of the kettle? I’m just wondering if I can squeeze another dip tube in there….