Author: Marshall Schott
In his ubiquitous manuscript, How to Brew, John Palmer states:
“It is a good idea to remove the hot break (or the break in general) from the wort before fermenting. The hot break consists of various proteins and fatty acids which can cause off-flavors, although a moderate amount of hot break can go unnoticed in most beers.” (Ch. 9, Sec. 1)
Despite stating that “moderate” amounts of break material can go unnoticed, the primary point of this statement appears to be that hot break in the fermentor is generally not a good thing. Many homebrewers go to great lengths to separate this gooey gunk from their wort with concerns of imparting undesired off-flavors, developing a stuck fermentation, or ending up with a hazy beer.
Then there are those those few rogue (lazy) brewers who couldn’t give two shits about kettle trub making it into their fermentors, claiming their beers attenuate just as well, taste just as good, and end up just as bright as beers fermented without trub. These folks annoy some of us, what with their flippant remarks about how we’re working too hard for something that has minimal, if any, impact on the finished beer and only results in the unnecessary expenditure of time, effort, and money…
Okay, I’m sort of one of these guys. It’s not that I’m against geeking out on equipment, I just appreciate simplifying the process while maintaining a high quality finished product. For more cynical folks like me, claims that kettle trub making it to the fermentor leads to lower quality beer are suspect, particularly when those claims aren’t necessarily backed up by any real-world evidence (that I’ve been able to find). As such, we’re left wondering: does it even matter?
In one study, researchers measured the impact of kettle trub on levels of isoamyl acetate (banana) and ethyl acetate (nail polish remover), splitting the same wort into 3 fermentors with the following trub volumes:
Low trub: .13 mg/ml
Moderate trub: 1.7 mg/ml
High trub: 15.9 mg/ml
To put this in a more understandable context, let’s consider what this would look like for a typical 5 gallon batch of beer:
Low trub: 0.1 oz (essentially nothing)
Moderate trub: 1.13 oz (probably close to what homebrewers who care can achieve)
High trub: 10.56 oz (quite a bit)
They found the wort with the most trub produced a beer with significantly lower levels of the aforementioned ester compounds. Huh?! We’re talking 106 times more trub than the beer in the low trub condition, equivalent to nearly 3/4 lb of kettle sludge in a 5 gallon batch. With all of my skepticism, not even I expected this. Fascinating.
Still, this is only a tiny slice of a huge pie and many questions remain: does kettle trub have an impact on clarity, flavor, or head retention? How do differing levels compare in regards to fermentation lag, vigor, and completion time? Do I really need to worry about this shit? These are the questions I aimed to at least attempt to provide some answers to in this exBEERiment.
| PURPOSE |
To compare the impact different amounts of kettle trub have on myriad aspects of 2 beers made from the same wort and fermented with the same yeast.
| METHOD |
I brewed a 10 gallon batch of Cream Ale on May 4, 2014 that would be fermented with Danstar Nottingham ale yeast, so no starter was prepared ahead of time.
Summer Cream Ale
Recipe Details
| Batch Size | Boil Time | IBU | SRM | Est. OG | Est. FG | ABV |
|---|---|---|---|---|---|---|
| 11 gal | 60 min | 15.8 IBUs | 3.9 SRM | 1.046 | 1.010 | 4.7 % |
| Actuals | 1.046 | 1.009 | 4.8 % | |||
Fermentables
| Name | Amount | % |
|---|---|---|
| Pale Malt (2 Row) US | 13.5 lbs | 72.97 |
| Corn, Flaked | 4 lbs | 21.62 |
| Acid Malt | 8 oz | 2.7 |
| Honey Malt | 8 oz | 2.7 |
Hops
| Name | Amount | Time | Use | Form | Alpha % |
|---|---|---|---|---|---|
| Summer | 14 g | 60 min | First Wort | Pellet | 5.5 |
| Summer | 99 g | 20 min | Aroma | Pellet | 5.5 |
Yeast
| Name | Lab | Attenuation | Temperature |
|---|---|---|---|
| Nottingham (-) | Danstar | 75% | 57°F - 70°F |
Download
| Download this recipe's BeerXML file |
I mashed at 150°F/66˚C for an hour, collected the wort, and started the boil as usual.
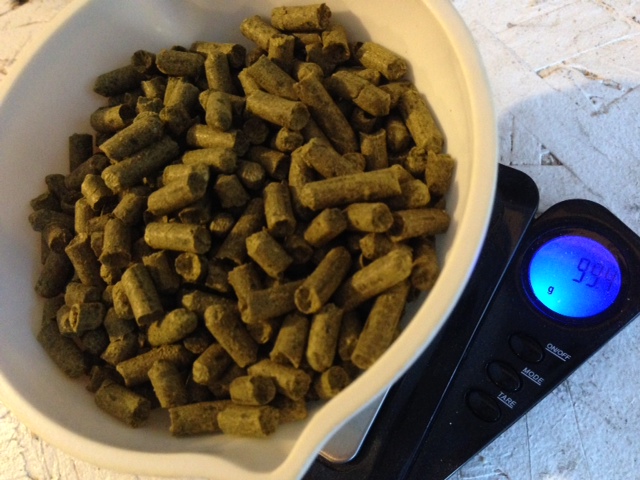
My decision to use 100% Australian Summer hops had mostly to do with the fact I had purchased 4 ounces a few months prior and thought “light melon and apricot” would compliment this style well, as non-traditional as it may be. While designing the beer, I figured it would also be cool to forgo all boil additions, settling on doing only FWH and flameout additions, the latter of which amounted to nearly 3.5 ounces.
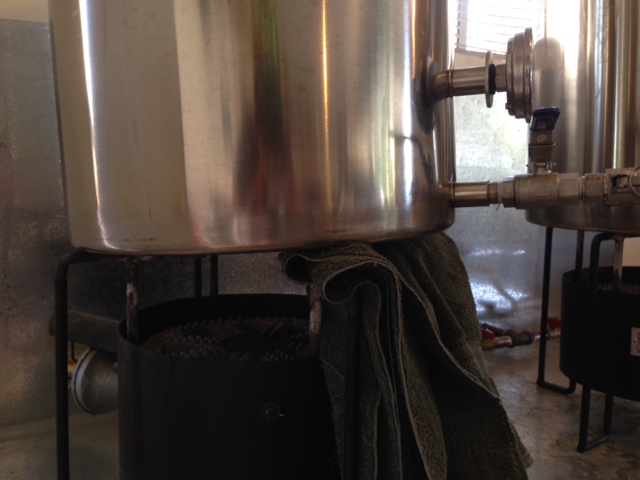
Once the boil was complete and the wort was chilled to 72°F (my groundwater is warm this time of year), the first carboy was filled halfway with excessive amounts of kettle trub intentionally added; a long spoon was used to coax trub from the bottom of the kettle out of the ball valve. I then covered the kettle and let it sit for about 15 minutes to allow the break material and hop matter to settle out, propping the front end up with a towel so that it settled on the opposite side of the valve.
I gently opened the valve to clear any leftover trub then transferred 5.25 gallons of very clear wort to the second carboy, Non-Truby. I finally finished filling Truby, making sure to transfer as much kettle trub as possible. I’ve never left such clear wort in my kettle before.
Both carboys were placed in the fermentation freezer and allowed to chill to my target pitching temp of 62°F/17˚C. The difference was pretty remarkable after only an hour in the cool chamber.
It took about 4 hours for the wort in each carboy to reach pitching temp, at which point the trub had compacted into a more solid mass. As hard as I tried to keep the trub out of Non-Truby, there remained a small amount of material that settled out, still significantly less than what was sitting at the bottom of Truby.
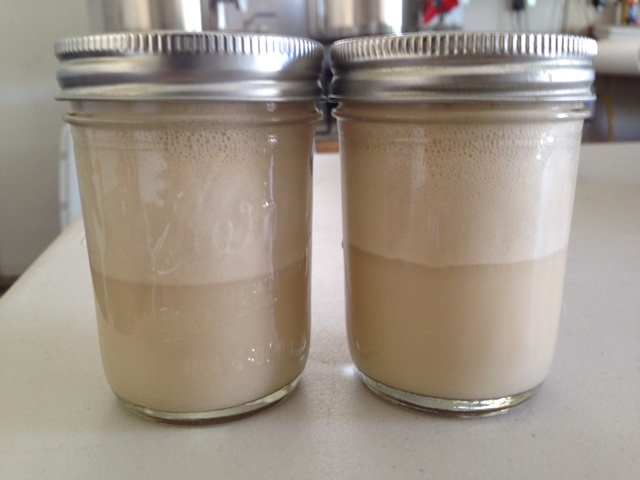
I rehydrated 1 sachet per carboy of Danstar Nottingham yeast in about 250 mL of 90°F water, allowing it to proof for 20 minutes. It was 68°F/20˚C by pitching time.
I’ve never actually used this yeast, I tend to stick to liquid varieties, but I’d heard it works really well at cooler temperatures and I’m always game for trying something new. Moreover, since each sachet had the same date on it, I figured this would potentially increase the equality between each batch in terms of pitch rate compared to trying to split a starter from a single vial of yeast. Not much was happening 12 hours post-pitch, I understand dry yeast tends to lag a bit longer than liquid, even when rehydrated.
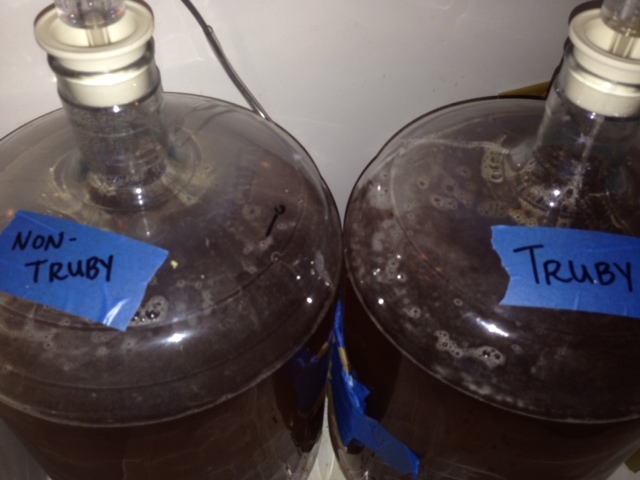
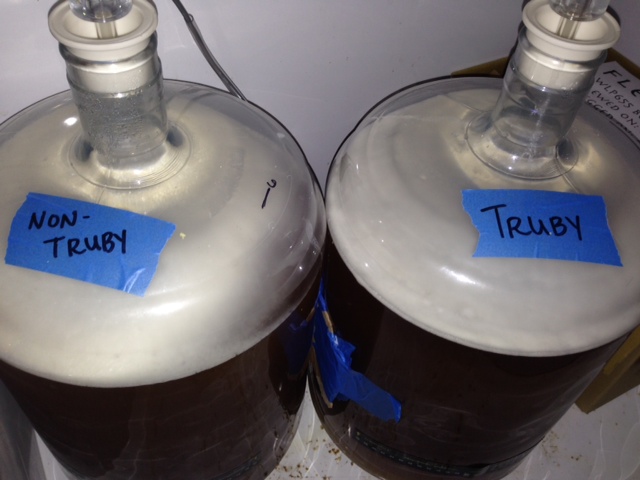
Just a few hours later, 18 since pitch, both beers were waking up.
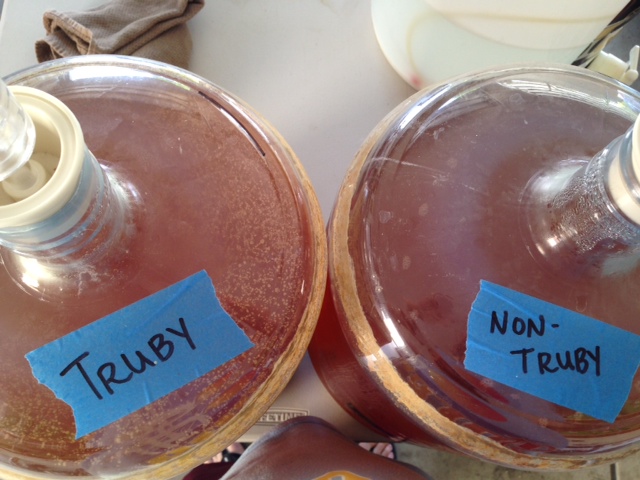
One thing I noticed was Non-Truby had slightly less krausen development (look toward the right side) while Truby was completely covered.
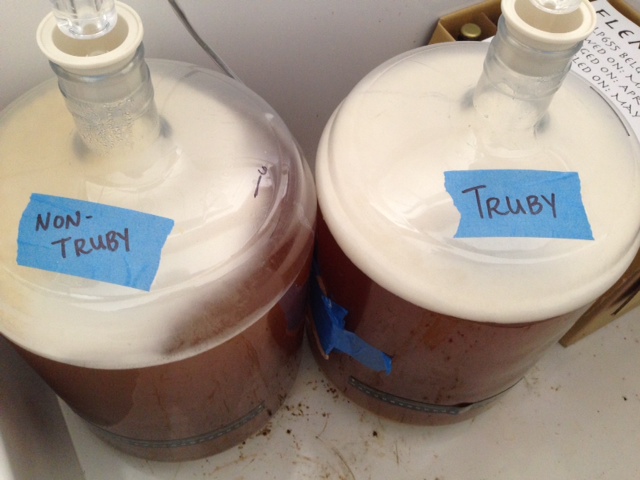
The difference was very slight and both beers were ripping along nicely by 36 hours post-pitch.
A few hours went by where both airlocks were blurping at the same exact rate, as if they had been purposefully synchronized. I felt like I’d seen a shooting star. Anyway…
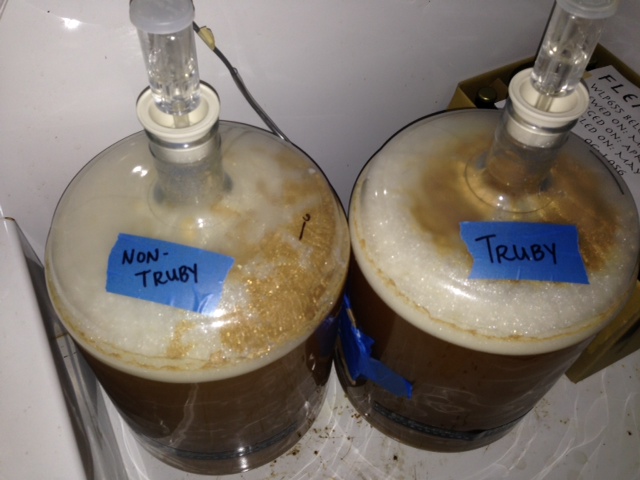
After 3 days fermenting at 62°F/17˚C, both beers were showing signs of reduced activity, so I bumped the ambient temperature of the chamber up to 70°F/21˚C to ensure complete attenuation. The beers were sitting at 67°F/19˚C the next evening and the krausen had dropped on both.
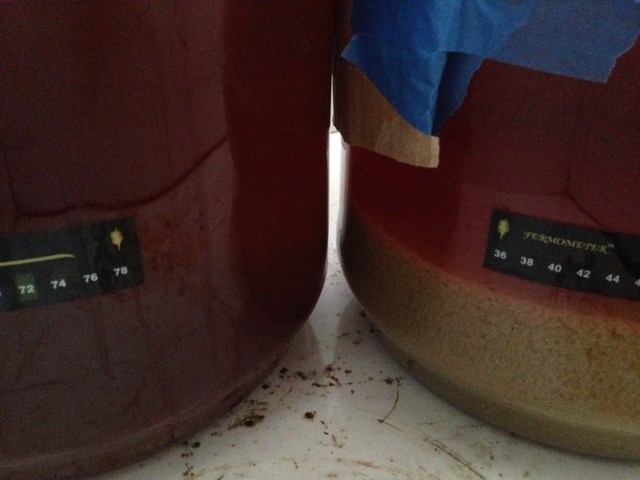
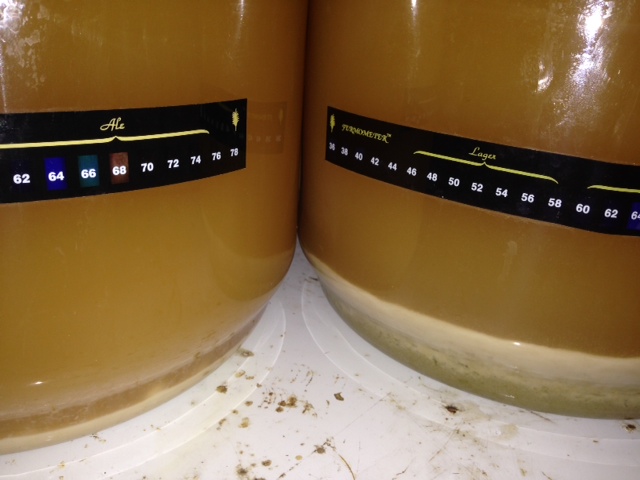
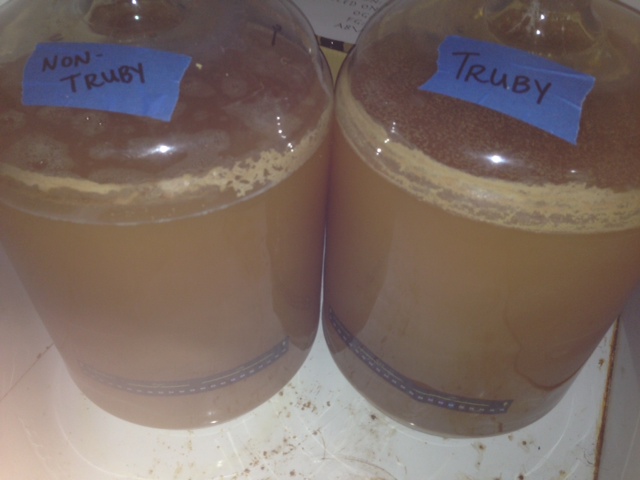
The difference in material at the bottom of each beer was pretty drastic.
If you look closely in the photo above, you’ll notice 2 fairly distinct layers in the carboy to the right. I’ve always assumed the yeast covering the greenish bottom layer of trub would limit any flavor or aroma impact it might have on the finished beer, I’m curious how true this is. Another very subtle difference was noticed on closer inspection of the top of each beer, with Truby appearing to have slightly more particulate matter floating around.
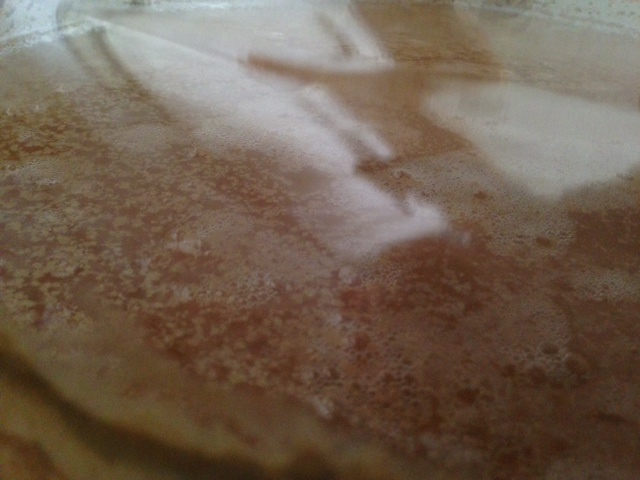
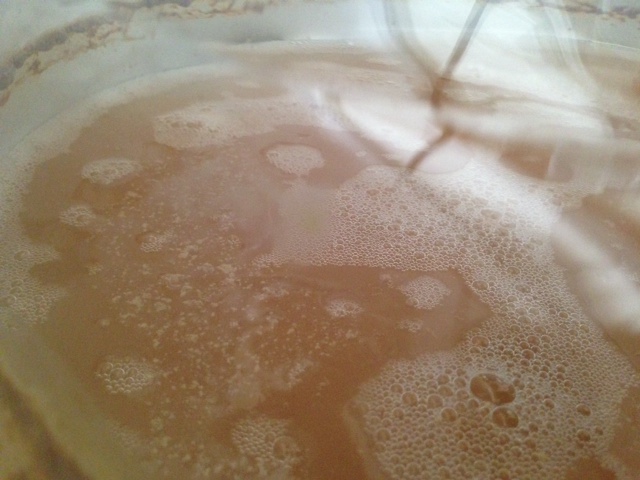
By the following morning, the beers were closer to 70°F and looked similar to the night before. The airlocks on each were totally inactive.
I tested the FG of both beers 5 and 8 days after pitching.
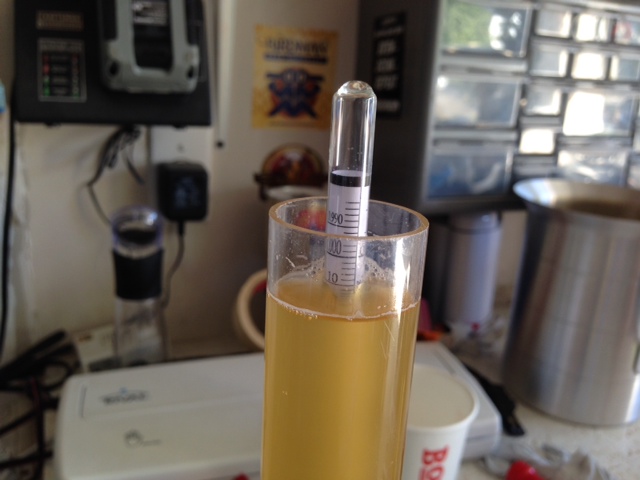
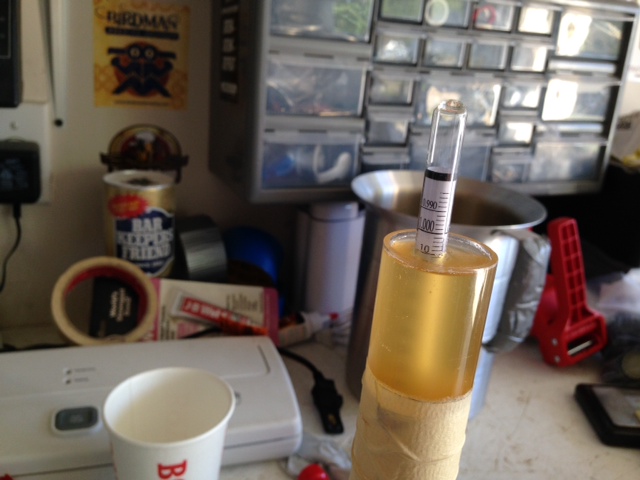
On both occasions, the beers read the same (precise photos of hydrometers are tough to take). I tasted each and detected no diacetyl, so I dropped the ambient temp in the chamber to 30°F/-1˚C to cold crash.
I was interested to find exactly zero difference in clarity between Truby and Non-Truby. In fact, they looked, smelled, and tasted the same to me. The Australian Summer hops were coming through with definite hints of apricot and sweet melon. By the evening of the 11th day since pitch, both beers were sitting right at 32°F/0˚C and dropping clear.
The only real difference seemed to be in the amount of stuff sitting atop each beer.
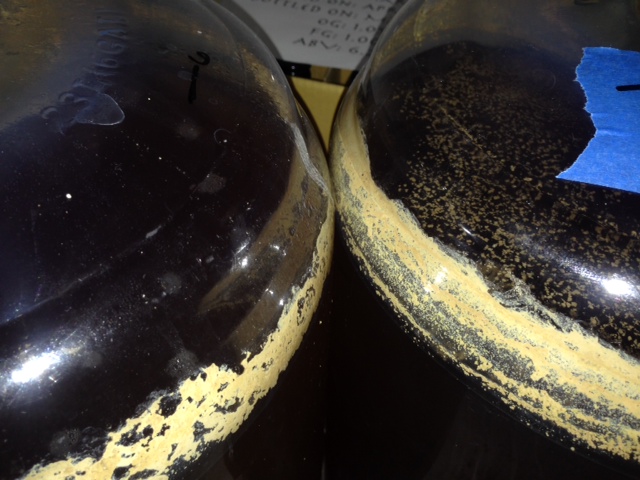
Kegging commenced on the 13th day after the beers were made. Both beers were removed from my fermentation chamber and left to settle for a few minutes.
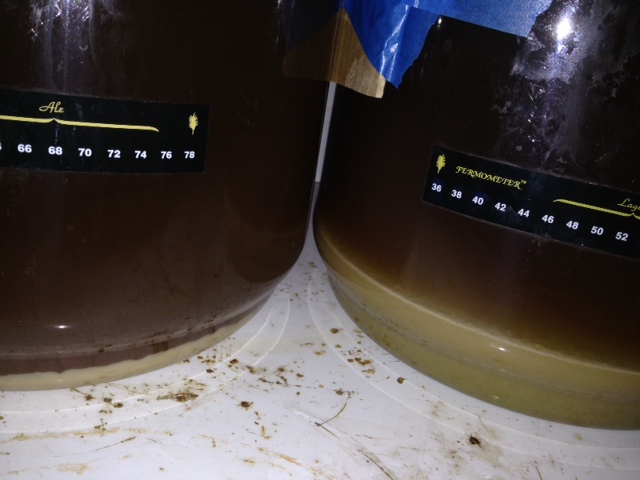
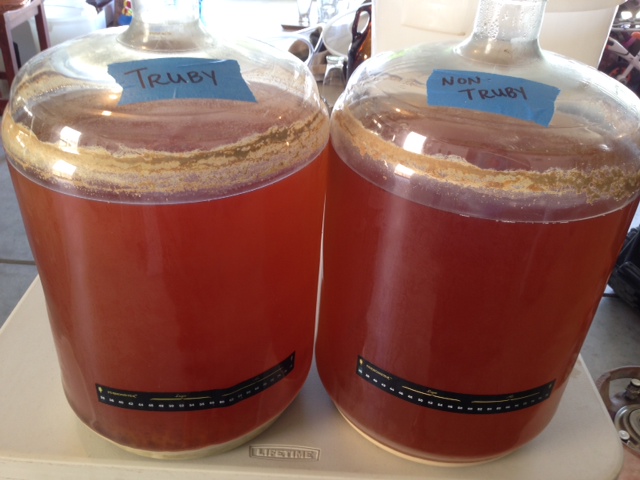
Some slight differences between the beers became more evident in this brighter environment.
The trub at the bottom of Truby was obviously thicker than the creamy cake at the bottom of Non-Truby.
The stratification again suggests the hop matter and hot break from the kettle settled before the yeast.
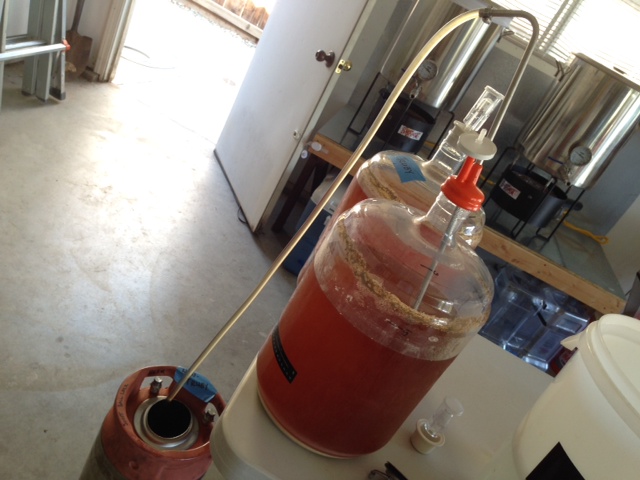
As had been the case for days prior, the top of Truby had noticeably more particulate floating on the top, while Non-Truby had almost none. I was developing some expectations as to how the finished beers might look at this point. The beers were kegged using one of my favorite homebrewing tools, the sterile siphon starter.
The yeast cakes in each carboy looked very different once the beer was removed.
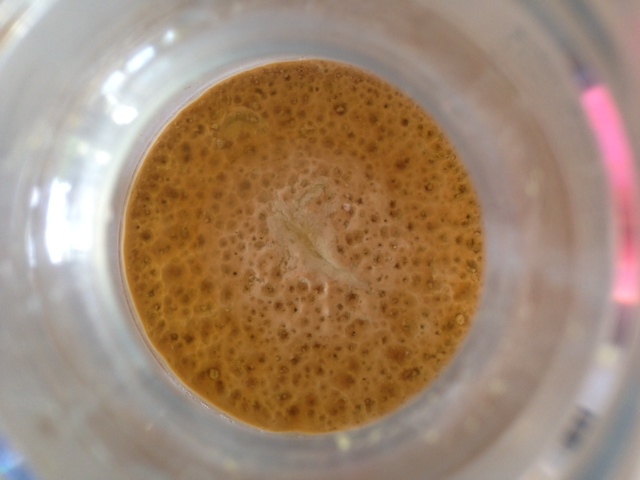
The leftover trub in Truby resembled something like a neuronal network of sorts, while Non-Truby was much smoother with interesting bubble-like formations. The swipes on each cake occurred post-racking during the removal of the siphon; I was sure not to transfer any muck from either batch to the kegs.

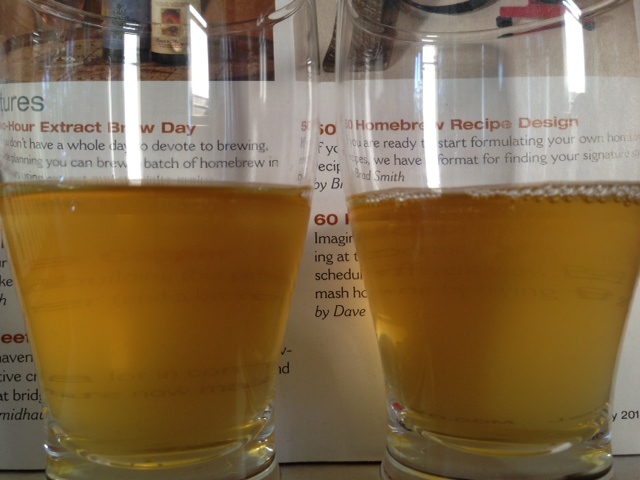
I stole a sample of each beer before kegging to see if there were any differences when experienced from a smaller glass.
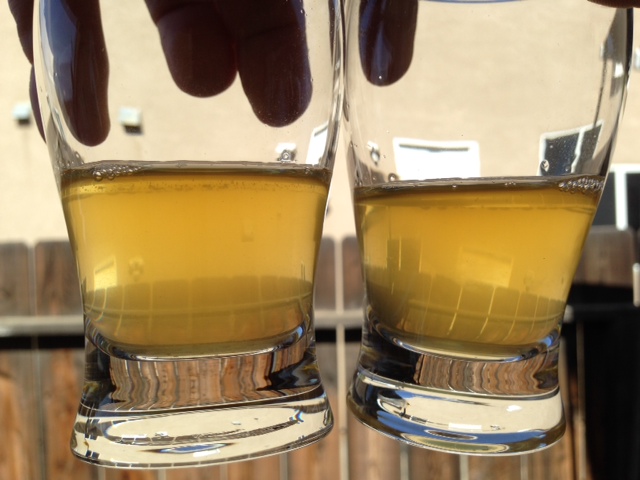
Both seemed to be dropping bright at a relatively similar rate, though I did perceive some subtle differences in clarity.
Both beers were put on 30 psi of CO2 for 36 hours, purged, then reduced to 12 psi. This is where they sat for a week while I spent a week camping at the river with family and friends, a time in which I shamelessly admit to swilling massive amounts of Heineken and Bud Light.
My wife sure has a knack for taking pretty pictures of our adorable kiddos.
I returned to two perfectly carbonated Cream Ales that had been allowed 9 days in the 38°F keezer to drop clear. A good friend and fellow camper, Ryan, was the first to taste and evaluate the beers, another friend dropped by the following day to do the same, then I finally took a couple bombers with me to the House of Pendragon taproom to share with a panel of tasters.
I feel compelled to say something here about the survey process and all that jazz. These exBEERiments were never intended to be super scientific in nature, I simply don’t have the resources, knowledge, or desire to design and perform actual experiments. While I made every effort to reduce potential bias by tasters, I absolutely understand this may have been done better. I promise to continually work toward improving the way I survey my exBEERiment tasting panels, though I still want this to be fun too. I used a simple survey for this first panel tasting and realized immediately areas that need to be reworked. In the future, I’m thinking of using an online survey platform where panel members answer questions on their mobile devices. I’m also starting to think the triangle test may not be totally necessary or even very helpful. Please, if you have any suggestions, do kindly share them with me! Without further ado…
Each taster was initially poured 3 small samples for a triangle test, the makeup of which was random for each taster. Each tasting session occurred privately and the surveys were completed by me. Once the triangle test was completed, one of the beers was removed, leaving 1 each of Truby and Non-Truby. Tasters were not informed if their response to the triangle test was correct. They were then instructed to complete the rest of the survey with the two beers left, understanding that they were in fact different from each other. Each taster was asked to indicate which of the 2 beers they thought was better in terms of appearance, aroma, flavor, and mouthfeel, and they were encouraged to provide subjective feedback as well. They were also asked to attempt to identify which beer was “experimental” (the one that had something out of the norm done to it, in this case Truby) as well as which one they preferred overall. Tasters were not made aware of what beer was in either glass until their survey was complete. In all, 6 people were included in the tasting panel.
| RESULTS |
Ryan, the first taster, was quick to accurately identify the different beer during the triangle test, which was Non-Truby, explaining it was more hazy than the other beers. He went on to report that Truby had a “crisper, sharper bite” to it, while Non-Truby was slightly smoother. When asked to indicate which of the beers was experimental, Ryan correctly chose Truby, stating his hunch the extra material in the carboy likely helped to clear the beer. Ryan’s overall impression was that both beers were “incredibly similar with the exception of clarity and that sharpness in the flavor,” stating that his slight preference was for Truby.
The next person to evaluate the beers was John, an avid homebrewer and beer lover. Like Ryan, he rather easily identified the different beer in the triangle test, which in this case was Truby, as it was “slightly though noticeably more clear” than Non-Truby. He went on to say, ” [Truby] has a little more tangy taste to it, it’s just a little more tangy up front and a little different on the back end, just mildly more bitter, but not much.” In terms of aroma and mouthfeel, he said they were almost identical. He was accurate in identifying Truby as the experimental batch, which he reported he had a slight preference for compared to Non-Truby, stating, “It’s really kind of nice.”
Aaron is a Cicerone Certified Beer Server at the House of Pendragon taproom who has also passed the written portion of the BJCP exam and currently serves on the Board of Directors for our local homebrew club, the San Joaquin Worthogs. After tasting the 3 beers presented to him for the triangle test, he was unable to accurately identify the different beer, choosing one of the 2 Non-Truby glasses instead. Perhaps it’s important to point out that the beers from here on out were being sampled from 4 oz Belgian-style taster glasses, which may have impacted perceptions of clarity. Once comparing just the 2 beers, Aaron did correctly identify the experimental batch. He reported minimal to no perceptible differences in aroma or mouthfeel, though after closer inspection stated that Truby was slightly more bright than Non-Truby. Flavor-wise, Aaron experienced Truby as being “a little more phenolic with a more biting apple-like flavor, maybe some acetaldehyde.” He was the first to report a preference for Non-Truby, explaining he appreciated its slightly less biting bitterness.
David is another server at the House of Pendragon taproom who is studying to become a Cicerone Certified Beer Server. While he does not currently homebrew, he has a great appreciation for good beer. He was unable to accurately identify the different beer during the triangle test and he also incorrectly guessed which of the beers was experimental. He commented that Truby was more clear, but that Non-Truby “just has more aroma to it and it’s a little more bitter at the end, I like that.” When asked to choose which one he’d rather drink a full pint of, he chose Non-Truby.
Chris was next to complete the evaluation, he is a regular homebrewer who is known by his friends for having a rather discerning palate. Chris was able to accurately identify the different beer in the triangle test as well as the experimental beer. He reported the clarity on Truby as being better, though noted that Non-Truby appeared to have slightly better head retention. To Chris, Truby had “a more pronounced aroma and tastes crisper” than Non-Truby, which he thought had “fuller mouthfeel and a better blend of flavors.” Apparently he liked the crisper flavor of Truby over Non-Truby’s better blend of flavors, as it was the beer he said he preferred.
Jeremy was the last participant on the tasting panel, he has enjoyed drinking delicious craft beer for many years. While he was inaccurate in his attempt to identify the different beer in the triangle test, he was able to detect which of the beers was experimental. He described Non-Truby as being “a little hazier, which I like, with more subdued aroma, smoother mouthfeel, and a more firm flavor, almost like sourdough.” He experienced Truby as having a “more lively” aroma with a “crisper, lighter” flavor. Overall, he preferred Non-Truby.
A quick recap of responses from the “official” tasting panel:
– 50% (3/6) accurately identified the different glass in the triangle test
– 83% (5/6) accurately identified Truby as the experimental batch
– 50% (3/6) preferred Truby over Non-Truby
– 100% (6/6) perceived Truby as being clearer than Non-Truby
– 50% (3/6) perceived no difference in aroma while 33% (2/6) thought Truby had better aroma
– 67% (4/6) reported Non-Truby as having better flavor in general
– 33% (2/6) thought Non-Truby had better mouthfeel while the others perceived no difference
While not included on the actual tasting panel, numerous others have also compared these 2 beers. Truby has consistently been voted the clearest beer with the sharpest/crispest flavor. Interestingly, there seems to be somewhat of a split when it comes to overall preference.
My Impressions: In the multiple times I’ve sampled both of these beers, I’ve regularly come to the same conclusions, namely that Truby is clearer with more noticeable hop aroma and a perceptibly enjoyable crispness. Like some of the others who have compared these beers, I agree that Non-Truby has a smoother flavor, slightly less biting, but all things considered, I actually find myself pulling the tap handle for Truby more often than Non-Truby.
| DISCUSSION |
Kettle trub making it into the fermentor certainly seems to have an impact on the finished beer, the most striking and perhaps surprising being on clarity. The assumption that clearer wort in the fermentor leads to clearer beer in the end appears to be false, at least based on the results of this exBEERiment, with all samplers agreeing that Truby was brighter than Non-Truby.
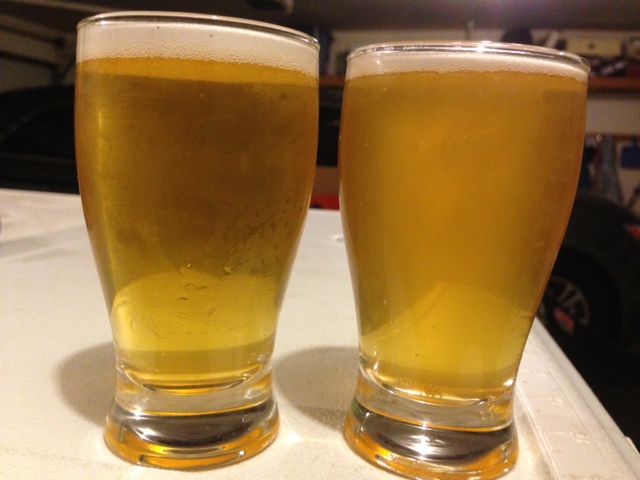
Given the subjective nature of taste preference, it behooves me to resist making any recommendation for what other brewers should do as a matter of principle. For those who tend to prefer clearer and crisper beers with potentially sharper bitterness, consider not worrying too much about the amount of kettle trub you transfer to the carboy. Alternately, those who enjoy slightly smoother bitterness and don’t mind a bit more haze in their beer may want to continue investing a little more effort in transferring only the clearest wort to their fermentor.
As with most things in this great hobby, what one brewer considers normal or even required practice may be viewed by another brewer as being totally unnecessary. Obviously, the experimental condition in this exBEERiment was purposefully overblown, as I was most interested in the impact massive amounts of trub would have compared to minimal amounts. I think this exBEERiment not only demonstrates that worrying about this issue is hugely unwarranted and that great beer can be produced regardless of the amount of trub that makes it into the fermentor, but that there is potentially some benefit to fermenting with a fair amount of break material.
If you have any questions or comments, please do not hesitate to share in the comments section below!
Cheers!
Support Brülosophy In Style!
All designs are available in various colors and sizes on Amazon!
Follow Brülosophy on:
FACEBOOK | TWITTER | INSTAGRAM
If you enjoy this stuff and feel compelled to support Brulosophy.com, please check out the Support Us page for details on how you can very easily do so. Thanks!









125 thoughts on “exBEERiment | Kettle Trub: Low vs. High In A Cream Ale”
Dude, BYO or a similar publication needs to make you a columnist. This is superb content, really well written, really well put together.
This validates my stovetop test batch procedure of dumping the entire contents into my fermentor to maximize yield 🙂
I never knew there was a difference in the final product, but I did know that trub in the carboy does not equal bad beer!
Stellar stuff! Apologies if this was covered in your article, but have you thought of using opaque glasses in your testing? I wonder how much a part visuals might have played in the perception of taste.
Thanks! I had a discussion with some people regarding the visual component, as it was fairly easy to tell them apart by clarity alone. We came to the conclusion that all beers should be judged using all senses. That said, I did have a couple friends close their eyes when they tasted the beers and the results weren’t any different than the other tasters.
FWIW, most sample panels in breweries that I’m aware of serve the beers in opaque glasses so things like color and clarity won’t influence flavor perceptions. when I did a sensory at Sierra Nevada, they used red plastic cups!
I’ve been considering going that route, though there are some xBmts that really have to do mostly with appearance.
How do they SOUND?
Cheen cheen!
Great write-up! I hadn’t seen your blog before, and I’m excited to have found it! I have a couple comments:
1) The clarity difference seen by all the tasters is very interesting. However, this is sort of an “extreme” experiment in the sense that one carboy had no trub and the other had an artificial amount. Lemme splain. If you were to make (for example) a 5-gallon batch and dump all of its trub into the fermentor, it would only have half the amount of trub that Truby had. That is to say, Truby essentially has an impossible-to-replicate amount of trub in it. That actually makes this a great experiment, because it’s no trub vs. extra trub. I wonder if there would be less difference in clarity/flavor/aroma if one carboy had no trub and the other had half of the remaining trub (5 gallons worth of trub, if you will). However, even if one trub-less beer and one with 5 gallons worth of trub were close to the same – that is still a result which could throw out the “common homebrewer wisdom” that more trub is bad.
2) Regarding the flavor (crisper, slightly more bitterness in Truby) – If you wanted to make a clone of Truby, wouldn’t a consistent amount of trub each time and a recipe change be a better and more repeatable way of changing the flavor of a given beer in this way?
In other words, if I wanted to clone truby, instead of making the same recipe and throwing a bunch of trub in the fermentor, I would rather get as little as possible so that it’s a more consistent amount, and change the recipe to make the non-Truby beer taste more like Truby. Especially considering different ingredients (which would produce different amounts of kettle trub), it seems to me that having a consistent amount of trub would be better than “a as much as possible.” *OR* maybe the perfect solution is to transfer to the fermentor with as little trub as possible, and then add to the fermentor a consistent amount of extra trub! that would *really* get the trub-haters in a frenzy (but also might be a better solution).
3) those of us with plate chillers (I didn’t see if you used IC or plate?) have an interesting issue here. As you know, if a ton of hops go through the chiller, it can clog. Even if it doesn’t clog, it will be an absolute PAIN to clean.
That doesn’t apply to break material, of course, but I wonder if a hop spider filtering out hops (but likely allowing most break material to flow to fermentor) would be more ideal for both having trub in the fermentor for clarity, but also having the recipe be more repeatable with regards to crispness and hop aromatics/flavors.
SO. My take on the results of your exBEERiment: Use a hop spider to filter hops but allow break material to pool at the bottom of the whirlpool. Transfer clear wort to the fermentor, then “top up” with a consistent amount of break material. Fermentor still gets the trub for clarity, but hop flavor/aroma/bitterness would be more easily tweaked by recipe changes.
OR maybe trub is acting just like any other post-kettle fining in this case, and the best thing to do would be to transfer as little trub to the fermentor as possible, and use finings later (canned trub?!). Maybe that would be the most consistent. brb, I’m going to go can some trub.
Tl;dr: I am long winded. Trub.
Soooo… I’m pretty sure I sort of agree with you 😉
I would never suggest people purposefully get as much trub in the fermentor as possible, I just don’t think it’s really worth worrying about, at all. My goal is always simplification. This is why I have ditched the plate chiller and returned to using a good IC effectively (check out http://www.JaDeDBrewing.com for more details). Anyway, thank you for the detailed response, I’m glad this got you thinking! I’ve got an 11 month old who needs removing from the tub now… cheers!
Outstanding article. My own experiments tend to agree with your findings. However, I believe the real villain in off flavors is determined in the wort clarity during sparging. If you don’t recycle your wort until you have a clear discharge from your grain bed, you tend to get tannins into your wort which will ruin your beer.
Thanks!! I actually plan to do a vorlauf vs. non-vorlauf exBEERiment in the future… because I’m not sure I agree with you 😉
The former resident Yeast Aficionado at Northern Brewer believed that by not doing a vorlauf, you’re allowing more lipids to reach the fermentor, which helped fortify the cell walls of the yeast.
http://vimeo.com/27542991
It was that episode that got me thinking about the real value of the vorlauf, or the lack thereof, at least on the homebrew scale. I’ve played around with not doing a vorlauf and noticed no increase in astringency at all. That said, I primarily batch sparge, so perhaps there’s a difference for those who fly sparge. I plan to do an exBEERiment on this one in the near future. Cheers!
I would love to read this! We have never done vorlauf, and always been happy with our beer. Once we heard of it, we considered trying it, but it seemed kind of a great amount of work doing something we didn’t really know if we needed to do…
Not what I’ve found. Unless you have a LOT of grain in your wort, I haven’t found runoff clarity to have any effect on beer flavor.
I just read an interesting article (J. ASBC 64(1):16-28, 2006) comparing turbid and clear lautering combined with inclusion and exclusion of hot break material. The article indicated that the beer produced (all pils malt using light bittering and lager fermentation) with turbid lautering and no hot break did have a slightly unpleasant bitterness and had the worst flavor stability over time (though still “acceptable”.) However, the beer produced with turbid lautering and hot break inclusion was not only at least as stable as the clearly lautered/no-hot break beer, but it was also preferred in terms of flavor! This is a real shock to me. I think I’ll try doing my own split batch to try this out for myself! The authors also measured the levels of fatty acids and zinc in the worts and found that the turbidly lautered and hot break-including worts contained more of both, resulting in very healthy fermentations, seeming to make up for a lack of oxygen in one set of their fermentations as well. It does seem that oxygenation can overcome some potential off flavors though and should be adequate regardless of lautering or HT inclusion.
Hats off to you sir! I am a Molecular Biologist with 20+ years of lab experience, and I find your study to be well thought out and very well executed. I have been home brewing for around 10 years, and I have long suspected your findings. It is refreshing to see a controlled study on this subject. Keep up the good work. I will have to check in on your blog from time to time.
Good read, thanks! Do you think the final yield is impacted by using one method over the other? Would that huge trub cake absorb more of that tasty beer than its low-trub counterpart?
I had 2 full 5 gallon kegs in the end, for what it’s worth 🙂
Great write up! Wish I’d read this before last night’s attempt to remove trub from my latest batch as I transferred it from the kettle to the FV ended with me spilling about 25% on the floor and likely contaminating the rest, haha. Next time I will know that any perceived benefit associated with removing the trub certainly isn’t worth the hassle or contamination possibility – thanks!
Well done old bean.
Great article, thanks for taking this on and for the write up. Very interesting conclusions here. I stopped trying to get clear wort about 2 years after I started home brewing and haven’t noticed any negative effects. I have accounted for the extra trub by shooting for 5.5-6gals of wort in the fermentor. I truly believe that grist, the brewing process, and cold conditioning time are the main factors to clear beer. Well done… well written…thank you!
GREAT READ!! Thanks for backing up what i have done for years… TRUBY ALL THE WAY!
Many thanks for the great write up. Fascinating results on clarity. RDWHAH wins again…
Great experiment! A suggestion for some further experimentation (if some beer is still left): try to store the beer for some extended time, then taste again. I would expect the truby to age better, but who knows?
Great idea, I actually have a couple bottled up, I believe.
Did you ever compare them after aging? I imagine there was very little difference over time?
I actually submitted the Truby beer into a local comp when it was a few weeks old, it got judged another week (or 2) later, and mine took first place. I don’t age many beers, admittedly, but in my experience, most beers seem to suffer from extended time sitting around.
Well, aging a trubby vs. non-trubby over time might be a fun exBEERiment OR a lauter cloudiness/clarity exBEERiment
So, if there’s no desperate need to siphon off the trub, does that mean that I can no-chill my beer and then just pitch yeast straight into the no-chill container to ferment? That seems awfully convenient!
As long as you don’t mind cleaning up a gigantic load of yeast and beer when fermentation is complete (given no headspace), I think you’re good to go.
Good read! Great looking family!
This is excellent. I was searching endlessly for methods to remove trub from my wort on its way out of the kettle. Last December I brewed a 7.5 gallon batch and split it into two fermenters. One ended up with all the trub and the other with none. In the end both batches were great but the one that contained the trub was noticeably better to my taste buds. Since them I haven’t bothered removing it at all and concentrate on keeping hops out of the fermenters.
Great post and thanks for going through the trouble of doing the experiment. I would just be curious how this experiment would play out across a range of beer styles. Is trub vs. no trub less of an issue in dark beers like stouts and porters? More of an issue in IPAs and Belgian ales? Are the results intensified by higher gravity beers? I would just hesitate to apply the findings from the cream ale experiment across the board. Sounds like RDWHAH is the way to go in any case. Thanks again and cheers!
Great article, I love these experiments as I don’t have to do them in turn 🙂
This is definitely an eye opener for me. I get tons of trub in my fermentor. I’ve tried to filter it out, but never really noticed much of a flavor difference. Your mention of the isoamyl acetate caught my attention. Unfortunately, I cannot access the article through your link. Do you believe this is true? I’ve never heard that isoamyl could be increased by removing trub from the fermentor. My interest in this is because my German Weiss never has enough banana for me. Sounds like I need to perform my own ExBeeriment.
Regarding isoamyl acetate… that was actually a well designed experiment performed by real scientists, I believe they measured levels using good equipment. Yeah, I’d say I believe it’s true. One way I’ve learned to increase the banana character in a Weiss, besides selecting the proper yeast, is to underpitch and ferment on the warmer end (68˚-70˚). Cheers!
Esters, higher alcohols and other flavor compounds can increase if yeast is stressed. Yeast could be more stressed if you are not pitching enough, providing nutrients and oxygenating enough. One way to overcome that could be by having less clear wort into your kettle and by including trub in the fermenter.
Great article! Good to see some hard evidence and well written methodology, results and conclusions. A think the whole community appreciates this experiment.
Great article. I’m going to give your recipe a shot, but was wondering why the acidulated malt is included in the grain bill? Just for ph reasons or to give it a little tang?
Just pH reasons 🙂
Man. I have been struggling with this subject as so many people tend to remove the kettle trub and harp on the idea that it must be done. I myself make pretty good beer but as you know truly loving this hobby will push you in the direction of making beer better and better until its great and perfect. The trub removal was one of my next steps in attempting to make the best beer ever. I’m not so worried about it now ! Thanks for this exBEERiment as it was a question I had wanted answered for some time now.
( Go Texans )
Ha! You should have been paid for so much work! Really great stuff.
I have to say, I am diggin’ every single exBEERiment you’ve done so far. As a lot of new brewers are, I was initially stressed out about the amount of trub ending up in my fermentor. After a while I just gave up and pretty much just started dumping the full contents of the kettle into my carboy. My beers have definitely improved since I gave my last shit about trub.. and your findings seem to confirm this which is encouraging.
A request if I may, in the spirit of simplification/minimalism in brewing – please please please, do an exBEERiment on no-chill – specifically I’d like to see the whole “Dimethyl sulfide” debate actually set straight with some actual testing. This is something I’ve had on the books to try for a while, but haven’t had the time/space to do it.
A no-chill vs. “quick/normal chill” exBEERiment is definitely on the list! For what it’s worth, I have a buddy who committed to doing no-chill all year… except he didn’t tell us this for a few months, so we’d been drinking his beers completely in the dark. I’m not kidding when I say they’ve been some of his best beers.
I have one data point. I made a 90%+ Pils-malt saison a few years ago and boldly only boiled for 60 minutes (not a super vigorous boil either), then chilled with an immersion chiller in the summer. I had been doing 90 minute boils up to that point with similar boil-off and chilling. The resulting beer had so much DMS that I had to dump it. DMS is real and can ruin your beer! I think you can overcome it with a really strong boil and fast chilling though. You could probably even chill slowly if you boil vigorously enough and for long enough. Some people are likely more sensitive to it. One way I’ve found to test for it in your beer more effectively (if you are doing well in keeping it low) is to take a tsp-Tbs of vinegar into your mouth and swish it around or swallow. then, take a drink of water to wash out the vinegar taste. I find this is an excellent way to clear off and sort of super-sensitize your palate. I can often taste faint hop flavor and DMS in beers after doing this. I don’t know how it affects my nose or how it works, but it seems to work sometimes.
Lovely test, lovely effort, thanks for sharing. I’d lile to suggest that this might have gotten more conclusive results if it was a low hop beer. Less (or zero) flameout hops might have helped this test, if not the best beer recipe. The hops are not helping taste subtle differences between the beer. Although, this is a decent test for trub impact on hob flavor/aroma!
Just a question. Did you use a hop sock or bag in the boil or did you add the hops straight to the boiling wort? On my lower hopped recipes I have taken to adding hops to the wort with no bag and have had no ill effects in the finished product. I made a wonderful American Wheat using this method.
I never filter out hop additions, in prior comoarisons in just didn’t seem to make any difference. Cheers!
I found your post very interesting as I have been a ‘trubby’ guy for awhile now and still end up with good clear beer. I don’t use any filter for hops either and since I do BIAB my pre-boil wort is also unfiltered, so I guess I’m a ‘super trubby’ guy. I’ve referenced your post in my own blog: http://beerandgarden.com/2014/10/kettle-trub-in-fermenter-could-it-actually-be-beneficial/
Cheers,
Aidan
Rad, thanks Aidan!
Thanks for your efforts. Very timely for me as I just moved to BIAB and am stressing over how much stuff would up in the kettle! Good to know it may be a good thing.
Do you use fining agents in the boil? The trub and yeast will form a solid cake in the fermenter whether there’s finings or not. If we’re not worried about moving hot break, cold break and hop particles to the fermenter (which I haven’t been for a long time – your experiment backed up my anecdotal evidence) then do we need finings to drop that stuff in our kettles?
I tend to use Irish Moss in the boil, as a matter of course, but I occasionally forget and haven’t noticed a huge difference in clarity. I have a IM vs. no finings xBmt planned!
i started a thread on AHA forum related to this. might want to check it out. interesting comments. cheers
https://www.homebrewersassociation.org/forum/index.php?topic=21329.0
Very cool, I’ve been meaning to frequent the AHA forums more often, I’ll definitely check that thread out.
I wonder if transferring huge flame out/whirlpool/hopstand@170F additions to the fermenter would lead to grassy taste just like long dryhopping. (in my case i need to finish dryhopping in 4-5 days otherwise i get the grass, it is probably because i dryhop at roomtemp instead of fermenting temps)
Marshall, I’d like to hear your thoughts about why a triangle test isn’t necessary.
Oh man, I totally do think it’s necessary! This was my very first xBmt, I absolutely have another trub one planned using what’s become my normal method for data collection.
Excellent work! I recently had surgery to a tendon in my hand. During my downtime I decided to brew a partial mash cream ale and a grain cascade pale. Everything went smoothly had two boils going. However, I finally realized I did not think out my tranfers by myself.
Being home alone that day and kinda struggling, I just dumped all my wort in bottles with excess trub and break. Normally I attempt to keep this to a minimum.
Your testing and trials, are simiar to my own results. I have been amazed by the clarity despite the added materials.
The cream ale was exceptionally clear and noticed no off flavors. The pale ale was a 2 row with caramel. Upon comparing a previous batched bottle the color was slightly darker, however there was no objectionable haze. The pale with trub definitely has crisper mouth feel and the hoppiness was very clean. This pale used cascade and the citrus/fruity note was sharp.
I found this article while attempting to find similar results as mine to confirm my brews were not flukes.
My results all came from lower gravity lower ibu brews. It would be interesting to see how the trub would fair in a heftier brews taste like a stout or black IPA. More so for flavar as clarity may not be an issue.
Awesome article that shows there is more than one way to brew a brew. In some cases you may produce a beer with good qualities with non conforming methods.
Ed
Hey Ed, I’m so glad you liked the article! While I do believe the results were interesting and valuable, I unfortunately failed to use a triangle test. I have another trub xBmt planned using this more stringent data collection method!
Great post. I see that I am late to the game here. I received some negative feedback on how low I had a nipple welded on a keggle. And while I don’t get all of the stuff out in to my Speidel, I do bring most of it over. And I’m making some decent beers some of the time! Cheers.
It’s coming!
This is really interesting! I no-chill my batches, i.e. transfer them into plastic jerry cans about 10 mins post boil and let them cool naturally. I usually end up with a fair bit of trub in the bottom of these containers, but I’ve always been reluctant to pour it into the fermenter, mainly because it just looks disgusting. As soon as it starts coming out, I stop pouring. I probably lose about 2 litres doing this. I might just tip the whole lot in next batch. Clarity isn’t a huge thing for me, but if something as simple as this helps with it, might just be worth a shot. Will be interesting to see how it turns out. 🙂
newbie brewie here, your publishing these findings saved me from dumping my first batch ever. i was overly worried about sediment (due to copious reading), but now will treat brewing like my wine making, if it fits through the mouth of the carboy, it’s get fermented. cheers!
Glad to be of assistance! One thing to keep in mind is that all of my results are but a single point of data. That’s not to say you won’t achieve great results doing what you’re doing, but if a batch doesn’t come out as planned, it’s probably good to consider what you may have done to have a negative impact. Also, never dump a batch before you’ve had a chance to taste it!! Cheers 🙂
Update: Brew date was 3/9 and Morebeer Scottish 60 Shilling extract turned out fine. I wanted to start out easy and cheap, just in case. OG 1.044 / FG 1.014. OG was higher than anticipated, BONUS! and did the kit as per instructions, whirlfloc included. pitch temp was on the high side ~ 80 but my house is chilly and figured it would cool down quick. fermentation temps 60 / 70, safale us05 sprinkled on top dry, no filtering of any trub. settled out nicely and cleared very well. very little “mother” in the bottom of pint bottles and clear in glass. All in all a good first brew. a little too sweet for my taste, definitely not a dumper and a good base recipe to expand on. again thanks for the help. btw, found your blog through a “beer sediment” google search. 🙂
This is FANTASTIC!!!! I can’t believe I am find your excellent posts for the first time just now, but thank you so much and keep up the good work!
Funnily enough I had read this article (thanks for the great work BTW!) a while ago and had nonetheless decided to keep trying to leave the trub out (while not worrying anally about it). My latest batch, a multigrain saison, was split into 2 fermenters only for space and logistical reasons. Today, as I had kind of forgotten about your article and as I tested for FG I noticed my own truby was noticably clearer than my non-truby. Your article came back to my mind, but before I read it I sampled, and there was a subtle difference in flavour, indeed truby being crisper while non-truby was a more rounder, maybe fuller. Preference will vary according to styles, in my case the crisper truby suits the saison style better. Anyway, my experience today matches your findings exactly.
Anyone has any idea why this is so?
Excellent article. Thanks for sharing. Very well written! I’ve been straining out about 2/3 of the trub, but in the back of my mind have thought “the old timers surely didn’t do this”…
Very interesting.
I have a question in the line of this exberiment because I usualy use whole hops with a bag, and want to change for pellets.
How do you filter/separate the pellets and turb from the wort? I think you don’t use a hop spider or anything similar. And make a whirpool with a immersion chiller is difficult without a pump.
Cheers!!
Hops are a part of the kettle trub, I don’t filter or “whirlpool” to remove them. That said, I also don’t intentionally transfer kettle trub to the carboy, I’ve just stopped worrying about the amount that makes it over.
Hi, the experiment is interesting, but I think that it would be better with a turbidimeter for measuring the turbidity in beer. regards.
Fantastic test. Thank you. I will do truby. Cleaning the wort is the most dificult part of my brewing day.
Thanks for a nice report from your exBEERiment. As a soon to be brewer, I wonder if you know anything about how the amount of trub (as much vs as little as possible) affects re-using the yeast for a later batch?
Best
Sondre
Hasn’t mattered on my sloppy slurry xBmts 1 bit!
Excellent report! Thanks so much!
Is that a University of Florida shirt Marshall?
Go Gators!
Ha! It is. But don’t get too excited, I’m not into college sports at all, I bought the shirt during a vacation in Orlando as a souvenir. Lame, I know.
At least you have good taste in souvenir shirts.
Great study. This is something I’ve wondered about but never took the time to experiment with.
Awesome write up! Thanks. I’ll continue to dump everything in my carboy…I’m lazy that way.
Thank you for this exBEERiment – very encouraging. Apparently there are homebrewing myths out there that make our lives (probably) miserable but not our beers any better. Great work, and great science 😉
This is awesome, really interesting information, thanks! 😀
One other thing that I’ve heard is that reducing trub can make the beer more stable over time. Did any of your test beer last long enough to notice any changes over time? Did one change more quickly than the other?
Not yet 🙂